3. Verify that a licensed electrician has attached the cable lug provided with the services gateway to the
grounding cable. The cable must be 6-AWG (13.3 mm
2
), minimum 60°C wire.
4. Make sure that grounding surfaces are clean and brought to a bright finish before grounding connections
are made.
5. Disconnect the ESD grounding strap from the site ESD grounding point, and connect it to one of the
ESD points on the chassis. For more information about ESD, see the SRX5400 Services Gateway
hardware documentation at www.juniper.net/documentation/.
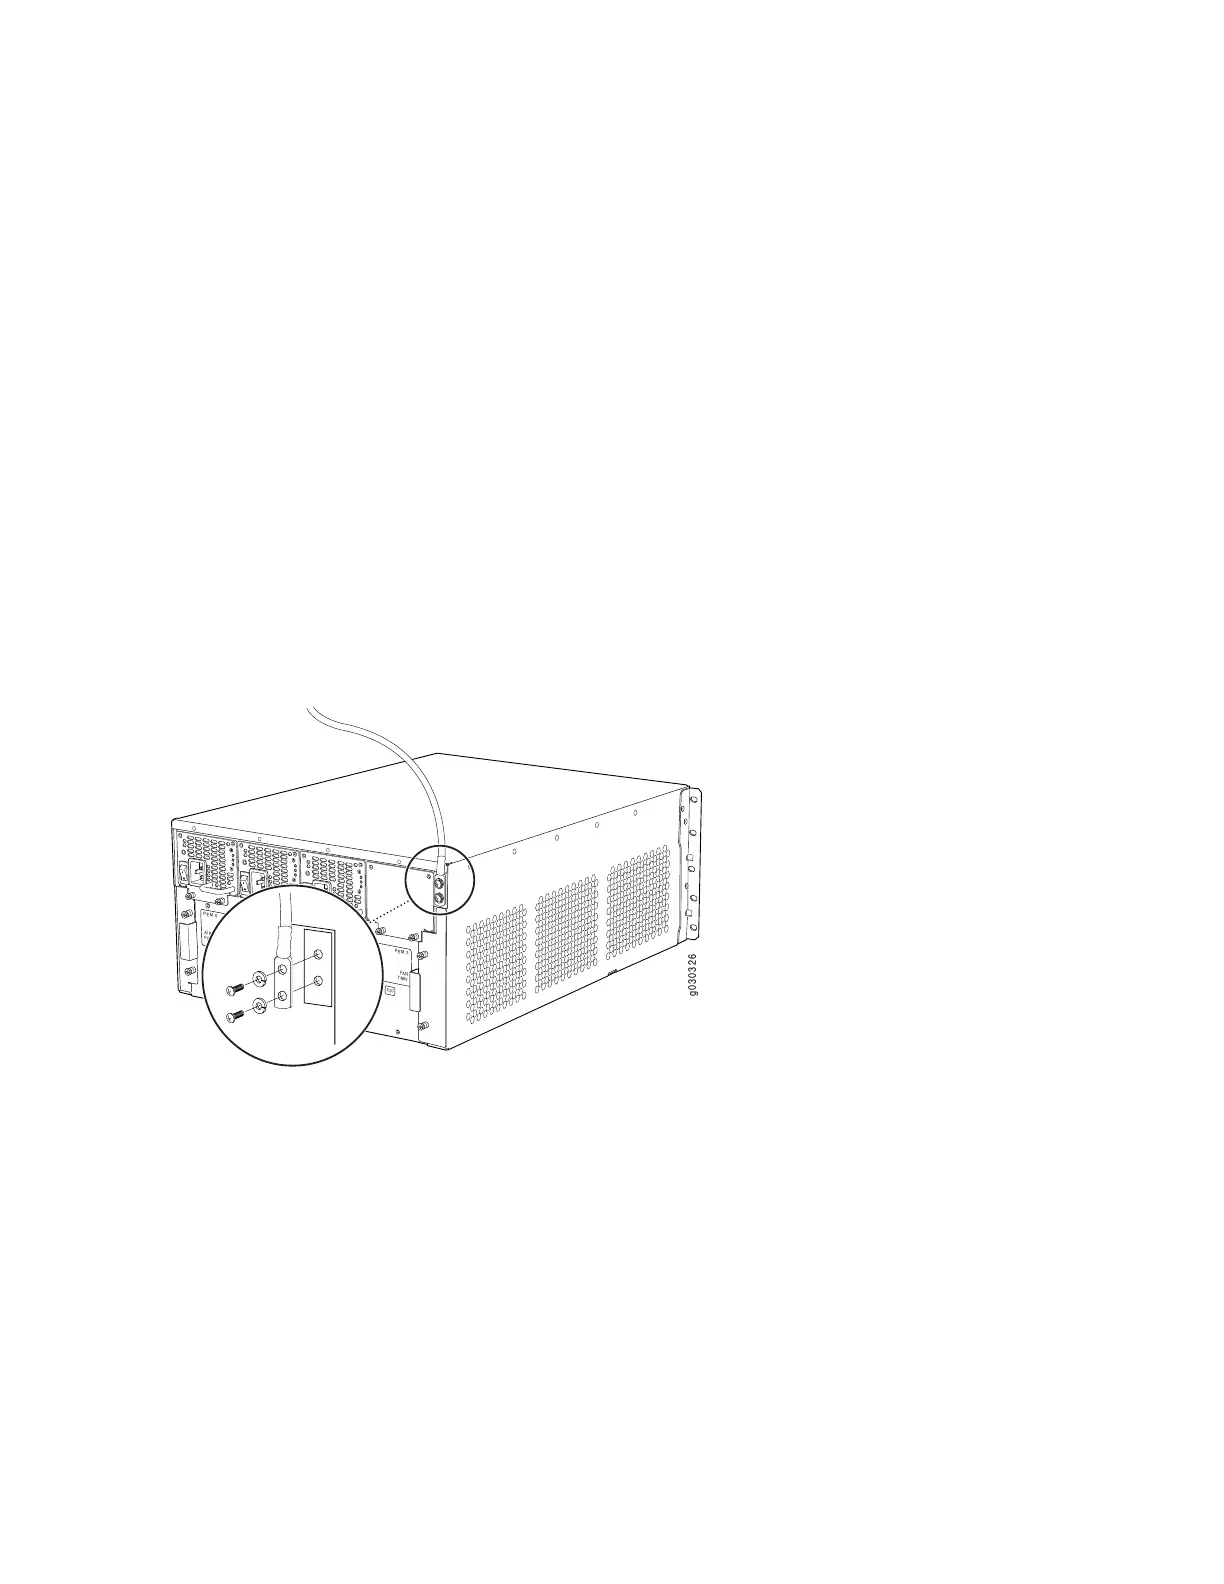
6. Place the grounding cable lug over the grounding point. The grounding point is sized for UNC 1/4-20
screws and 1/4 in. split washers, which are provided in the accessory box.
7. Secure the grounding cable lug to the grounding point, first with the washers, and then with the screws
as shown in Figure 8 on page 15.
Figure 8: Connecting the Grounding Cable
PEM 3
PEM 2
PEM 1
PEM 0
AIR
FILTER
FAN
TRAY
g030326
ESD
8. Verify that the grounding cabling is correct, that the grounding cable does not touch or block access
to services gateway components, and that it does not drape where people could trip over it.
Proceed to “Step 5: Connect External Devices and Network Cables” on page 16.
15

 Loading...


