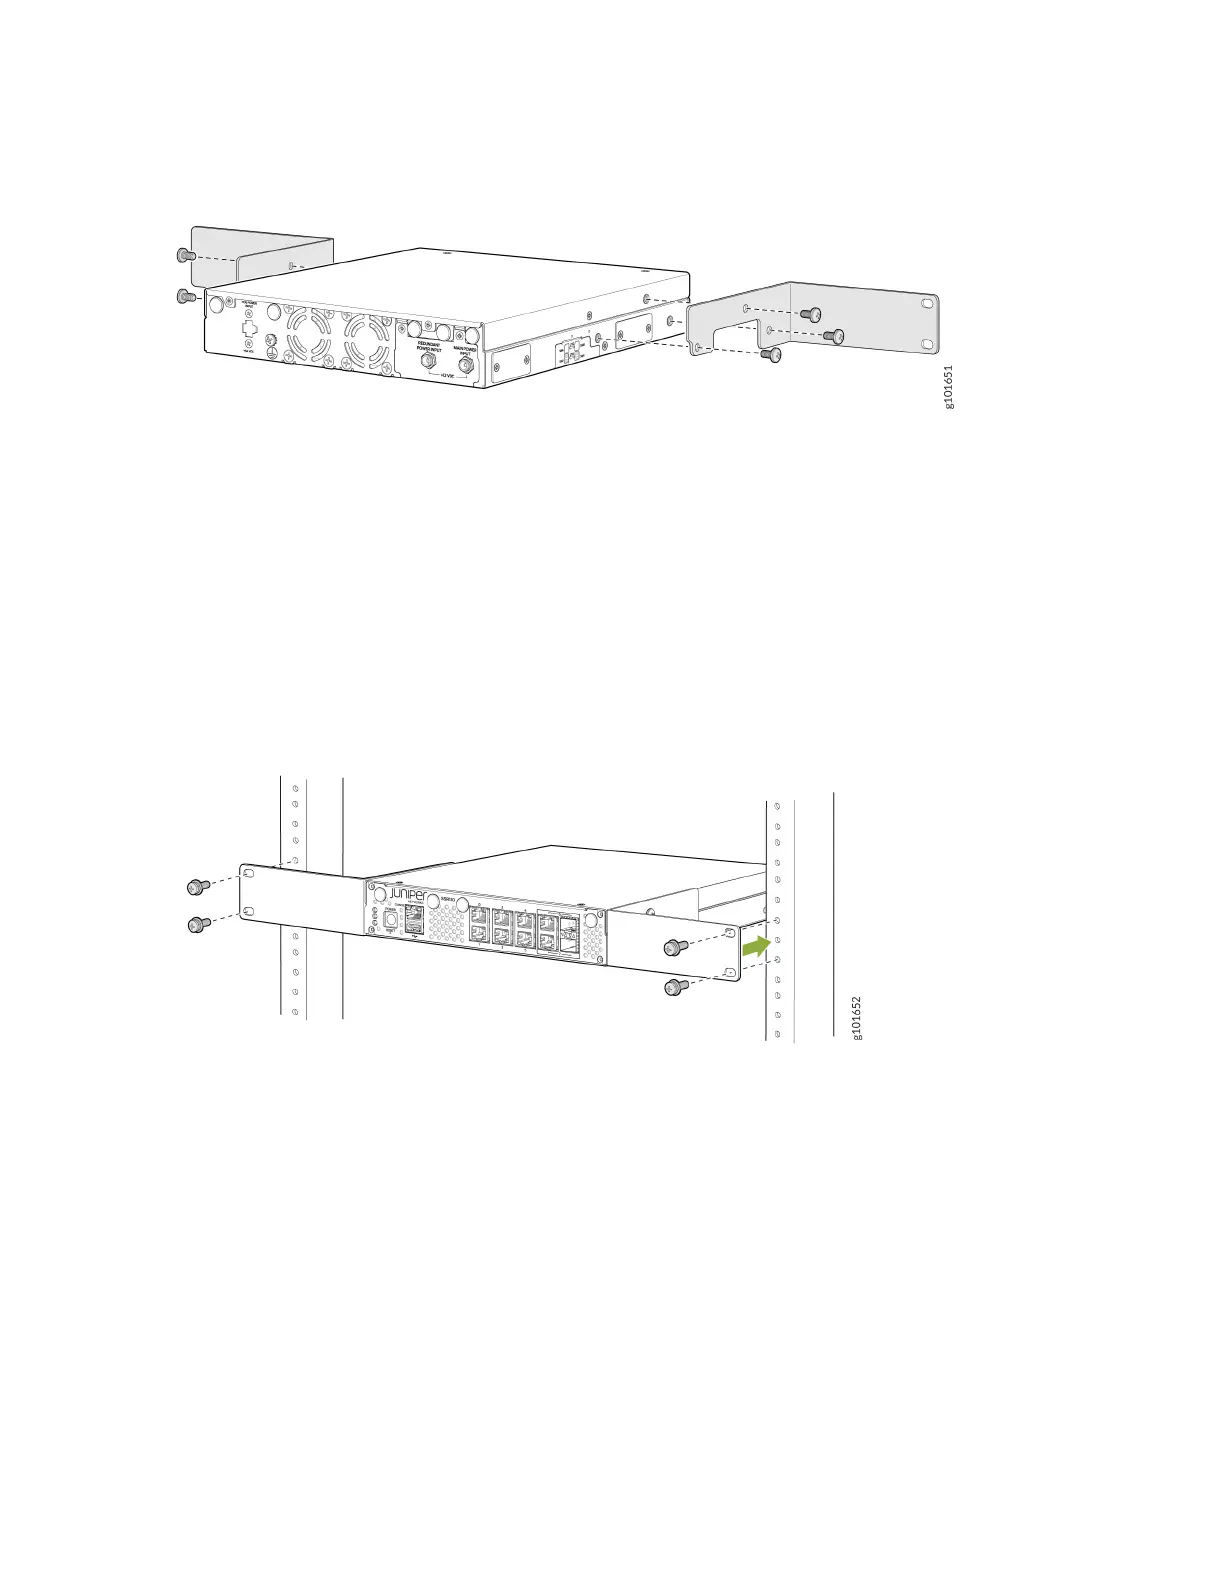
Figure 7: Attaching the Mounting Brackets
3. Insert the four M5x7.0 mm flat-head bracket screws into the aligned holes and tighten the screws with
torque of 10 Nm. Ensure the curved part of the bracket fits snugly on the lower portion of the appliance’s
body.
4. Have one person grasp both sides of the appliance, lift the appliance, and position it in the rack, aligning
the mounting bracket holes with the threaded holes in the rack rail. Align the bottom hole in each
mounting bracket with a hole in each rack rail, making sure the appliance is level. See Figure 8 on page 32.
Figure 8: Mounting the SSR130 on a Two-Post Rack
5. Have a second person secure the appliance to the rack by using the 4 flat-head M6x16 mm Phillips
round head mounting screws, 4 M6 floating nut in cage, and 4 M6 plastic washers. Tighten the screws
with torque of 18 Nm.
6. Ensure that the appliance is level by verifying that all screws on one side of the rack are aligned with
the screws on the other side.
32
 Loading...


