Camera Setup for Network Connection
1
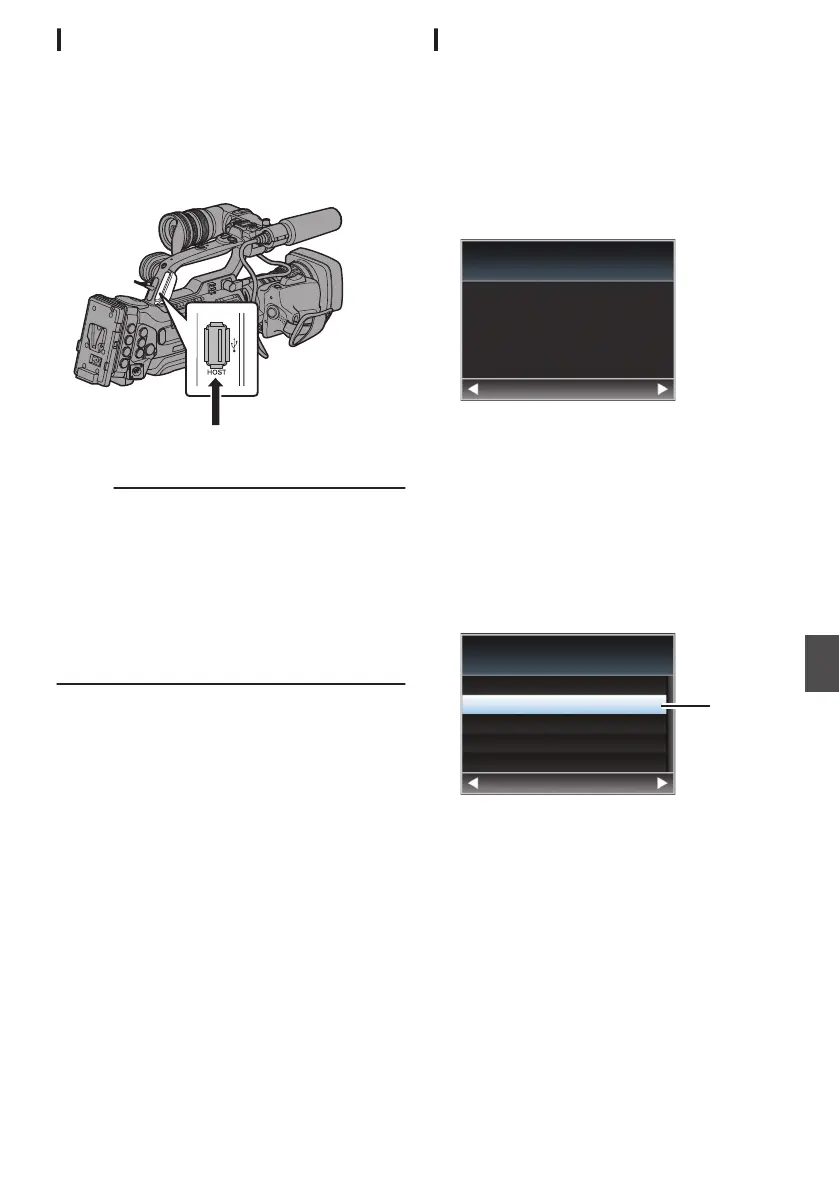
Connect an appropriate adapter according
to the intended use to the [HOST] terminal
at the rear of the camera recorder.
The following adapters can be connected.
0
Wireless LAN adapter
0
Ethernet adapter
0
Cellular adapter
.
Connect an appropriate adapter
Memo :
0
Only a network connection adapter can be
connected to the [HOST] terminal.
0
Connect or disconnect an adapter only after you
have turned off the power of the camera
recorder.
0
You can find the latest information on the
compatible adapters at the product page of our
website.
0
Two types of network coverage (WAN and LAN)
are available for each application.
2
Enable the network connection.
Set [Main Menu] B [System] B [Network] to
“On(HDMI Off)” or “On(SDI Off)”.
3
Configure the connection settings.
0
Select [Main Menu] B [System] B [Network]/
[Settings] B [Connection Setup] B [Wizard]
and press the Set button (R).
0
A wizard screen appears according to the
type of adapter connected. Follow the
instructions on the screen to perform setting.
(A P175 [Connecting via Wireless LAN] )
(A P177 [Connecting via Wired LAN] )
(A P177 [Connecting via Cellular Adapter] )
Connecting via Wireless LAN
Connection via Access Point
1
Perform setting on the camera recorder,
and start up the [Wizard] screen.
(A P175 [Camera Setup for Network
Connection] )
2
[Wireless LAN] appears on the [Wizard]
screen.
.
Back Next
Wireless LAN
Available Adapter
3
Press the I button to display the [Select
Connection Type] screen.
Select “Connect with Access Point”.
Follow the screen instructions to complete
setting. Perform setting for the following.
0
Mode of connection
0
Method of setting
* SSID, type of encryption, Passphrase, and
IP Address setting (“DHCP” or “Manual”) in
cases other than WPS
.
3
Back Next
Connect with Access Point
P2P
Select Connection Type
4
Setting is complete.
After setting is complete, you can access the
camera recorder via a web browser.
(A P182 [Connecting from a Web Browser] )
Preparing Network Connection
175
Connecting to the Network

 Loading...