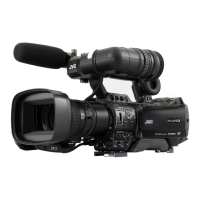
LCD Monitor
.
A
LCD Monitor
(A P38 [Adjusting the LCD Monitor and
Viewfinder] )
B
[LCD PEAKING +/-] LCD Outline Adjustment
Button
(A P39 [Adjusting the LCD Monitor] )
C
[LCD BRIGHT +/-] LCD Display Brightness
Adjustment Button
(A P39 [Adjusting the LCD Monitor] )
D
[AUDIO SELECT CH-1/CH-2 AUTO/MANUAL]
Selection Switch
(A P69 [Audio Recording] )
E
[TC DISPLAY] TC/UB Display Switch
(A P72 [Time Code and User’s Bit] )
(A P73 [Setting Time Code Generator] )
F
[TC GENE.] Time Code Generator Switch
(A P72 [Time Code and User’s Bit] )
(A P73 [Setting Time Code Generator] )
(A P78 [Synchronizing the Time Code with an
External Time Code Generator] )
G
LCD Cover Lock Release Knob
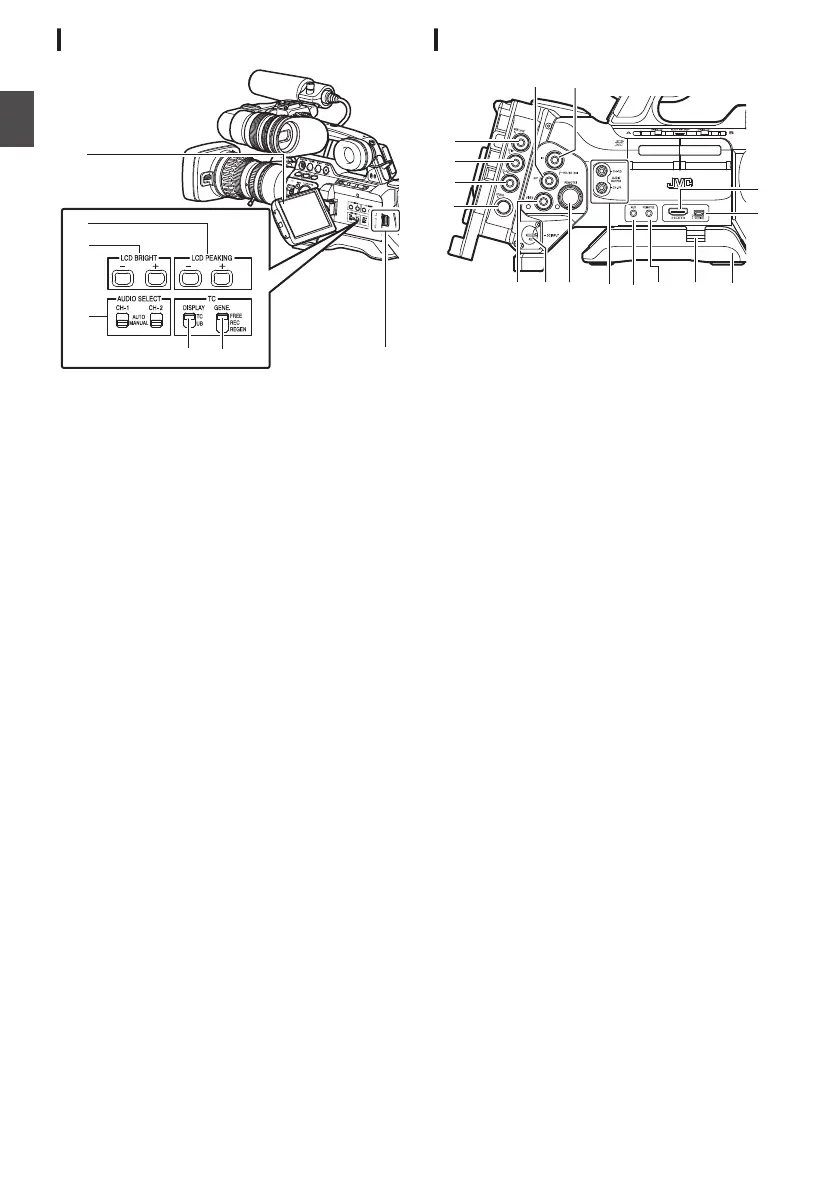
Side Terminal Section
.
* GY-HM890U/GY-HM890E/GY-HM890CHU/GY-
HM890CHE is used in the illustration here.
A
[HD/SD SDI IN] HD/SD SDI Input Terminal
(BNC) A B
(A P168 [Inputting SDI Signals from an
External Device A B] )
B
[HD/SD SDI OUT] HD/SD SDI Output Terminal
(BNC)
(A P161 [Connecting External Monitor] )
C
[GENLOCK] Genlock Terminal (BNC)
(A P169 [Inputting External Synchronizing
Signals (Genlock)] )
D
[TC IN] Time Code Input Terminal (BNC)
(A P78 [Synchronizing the Time Code with an
External Time Code Generator] )
E
[TC OUT] Time Code Output Terminal (BNC)
(A P78 [Synchronizing the Time Code with an
External Time Code Generator] )
F
[STUDIO] Studio Terminal (Mini
DIN) A B
Connect to this terminal when you are
combining the use of devices such as a
transmission unit manufactured by a different
company.
(A P172 [Displaying Return Videos from an
External Device A B] )
G
[VIDEO OUT] Video Output Terminal (BNC)
(A P78 [Synchronizing the Time Code with an
External Time Code Generator] )
H
[DC INPUT] DC Input Terminal
Input terminal for DC 12 V power supply.
Connect it with an AC adapter.
(A P30 [Using AC Power (DC IN Power)] )
I
[REMOTE1] Remote 1 Terminal
(A P164 [Connecting a Remote Control Unit] )
24
Names of Parts
Introduction
 Loading...