Memo :
0
When the menu or status is displayed,
display of the confirmation screen will be
put on hold.
0
If the menu is displayed on the camera
recorder, close the menu.
0
If the status is displayed on the camera
recorder, close the status display.
0
Pressing the Set button (R) on the camera
recorder while in the Remote Edit Mode
ends the Remote Edit Mode forcibly and
switches to the Camera mode.
0
When FTP upload via the camera unit is
currently in progress, switching to the
Remote Edit mode is disabled.
4
Select the Upload mode.
Select the [Upload] tab.
5
Select the clip you want to upload.
0
A list of the recorded clips appears on the
[Clip List] screen.
0
Tap (click) the clip you want to upload to
select it.
0
Clips being selected are indicated by a
check mark.
Memo :
0
You can switch the displayed slot using the [Slot
A] and [Slot B] tabs.
0
You can use the [J-30] or [K+30] tab to jump to
the previous or next 30 clips on the list.
6
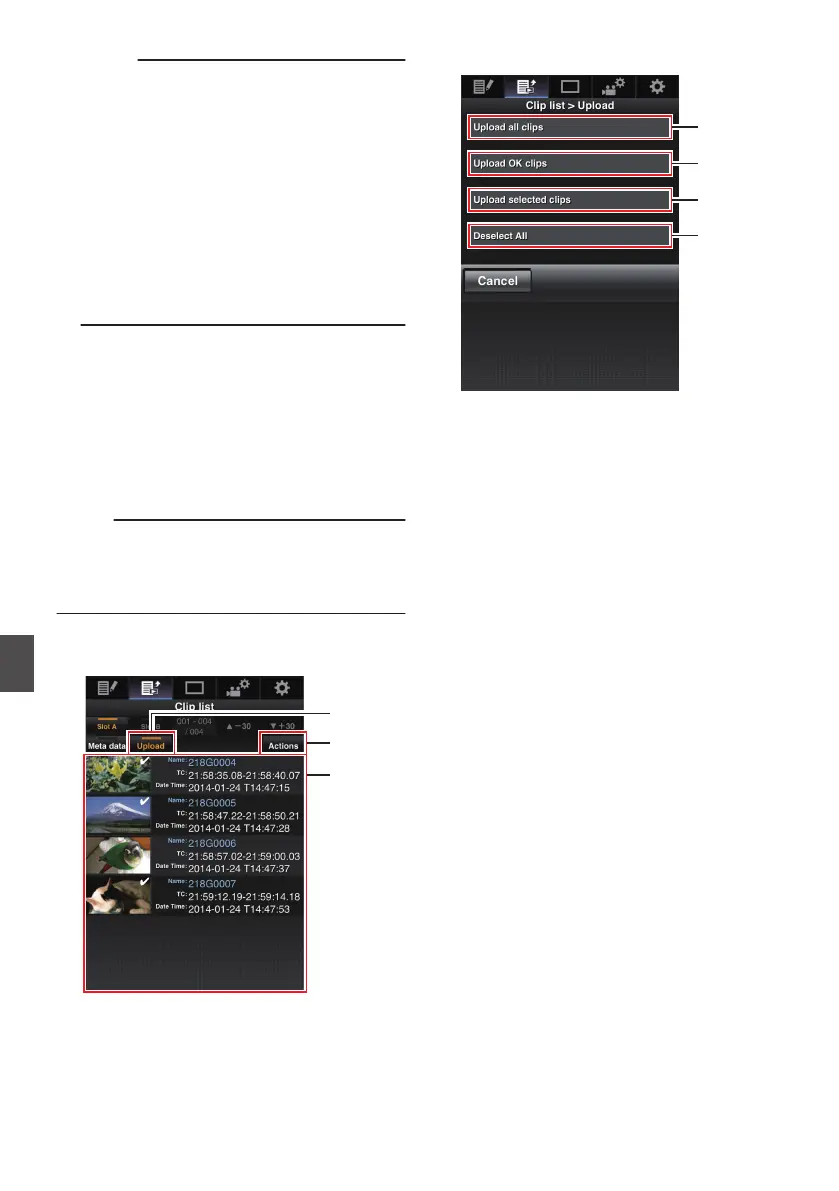
Select the upload operation.
Tap (click) the [Actions] button.
.
7
Select a method to upload the clips.
.
A
Upload all clips
Uploads all the clips in the displayed slots.
Tap (click) to move to the [Clip Server] screen.
B
Upload OK clips
Uploads all clips in the displayed slots that are
appended with an OK mark.
Tap (click) to move to the [Clip Server] screen.
C
Upload selected clips
Uploads the clips you have selected.
Tap (click) to move to the [Clip Server] screen.
D
Clear all selection
Clears all clip selection and returns to the [Clip
List] screen.
188
Uploading a Recording Clip via a Web Browser
Connecting to the Network
 Loading...