KIC 2000 v2.4.0.x
KIC 2000 User Manual 57
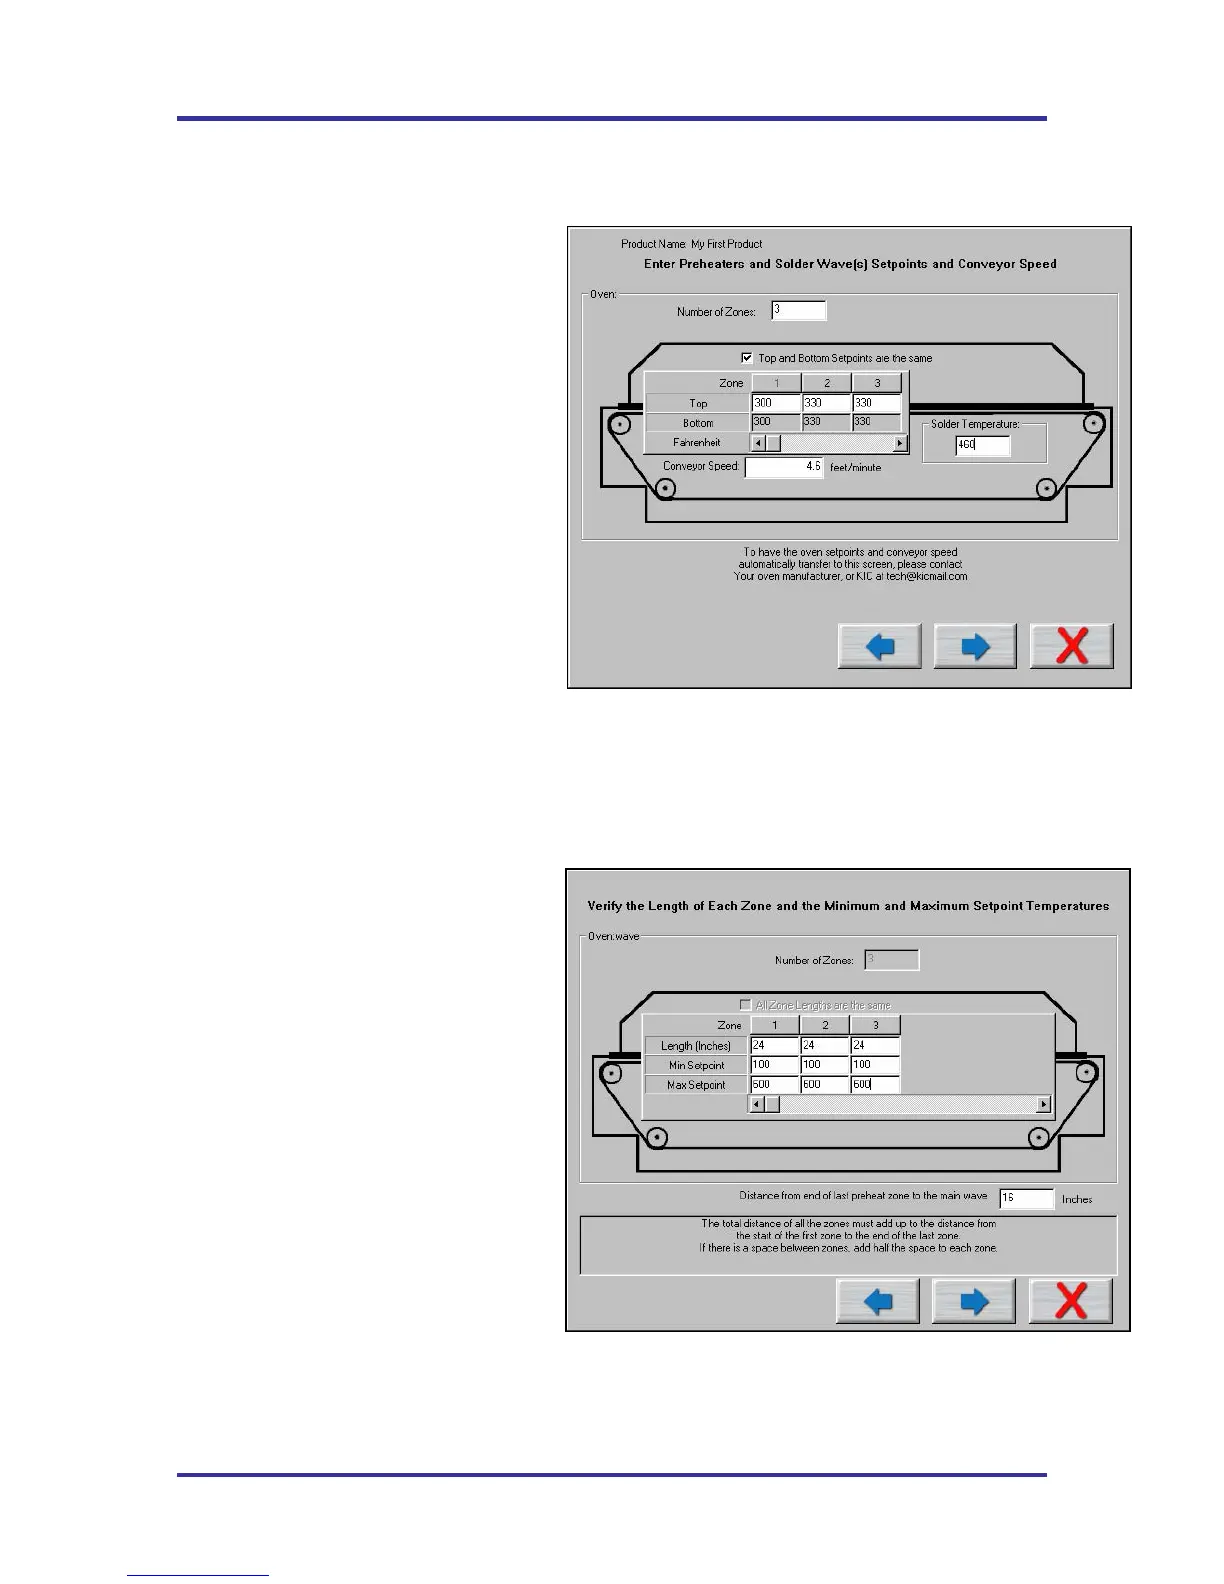
Entering Temperature Set Points and Conveyor Speed
If you typed a new oven name, the KIC 2000 software requires you to enter the number of heated zones or
pre-heat zones in your wave solder machine.
See Figure 87.
If your process requires different top and
bottom set points, deselect the check box
labeled Top and Bottom set points are the
same This will allow the user to enter
different values for top and bottom heaters in
each zone. If your oven has top and bottom
heaters, but not in all of the heated zones,
just enter the same value as the actual set
point in that zone for both the top and
bottom setting.
This is also were you will enter the
temperature settings for each zone or pre-
heater in your wave solder machine and the
conveyor speed setting. In the field marked
Solder temperature enter the setting for the
solder pot temperature from your wave
solder machine.
When you have finished entering this
information select the Forward Arrow button
to continue.
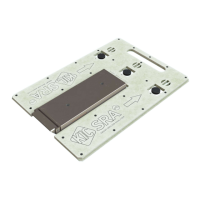
Zone length, Minimum and Maximum Temperature settings
If you typed a new oven name, the KIC 2000
software also requires you to enter the length
of each zone as well as the minimum and
maximum zone temperature settings. This
information will help the KIC 2000 software
narrow the possibilities of prediction results
that your oven can actually achieve. See
Figure 88.
For wave solder processes you are required
to enter the distance from the end of the last
preheat zone to the beginning of the main
wave. Enter this value in the field labeled
Distance from end of last preheat zone to the
main wave.
Once you have finished entering this
information select the Forward Arrow
button to continue.
Figure 87: Run a Profile Screen #2
Figure 88: Run a Profile Screen #3