3-7
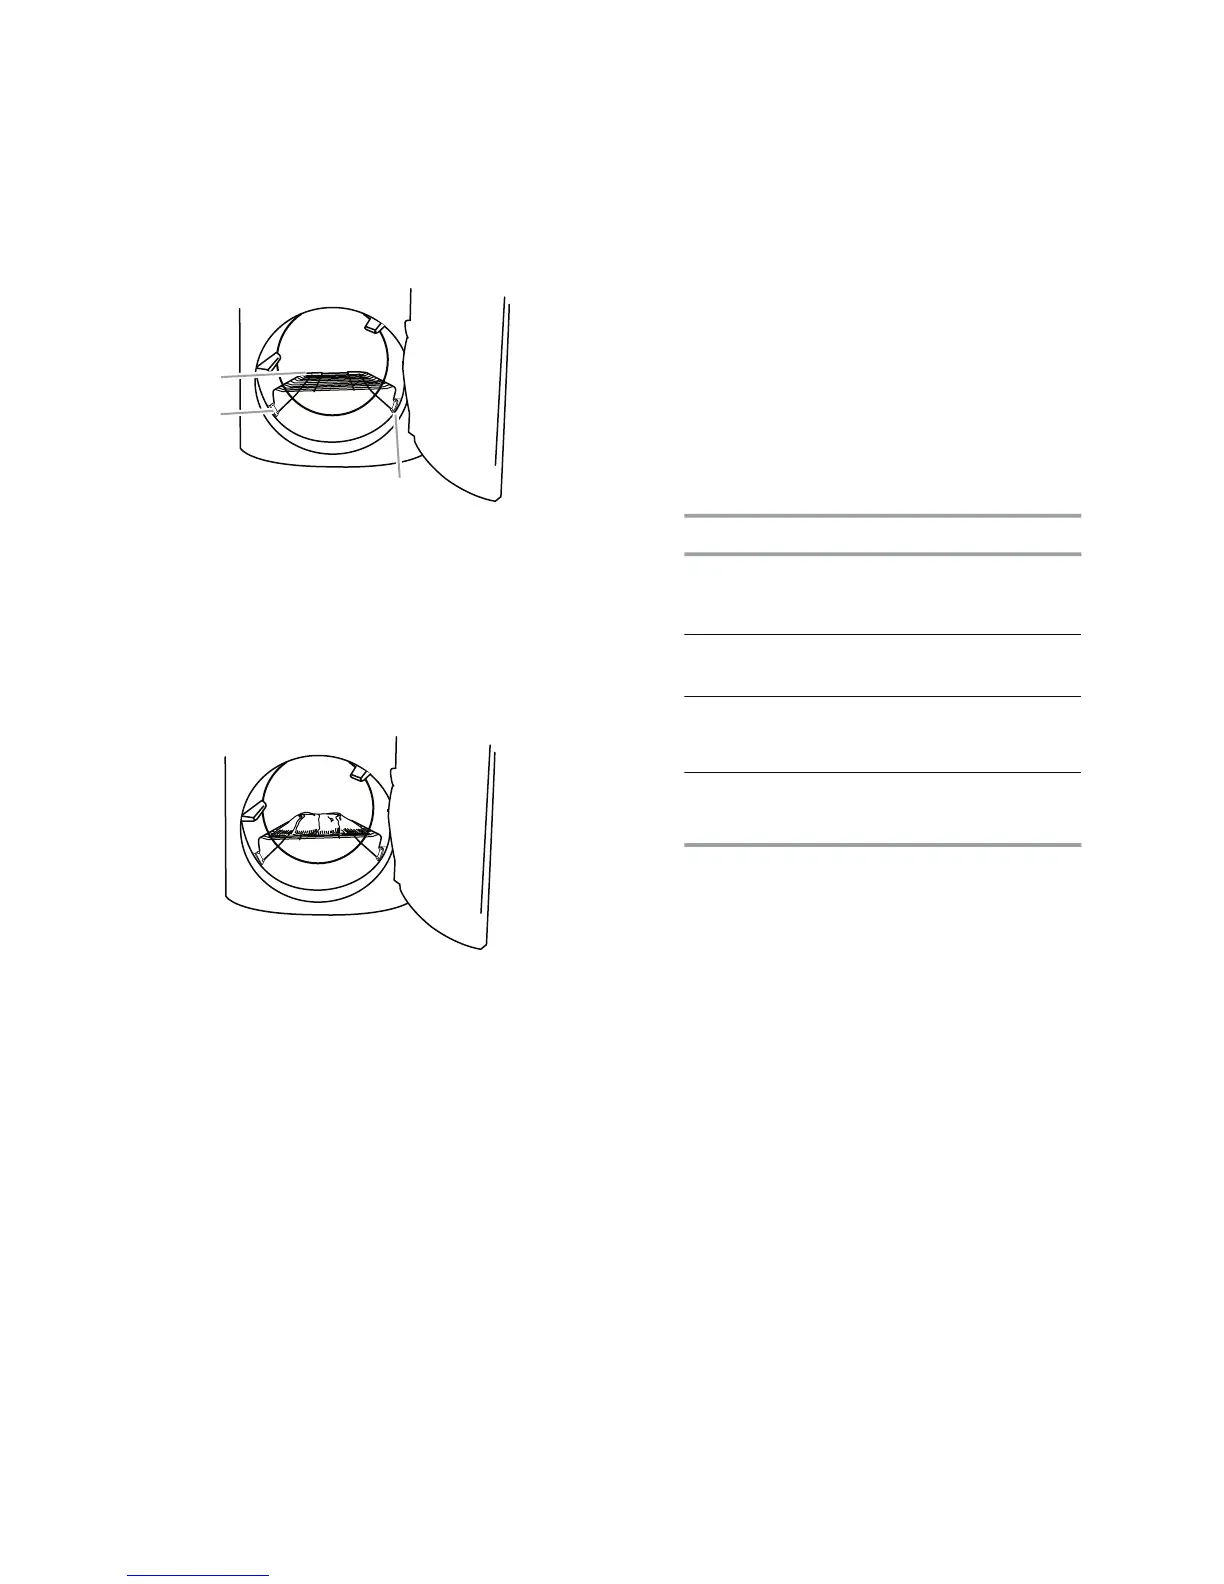
2. Place drying rack inside dryer drum, po-
sitioning the back wire on the ledge of the
inner dryer back panel. Push down on
front feet of drying rack, at the same time,
aligning the locator tabs with the locator
indentations in the dryer drum.
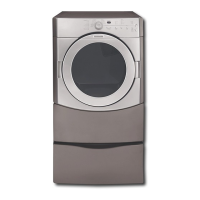
3. Put the wet items on top of the rack. Leave
space between the items so air can reach
all the surfaces.
NOTE: Do not allow items to hang over the
edge of the rack.
4. Close the door.
5. Select Dry Rack cycle. Items containing
foam, rubber or plastic must be dried on
a clothesline or by using the Air Only tem-
p
erature setting.
6. You must select a time by pressing the
MANUAL DRY TIME (- or +) buttons. Reset
time as needed to complete drying. Refer
to the following table.
7. Press and hold START button (about 3 sec-
o
nds).
NOTE: You must remove rack for normal tum-
b
ling.
This chart shows examples of items that can
be rack dried and the suggested temperature
setting and drying time. Actual drying time
will depend on the amount of moisture items
hold.
*(Minutes) Reset time to complete drying, if needed.
Rack Dry Temp. Time*
W
ool Sweaters
B
lock
to shape and lay flat on
the rack
Low 60
S
tuffed toys or pillows
Cotton or polyester fiber filled
Low 60
S
tuffed toys or pillows
F
oam rubber filled
A
ir Only
(no
heat)
90
Sneaker
s or canvas shoes Air Only
(no
heat)
90
A. Dryer back panel
B. Locator tabs
C. Locator indentations (inside dryer drum)
A
B
C



 To Next Page