4-10
1. Unplug dryer or disconnect power.
2. Turn off gas supply to dryer.
3. Remove the toe panel from the front of the
dryer (see page 4-6 for the procedure).
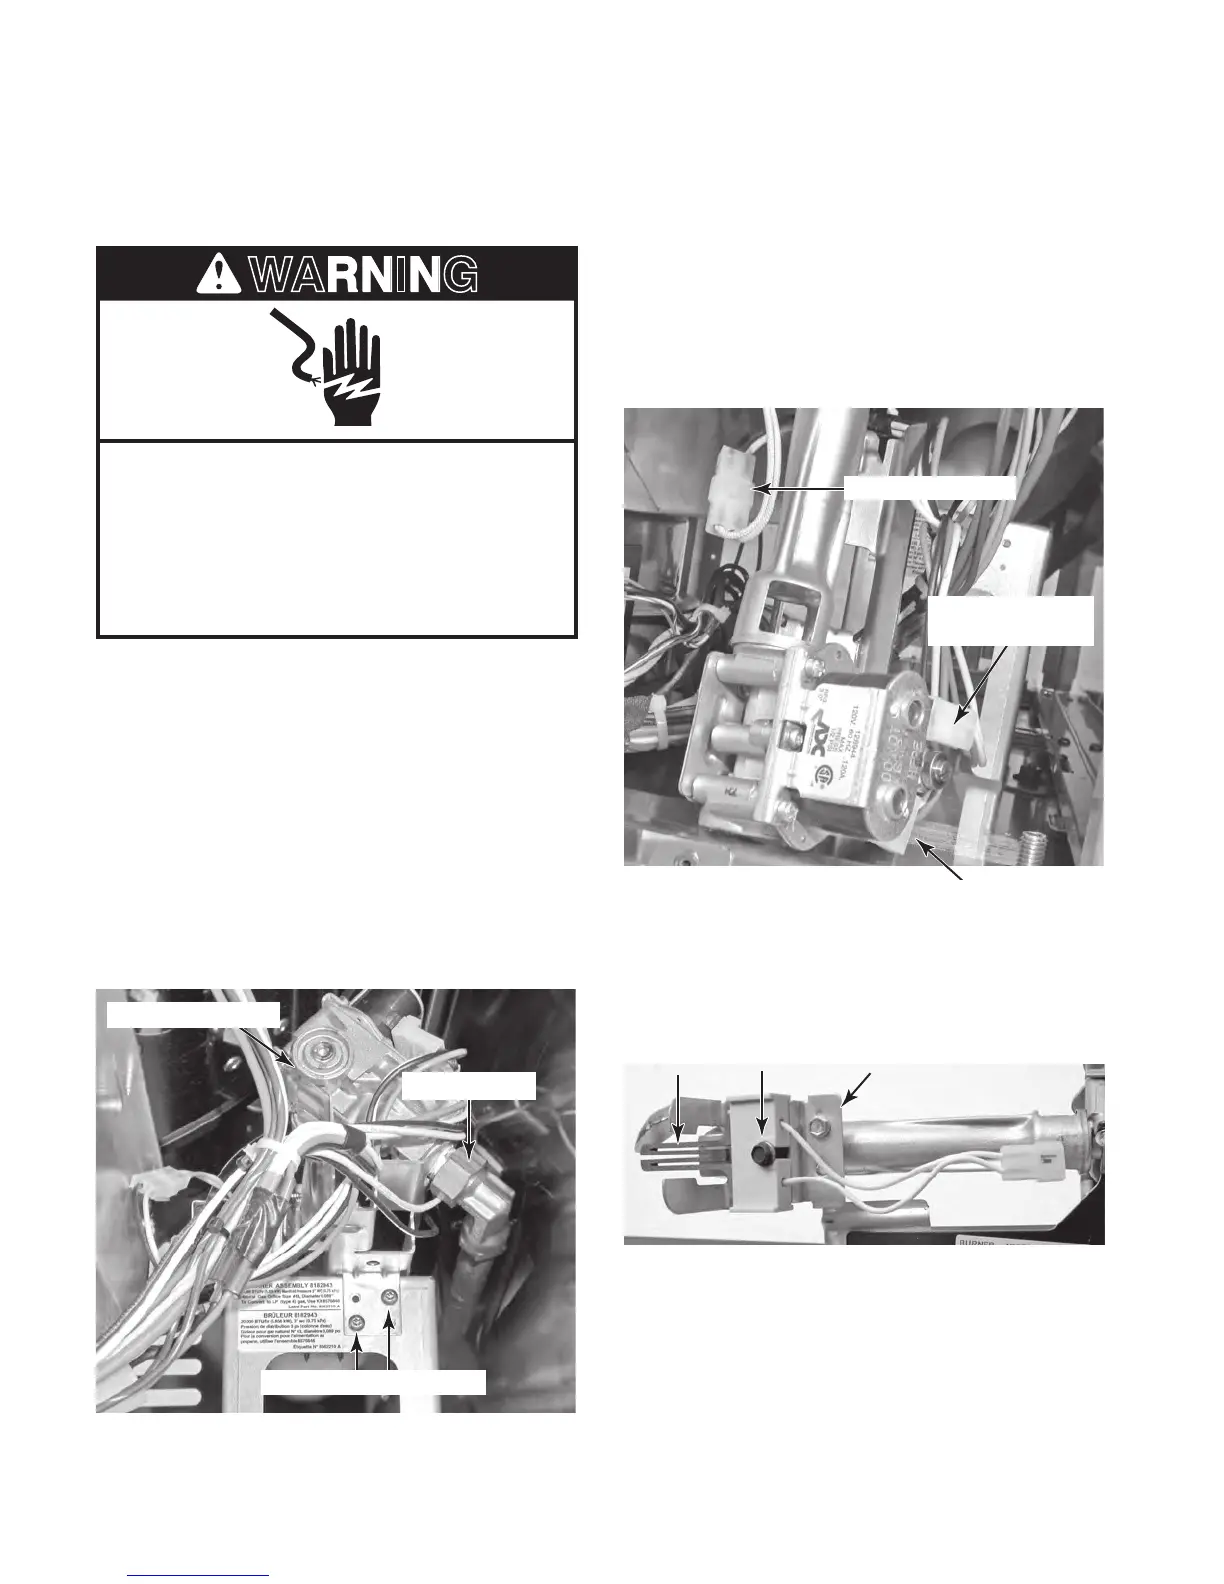
4. To remove the burner assembly:
a) Remove the manifold nut from the burner
assembly.
b) Remove the two T-20 screws from the
burner support bracket, and pull the burn-
e
r assembly away from the bracket.
REMOVING THE BURNER ASSEMBLY,
FLAME SENSOR, THERMAL CUTOFF (TCO),
AND HIGH LIMIT THERMOSTAT (GAS DRYERS ONLY)
Electrical Shock Hazard
Disconnect power before servicing.
Replace all parts and panels before
operating.
Failure to do so can result in death or
electrical shock.
d) To remove the ignitor from the burner
assembly, loosen the 5/16˝ hex-head
s
crew, and remove the ignitor from the
mounting bracket.
Ignitor Screw Bracket
c) Disconnect the following wires from the
burner assembly:
• 2-wire connector from the ignitor.
• 2-wire & 3-wire connectors from the
coil assembly.
Burner Bracket Screws
Burner Assembly
Ignitor Connector
Coil Assembly
2-Wire Connector
Coil Assembly 3-Wire Connector
Manifold Nut



 To Next Page