4-8
1. Unplug dryer or disconnect power.
2. Pull the dryer out from the wall.
3. Remove the toe panel from the front of the
dryer (see page 4-6 for the procedure).
REMOVING THE HIGH LIMIT THERMOSTAT,
THERMAL CUTOFF (TCO), AND HEATER ELEMENTS
(ELECTRIC DRYERS ONLY)
Electrical Shock Hazard
Disconnect power before servicing.
Replace all parts and panels before
operating.
Failure to do so can result in death or
electrical shock.
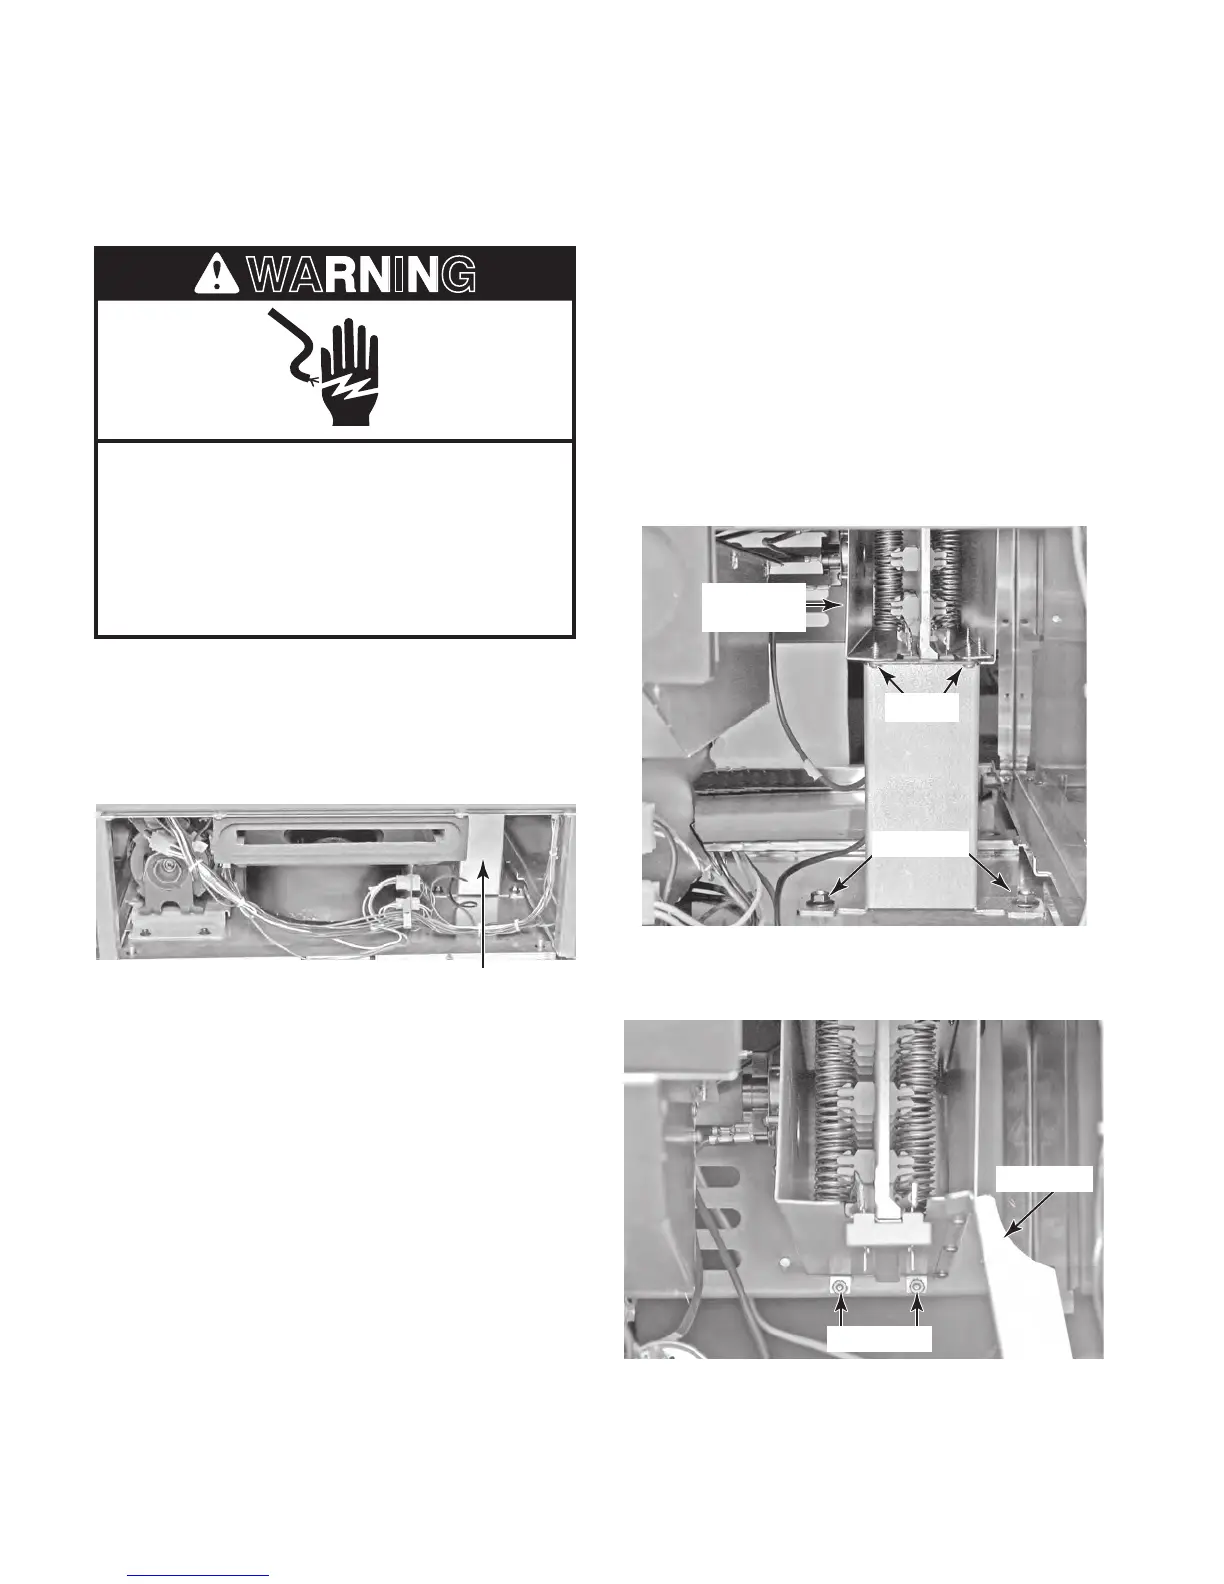
Heater
Assembly
Hex Nuts
8. Remove the two 11/32˝ nuts from the rear
of the heater housing.
Screws
Bracket
Rear Nuts
4. IMPORTANT: Discharge the blower ca-
pacitor by touching a 20,000 Ω resistor
t
o the terminals and chassis ground (see
page 4-14).
Heater Assembly
5. Remove the two T-20 screws from the
heater bracket.
6. Remove the two 7/16˝ hex nuts from the
h
eater bracket.
7. Remove the heater bracket from the two
studs, rotate it to the right side, and prop
the heater up with the bracket so that you
can access the two nuts at the rear of the
heater.



 To Next Page