4-12
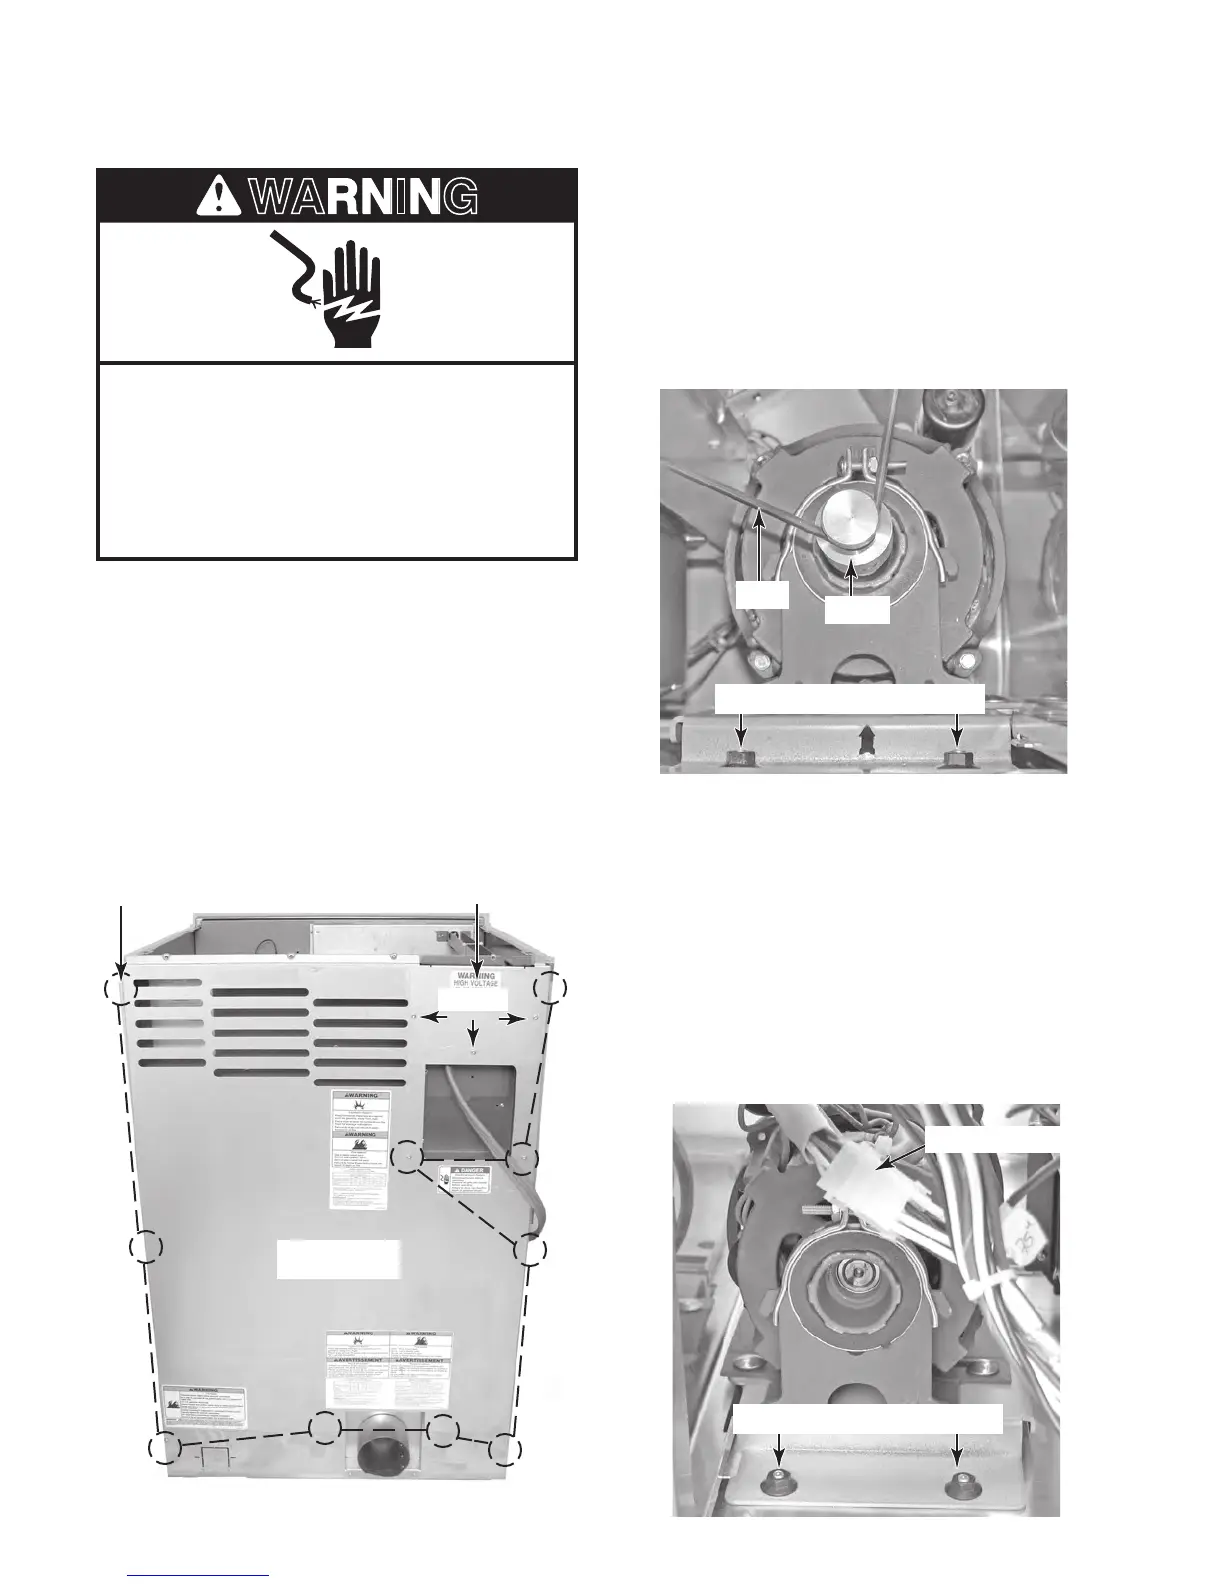
REMOVING THE DRIVE MOTOR & MOTOR CAPACITOR
AC Terminal Wiring Cover
10 Rear Panel Screws
Screws
Rear Panel
Electrical Shock Hazard
Disconnect power before servicing.
Replace all parts and panels before
operating.
Failure to do so can result in death or
electrical shock.
6. To remove the drive motor:
a) From the rear of the dryer, remove the
drive belt from the drive motor pulley. To
do this, pull back on the belt, and rotate
the pulley until the belt is off.
b) Remove the two 7/16˝
nuts from the rear
of the drive motor mounting bracket.
Pulley
Rear Mounting Bracket Nuts
Belt
c) Remove the toe panel from the front of
the dryer (see page 4-6 for the proce-
d
ure).
d) Squeeze the locking tabs on the motor
connector, and remove the connector
from the wiring harness.
e) Remove the two 7/16˝ hex nuts from
t
he front of the drive motor mounting
bracket, and remove the drive motor
assembly from the dryer.
Motor Connector
Front Mounting Bracket Nuts
1. Unplug dryer or disconnect power.
2. Turn off gas supply to dryer.
3. Remove the top cover from the dryer (see
page 4-2 for the procedure).
4. Remove the three T-20 screws from the
AC terminal wiring cover (electric models
only) and remove the cover.
5. Remove the ten T-20 screws from the rear
panel, and remove the panel from the dryer.