4-13
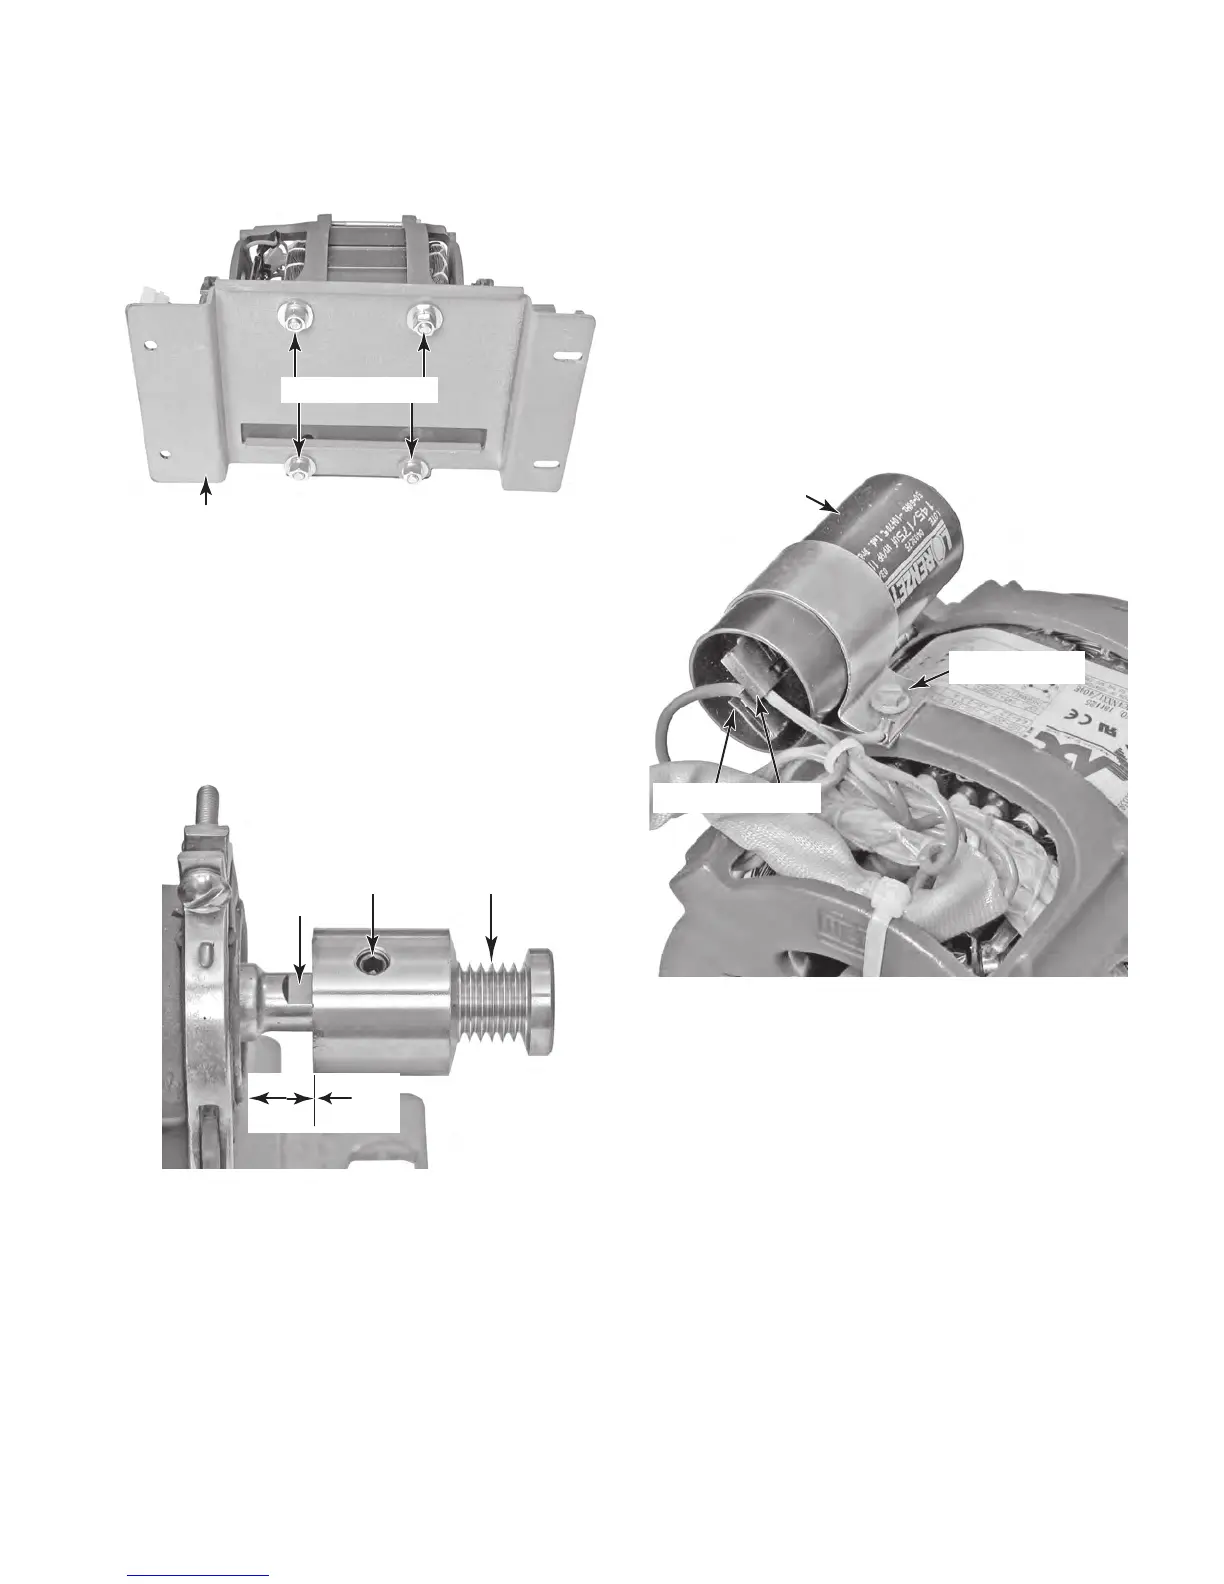
f) Remove the four 1/2˝ nuts and washers
from the drive motor mounting plate and
remove the motor from the plate.
Mounting Plate
Nuts & Washers
g) Loosen the Allen screw on the belt pulley
and remove the pulley from the motor
shaft.
NOTE: When you remount the belt pul-
l
ey on the drive motor shaft, position the
pulley so the inside edge is 5/8˝ from
t
he motor case, and tighten the Allen
screw on the flat of the shaft.
Allen Screw Belt Pulley
5/8˝
Flat
Capacitor Wires
Clamp Screw
Motor Capacitor
7. To remove the motor capacitor:
NOTE: The motor capacitor can be re-
placed without removing the drive motor
from the unit.
a) IMPORTANT: Discharge the capacitor
by touching a 20,000 Ω resistor to the
t
erminals and the chassis.
b) Disconnect the red and black wires from
the capacitor terminals.
c) Remove the hex-head screw from the
clamp and remove the motor capacitor.