22
3.7 Mounting Location
3.7.1 CAUTION! Prior to mounting the hoist ensure that the suspension and it supporting structure are
adequate to support the hoist and its loads. If necessary consult a professional that is qualified to
evaluate the adequacy of the suspension location and its supporting structure.
3.7.2 NOTICE! See Section 7.6 for outdoor installation considerations.
3.8 Connecting Hoist to Air Supply
3.8.1 WARNING! HAZARDOUS AIR PRESSURE IS PRESENT IN THE HOIST, IN THE SUPPLY OF
COMPRESSED AIR TO THE HOIST, AND IN THE CONNECTIONS BETWEEN COMPONENTS.
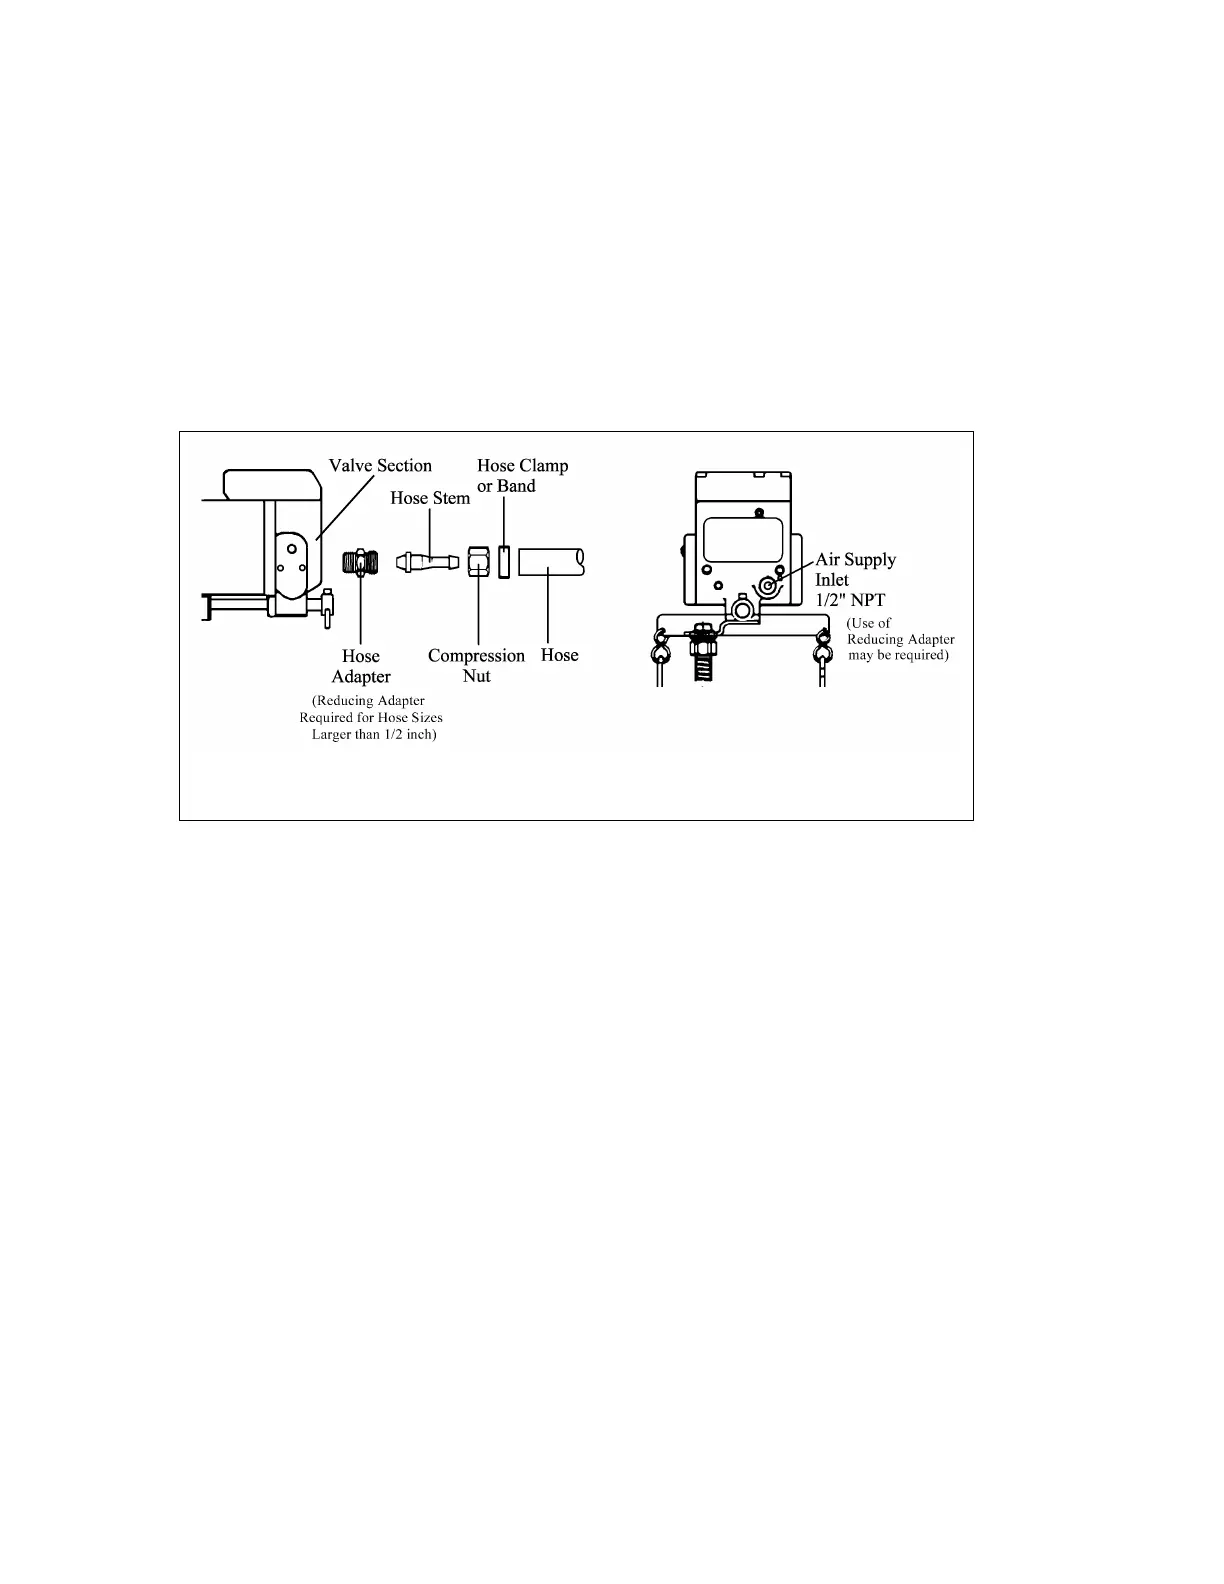
Figure 3-4 Typical Air Supply Connection
3.8.2 Shut off the air supply and stop the airflow completely. Perform Lockout /Tagout in accordance with
ANSI Z244.1 “Personnel Protection -Lockout/Tagout of Energy Sources”.
3.8.3 CAUTION! Before connecting the air supply hose to the hoist, always purge the air hose to clear
any debris and water.
3.8.4 Apply approximately 10-15 drops of turbine oil (see approved lubricant under Section 6.0 Lubricants)
into the hose before attaching to the hoist.
3.8.5 Make connections to air supply; reference Figure 3-4. Use a reducing adapter at the hoist valve
section for hose sizes larger than 1/2 inch.
3.8.6 CAUTION! Where conditions dictate, the installation sequence can be reversed by mounting the
hoist first (Section 3.9) followed by connecting the air supply (Section 3.8).
3.9 Mounting the Hoist
3.9.1 Manual Trolley - Follow instructions in Owner’s Manual provided with the trolley.
3.9.2 Hook Mounted to a Fixed Location - Attach the hoist’s top hook to the fixed suspension point.
3.9.3 NOTICE! Ensure that the fixed suspension point rests on the center of the hook’s saddle and
that the hook’s latch is engaged .

 Loading...