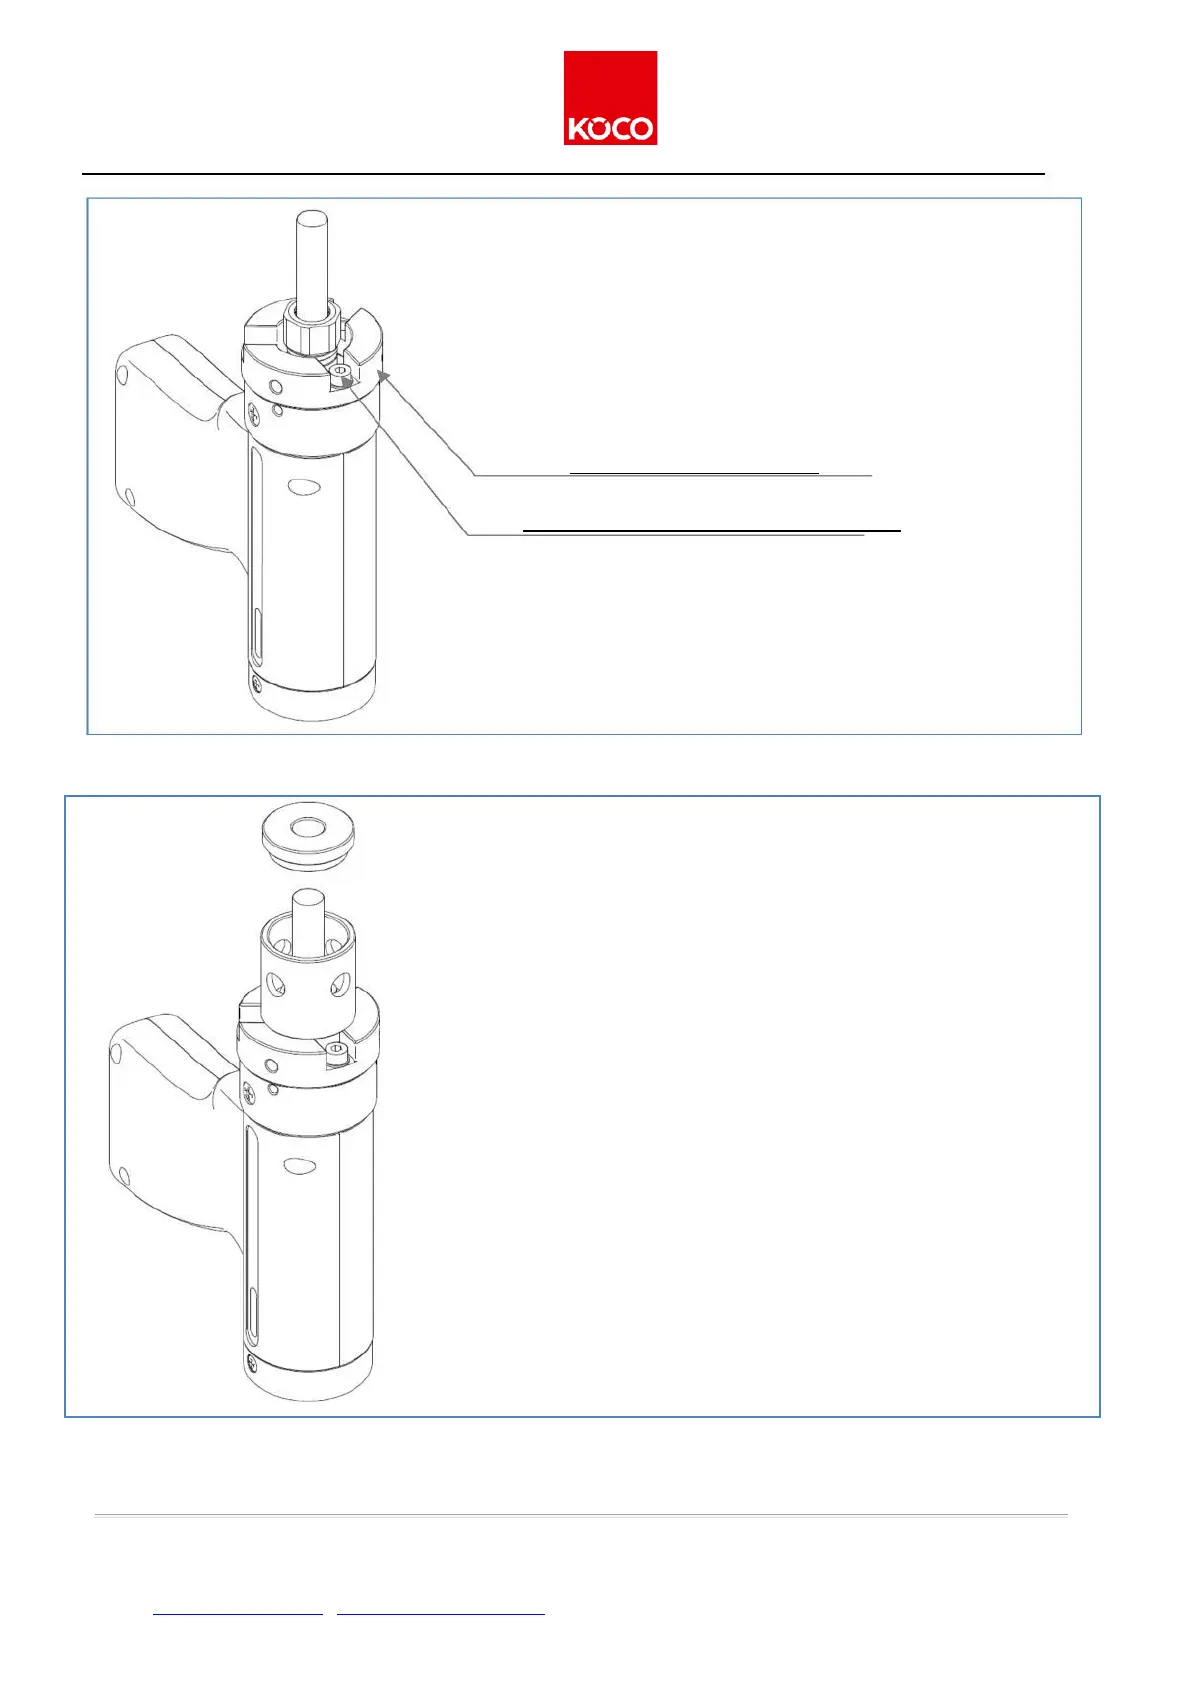
Fig. 28: Setup, step 3
Fig. 29: Setup step 4
Köster & Co. GmbH • D-58256 Ennepetal • Spreeler Weg 32 • Tel. +49 2333 8306-0 • Fax +49 2333 8306-38
1. Place the rear end of the gun on a horizontal surface.
2. Put the centring tube adapter (Pos. 1) on the base ring
and place the three fastening holes above the three
screw-in threads for the support legs.
3. Fasten the centring tube adapter lightly to the base ring with
the 3 M4x12 screws (Pos. 2) and the washers (Pos.3).
1. Insert centring tube (Pos. 4) into the centring pipe adapter and
lock it in place.
2. Thread the centring gauge (Pos.8) onto the cylindrical pin and
let it fall onto the centring tube.
3. Loosen the three fastening screws carefully until the
centring tube adapter can be moved.
Now shift the centring pipe adapter on the front surface of the
base ring until the centring gauge falls into the centring tube.
4. Tighten the three fastening screws alternately in several steps
and check each time whether the centring gauge is still easily ro-
tatable.
If necessary, loosen the screws slightly again and readjust the
centring tube adapter.
5. Remove the centring gauge and centring tube.
Remove the cylindrical pin from the piston and insert a chuck.
Re-insert centring tube and lock it in place.
Please note:
Thanks to high-precision manufacturing of the centring pipes,
the centring pipe adapter does NOT need to be readjusted when
the centring pipe is exchanged or replaced.