INFORMATION ABOUT REPLACEMENTS
6
47
EN
6 INFORMATION ABOUT REPLACEMENTS
6.1 Engine oil replacement
•
Disconnect the negative wire (-) from the battery to avoid accidental engine starting.
Important:
•
Before proceeding with operation, read Cap. 3
.
Important :
•
Place engine on level surface to ensure accurate
measurement of oil level.
Before proceeding, perform the operation described in
Par. 6.2
- Point
NOTE: Perform this operation with warm engine, to get a
better fluidity of the oil and get a full discharge of oil and
impurities contained in it.
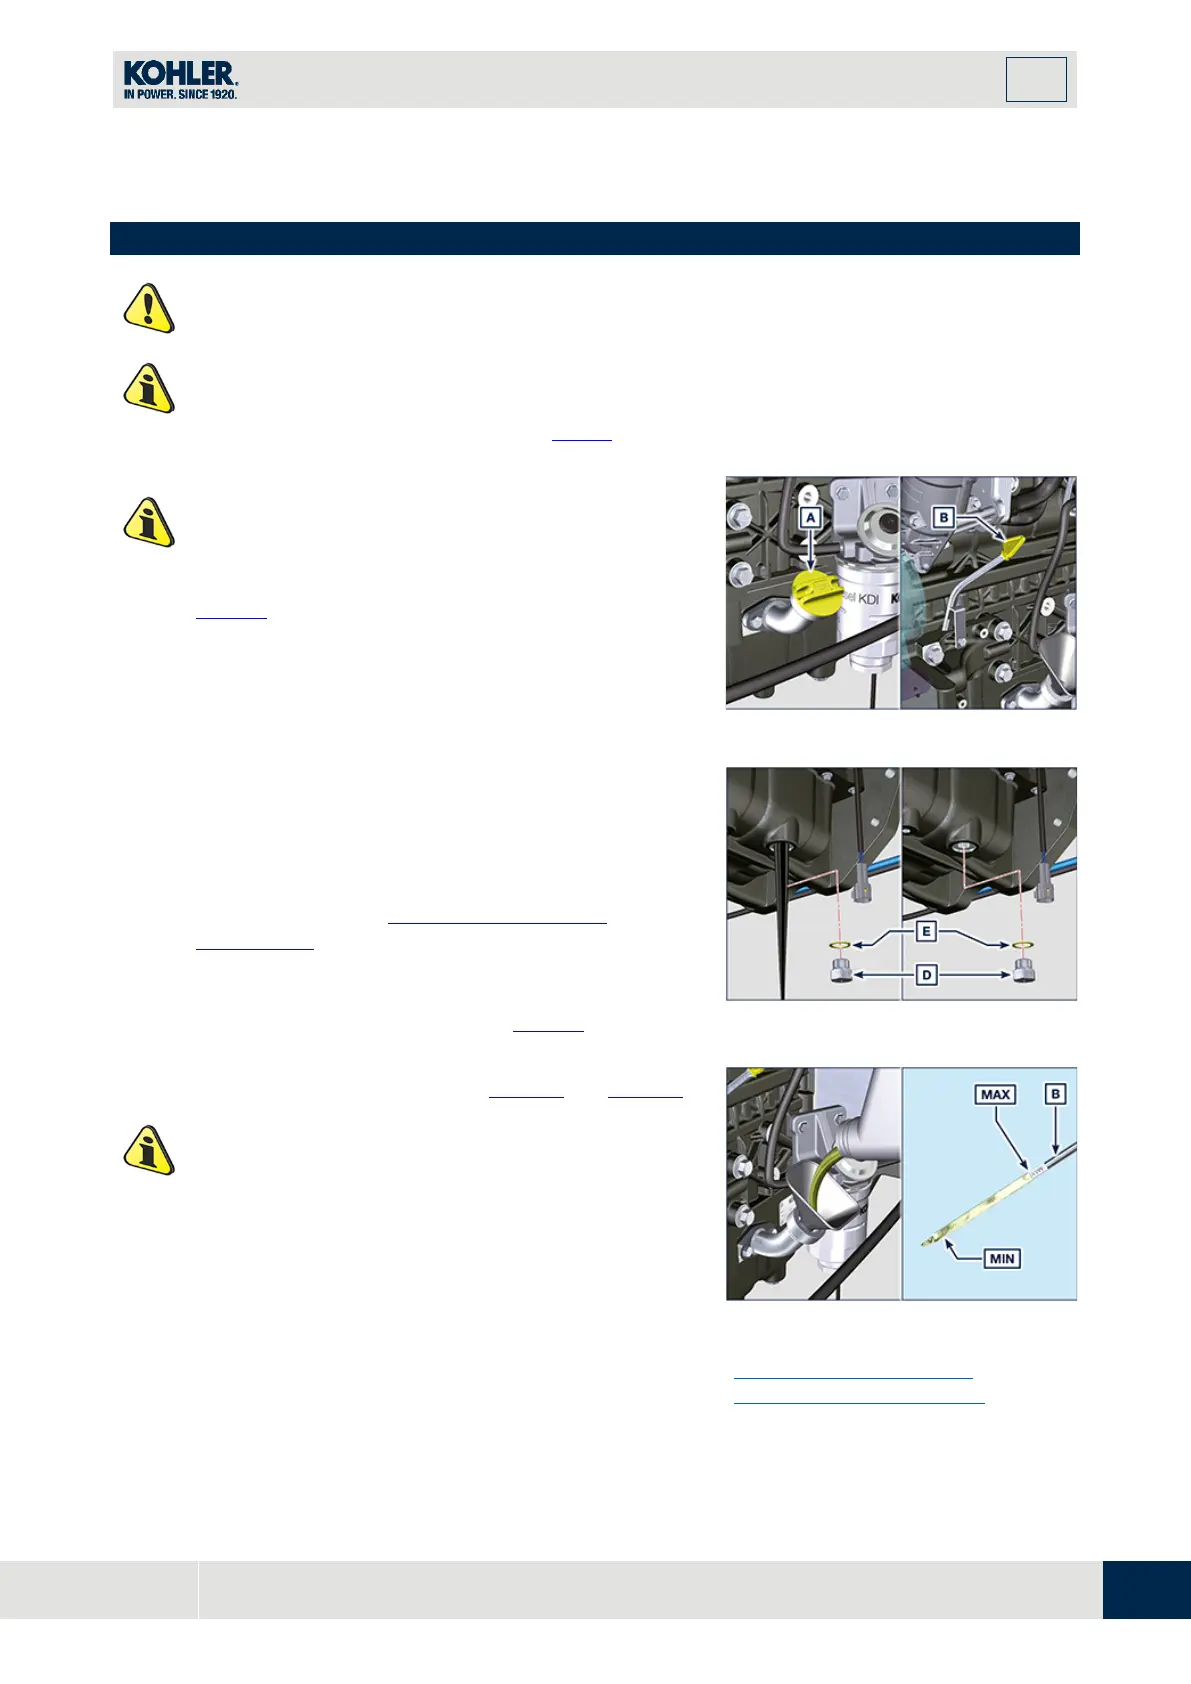
6.1
1.
Loosen the oil filler cap A (Fig. 6.1).
2.
Remove the oil dipstick B.
3.
Remove the oil drain plug D and the gasket E (the oil
drain plug is on both sides of the oil sump).
4.
Drain oil in an appropriate container (For the exhausted
oil disposal, refer to (
Par. 6.6 DISPOSAL and
SCRAPPING ).
5.
Replace gasket E.
6.
Tighten the drain oil plug D (tightening torque at 50 Nm).
7.
Perform the operation described in Par. 6.2
- point 2 to 5.
6.2
8.
Add the type oil recommended ( Tab. 2.1 and Tab. 2.2
).
Important :
•
Do not exceed the MAX level on the dipstick.
•
Do not use the engine with the oil level below the MIN.
9.
Fit and remove the oil dipstick B to check the level. Pour
in fluid until reaching the MAX level mark.
10.
Upon completion, reinstall the oil dipstick B completely.
11.
Tighten the cap A.
6.3
NOTE:
Click on the icon to play the procedure.
embed/T7XFP3Vn_q0?rel=0

 Loading...


