1.4
Getting started
16
Numeric keypad — Just like the numeric keys on a regular tone-dialing
phone. Use these to dial phone and fax numbers and to enter numbers when
you’re setting up the machine.
17
In Fax mode:
SPEED DIAL
/
TEL INDEX
— Starts a speed-dialing operation, which you finish by
pushing three of the keys on the numeric keypad. Also displays one-touch and
speed-dial entries sorted alphanumerically, as in a telephone directory. (See
page 3.8.)
Or, in Copy mode:
ZOOM
– Pressing this key will turn on or off the
ZOOM
light.
When the
ZOOM
light glows, you can set the copy reproduction ratio at 1%
steps by using or key.
When the
ZOOM
light is not lit, you can choose one of several fixed copy repro-
duction ratio by using or key.
18
Program key — Any function can be started by first pressing this key and
then entering the function number.
19
Cursor Keys
— Scrolls (moves) through features and command options as dis-
played on the
LCD
.
20
ENTER
— It confirms user settings, begins operations and moves through com-
mand levels.
21
CANCEL
— Pressing this key will delete characters on the
LCD
and cancel com-
mands you have entered into the machine.
22
PAPER SIZE
/
NEXT DOC
—
In Copy mode:
Selects the printout paper you want to use.
While scanning a document:
Pressing this key will tell your machine to scan one or more additional docu-
ments after the current scanning ends.
23
DOCUMENT SIZE
— Instructs the fax to scan A4, A5 or F4 sized documents
when you use the platen glass.
24
Liquid crystal display (
LCD
) — Shows the machine’s status and lets you
see what you’re programming into the machine. The display shows 2 lines, 20
characters per line. If the
LCD
is blank, the machine is off.
25
Printer status lights — Green lights indicate the acceptable paper sources.
Red light will glow if the printer problem (such as paper jam) occurred.
26
CONTRAST
— Pressing this key will adjust the contrast level.
27
DOCUMENT
/
RESOLUTION
—
In Fax mode: Pressing this key will toggle among the three resolution modes
and grayscale.
Or, in Copy mode: Pressing this key will select the type of your document.
28
COPY
/
FAX
— Pressing this key will toggle between Fax mode and Copy mode.
29
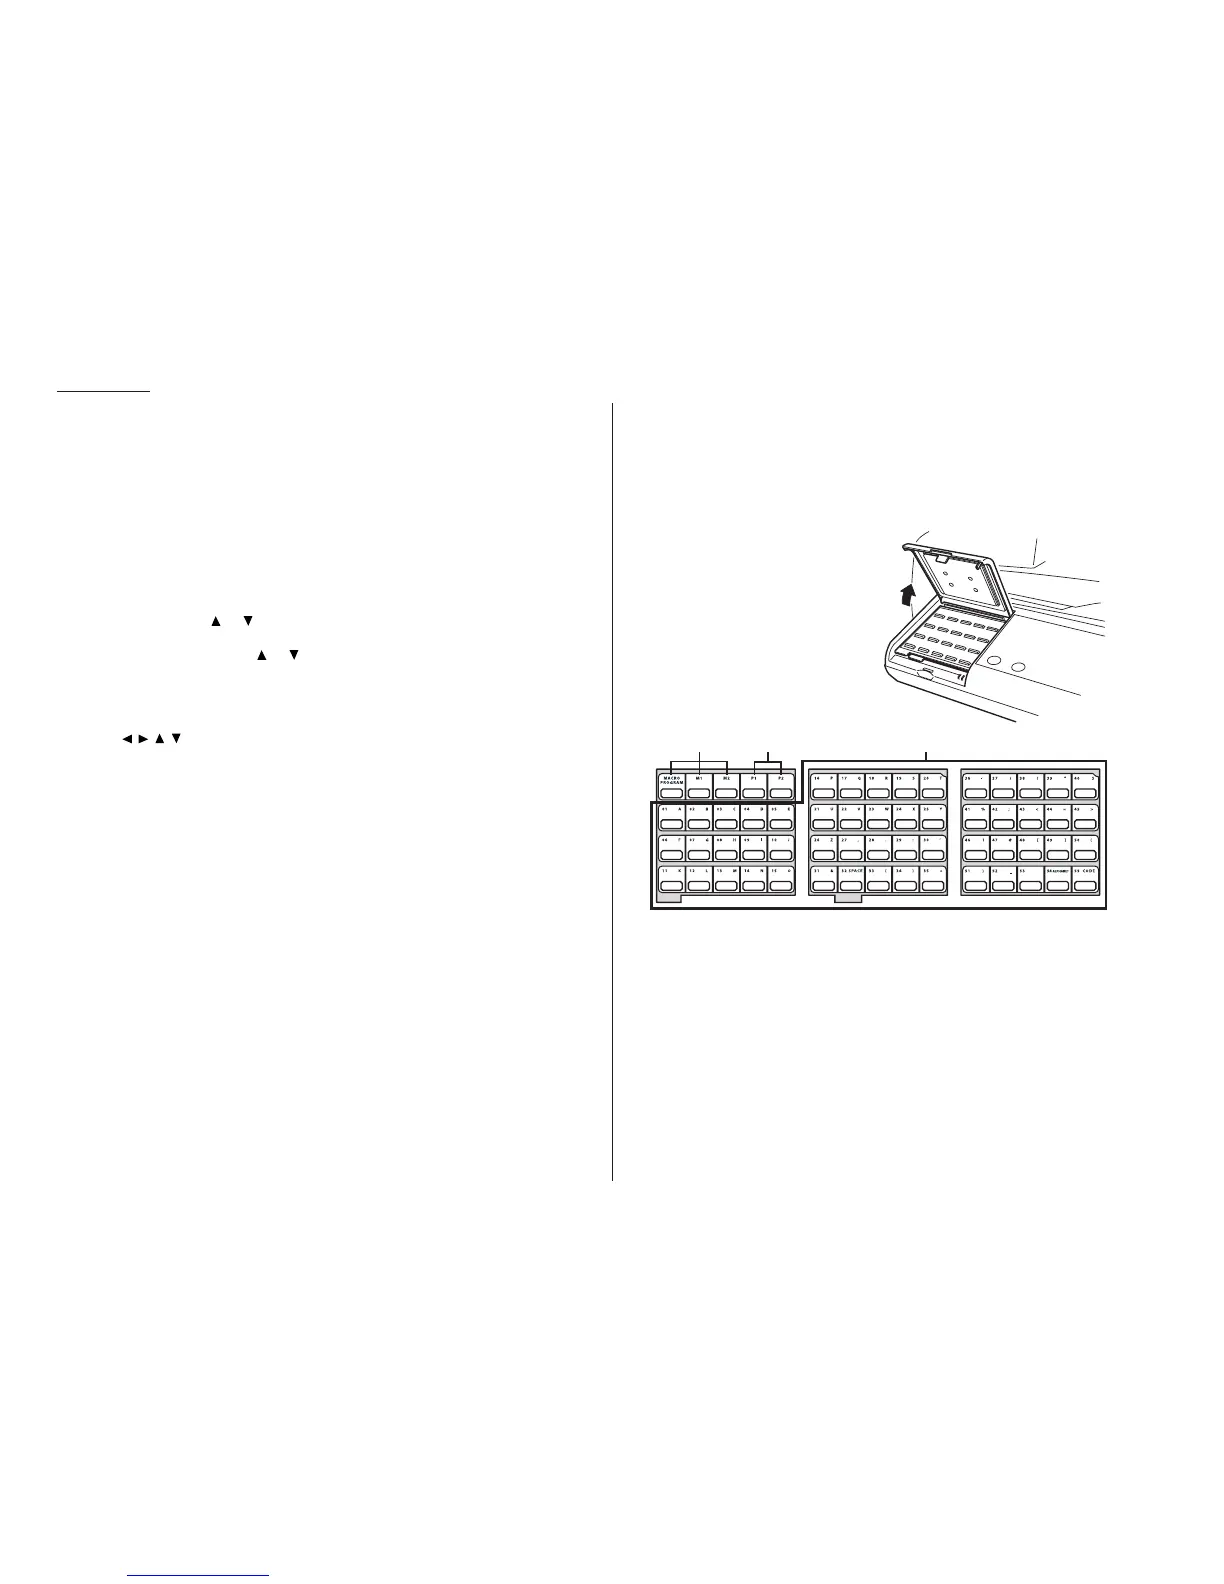
Macro Keys — Programming the Macro keys (
M
1 and
M
2) can reduce many
steps of the operation to a simple press of a key. You can “teach” the Macro
keys to carry out one of the several operations (see pages 3.17–3.19).
30
Programmable One-Touch Keys — The keys labeled P1 and P2, this lets
you teach your machine an advanced multi-step function just once, then recall
the function at any time by pressing one of these keys.
31
One-Touch Keys — The keys labeled 01-55 offer one-touch dialing conve-
nience. Also, you may use these keys to enter the characters when you are
setting up the machine.





 To Next Page