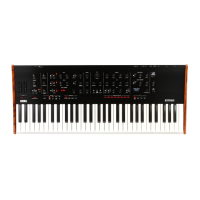
2
Basic
operation
•MEMORY CARD
1.2 Rear panel
•ECS
jack
Connect
an
ECS
External
Controller
(sold separately) to this
jack.
By
pressing the switch,
you
can
turn
on/
off
the
assigned
function. p.14
•MIDI
connectors (IN,
OUT,
THRU)
External MIDI devices
can
be connected to these connectors.
MIDI
IN
receives
messages
from
an
external
MIDI device.
MIDI
OUT
transmits
messages
from
the
Prophecy
to
external MIDI devices. MIDI THRU
re-transmits
messages
that
were
received
at
MIDI IN. p.36
An
optional
card
containing
(or for storing)
programs
and
arpeggiator
patterns
can be inserted here.
~-----------------------------------------------------
•POWER(power switch)
This switch
turns
the
power
on/off.
p.6
•Ac
power inlet
Connect the included AC cable to this inlet.
After
connecting
the
AC
cable
here,
connect the
other
end
to
an
AC outlet.
2.1
Setup
Cable
To
AC
Outlet
Prophecy
SOLO
SYNTHESIZER
MIDI Cable
Be
sure
that
the
power
is
turned
OFF
when
making
any
connections.
Basic connections
4
Connect
the
power
cable.
Connect the
audio
cables.
In
order
to
take
full
advantage
of
the
high
quality
sound
of
the
Prophecy,
we
recommend
that
you
use
a
stereo
system
if
possible.
If
you
are
connecting
it
in
mono,
use
the
L/MONO
jack.
In
order
to
faithfully
reproduce
the
sound
of
the
Prophecy,
we
recommend
that
you
use
a
powered
monitor
(a
powered
speaker
such
as
the
PM-15 [sold
separately]).
If
you
use
the
amp
of
your
stereo
audio
system
or
a
portable
cassette-radio
with
an
external
input,
connect
the
audio
cable from
the
Prophecy
to
the jack
marked
LINE IN,
AUXIN,
or
External
Input,
etc.
Please
be
aware
that
if
you
play
the
Prophecy
through
your
stereo
system
or
a cassette-radio,
you
should
keep the
volume
down,
since excessive volume
can
damage
your
speakers.
If
you
are
using
headphones,
connect
them
to
the
PHONES jack located at the left front
of
the Prophecy.
Connecting pedals, etc.
By
connecting
a
pedal
volume,
pedal
switch,
and
an
ECS
external
controller,
you
can
enjoy
an
even
wider
range
of
performance possibilities. Connect these devices as desired.
Connect
the
pedal
volume
(EXP-2, XVP-10 etc.
[sold
separately]) to
the
rear
panel
FOOT PEDAL connector.
The polarity
of
the
pedal
volume
(the
Max./Min
status)
is
determined
by
the Global section
page
GLB-4 [Sens &
Polar] Foot Pedal Polarity setting.
Connect
the
pedal
switch
(PS-1/2,
DS-1/2
etc.
[sold
separately]) to
the
rear
panel
FOOT SWITCH connector.
The polarity
of
the
pedal
switch
(the
ON/OFF
status) is
set
by
the
Global section
page
GLB-4 [Sens & Polar] Foot
SW Polarity setting.
Connect the
ECS
external controller [sold separately] to
the rear panel
ECS
connector.