69
Basic functions
Sampling mode
Using an insert effect
The TRITON-Rack’s insert effects can be applied to the
sound that is being input from the AUDIO INPUT 1
and 2 jacks, allowing you to record a sample with
effects applied. As an example, we will explain the pro-
cedure for applying an insert effect to a stereo source
and sampling the result.
1 Make the settings of step 1 and 2 in “Connec-
tions and settings for a stereo source.”
2 Set the various “Input 1” and “Input 2” parame-
ters.
• Set “BUS” to IFX1 for both Input 1 and 2.
• Set “Lvl” and “Pan” to the same settings as in step
3 of “Connections and settings for a stereo
source.” With these settings, the stereo source will
be sent to insert effect 1 (IFX 1).
3 Use the [INPUT] knob to adjust a suitable input
level. (Refer to step 6 of “Connections and set-
tings for a monaural source.”)
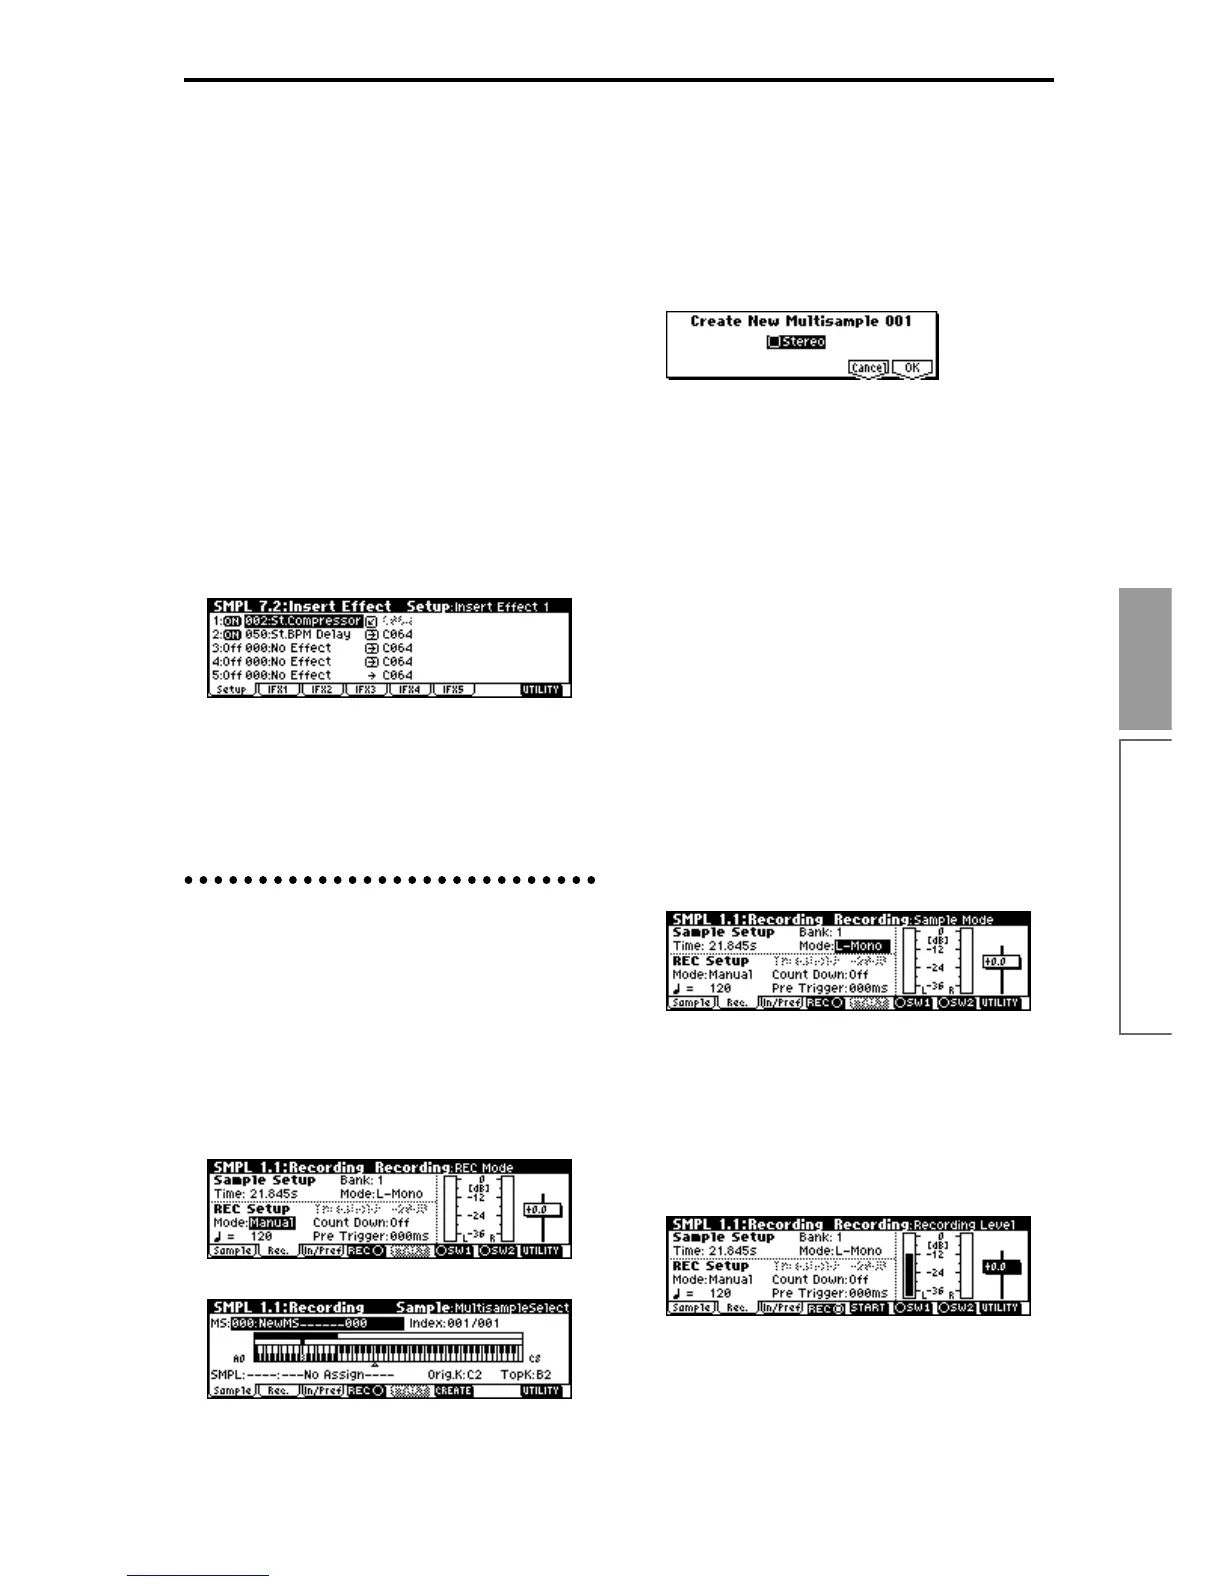
4 Select the 7.2: Insert Effect, Setup page.
Up to five insert effects can be connected in series.
Make settings for “Insert Effect,” “Chain,” and the
“Pan (CC#8)” of the sound after it has passed
through the insert effect. (
☞PG p.28, 104)
Examples of settings using the insert effects are
given in “Mode (Sample Mode)” (
☞PG p.77).
Manual sampling
There are two methods of sampling: manual and auto.
In manual mode, sampling is started by pressing the
[F5] (“START”) key from the recording standby condi-
tion (entered by pressing the [F4] (“REC”) key once).
For the sampling procedure in auto mode, refer to
“Auto sampling” (☞p.70).
1 Select the 1.1: Recording, Recording page.
2 For “Mode (REC Mode),” select Manual.
This will select manual recording mode.
3 Select the 1.1: Recording, Sample page.
4 For “MS (Multisample Select),” select 000:
NewMS____000.
Immediately after the power is turned on, 000:
NewMS______000 will be created automatically.
Use the numeric keys [0]–[9] to input the multisam-
ple number that you wish to record, and press the
[ENTER] key.
If you select a new number, the Create New Multi-
sample dialog box will appear. Press the [F8] (“OK”)
key, and the new multisample will be created.
To specify the name, use the Utility “Rename MS.”
5 In “SMPL (Sample Select),” select the sample that
you wish to record. For this example, select ----: ---
No Assign----.
Immediately after the power is turned on, this will
be set to ----: ---No Assign----. You may sample even
in this condition. The sample will be automatically
recorded to a vacant sample number.
If you wish to start by specifying the sample num-
ber to be sampled, use the [INC], [DEC] keys or
numeric keys [0]–[9] and [ENTER] key to specify the
desired number.
A sample will be created when you record. A sam-
ple name such as 0000: NewSample_0000 will be
assigned automatically. This name can be edited
using the Utility “Rename SMPL.”
If you execute sampling when an existing sample
such as 0000: NewSample_0000 is selected, the new
sample will be sampled to a vacant sample number.
You do not need to be concerned with this setting
even when you continue recording successive sam-
ples.
6 Select the 1.1: Recording, Recording page.
7 Set the “Mode (Sample Mode).”
Monaural source: If the “Input1” setting “Pan” is
L000, set “Mode (Sample Mode)” to L-Mono. If
“Pan” is R127, set “Mode (Sample Mode)” to R-
Mono.
Stereo source: Set the “Mode (Sample Mode)” to
Stereo.
8 Press the [F4] (“REC”) key.
If an input signal is present, the Recording Level
[dB] meter will move according to the Pan setting in
“Input1” and “Input2.” This is the recording-
standby condition.
In the case of “Connections and settings for a mon-
aural source,” the L meter will move. In the case of

 Loading...