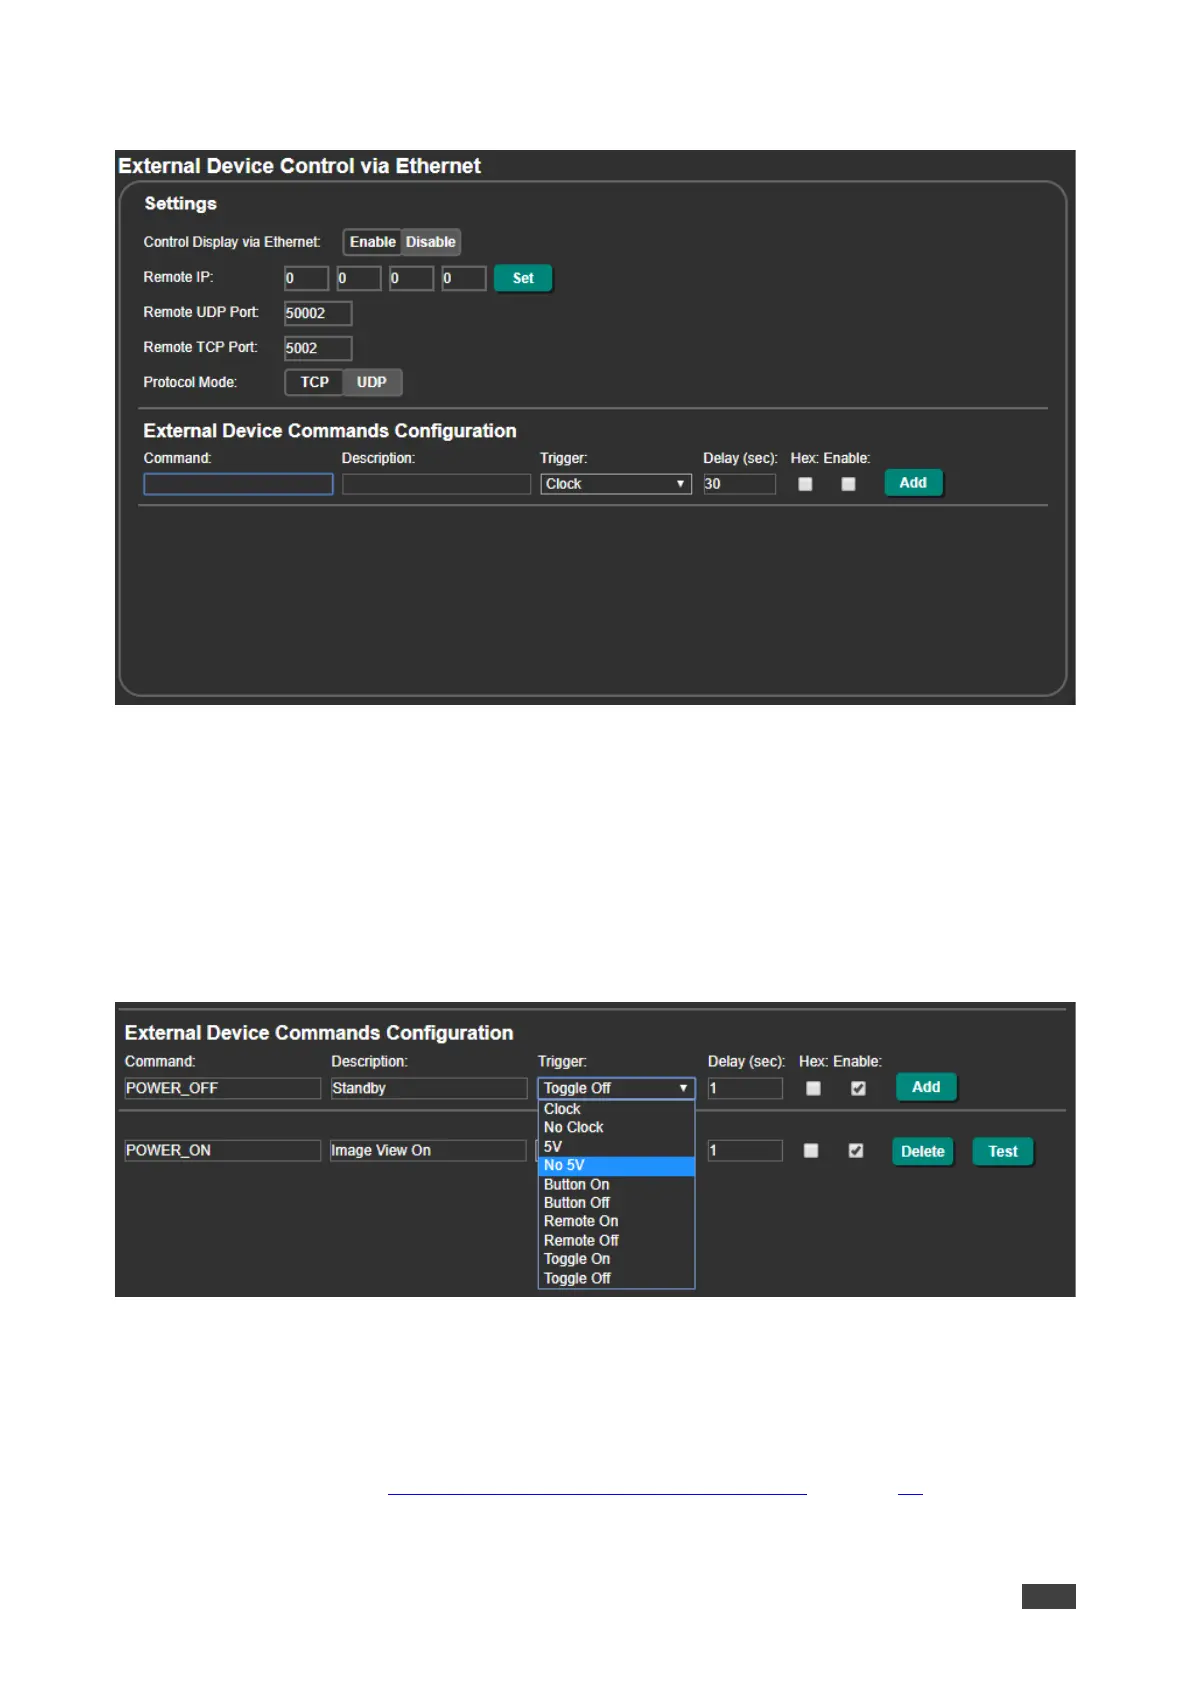
4. In the Navigation pane, click Ethernet. The Ethernet page appears.
Figure 50: Ethernet Page – Button On and Button Off Command Configuration
5. Click Enable to control the display via the Ethernet.
6. Enter the Remote IP address (of the connected display) and click Set.
7. Set the remote port (UDP – 50002; TCP – 5002, by-default).
8. Click TCP or UDP to select the protocol mode.
9. Configure the Clock / No Clock and 5V / No 5V commands and add them to the Ethernet
command list.
Figure 51: RS-232 & Remote Page – Clock and/or 5V Command Configuration
10. If required, configure the other commands, and add them to the Ethernet command list.
The display is triggered to turn on and off automatically via 5V/No 5V/Clock/No Clock
commands via the Ethernet port.
For further details, see Controlling an External Device via Ethernet on page 52.