4. In the Navigation pane, click RS-232 & Remote. The RS-232 & Remote page appears.
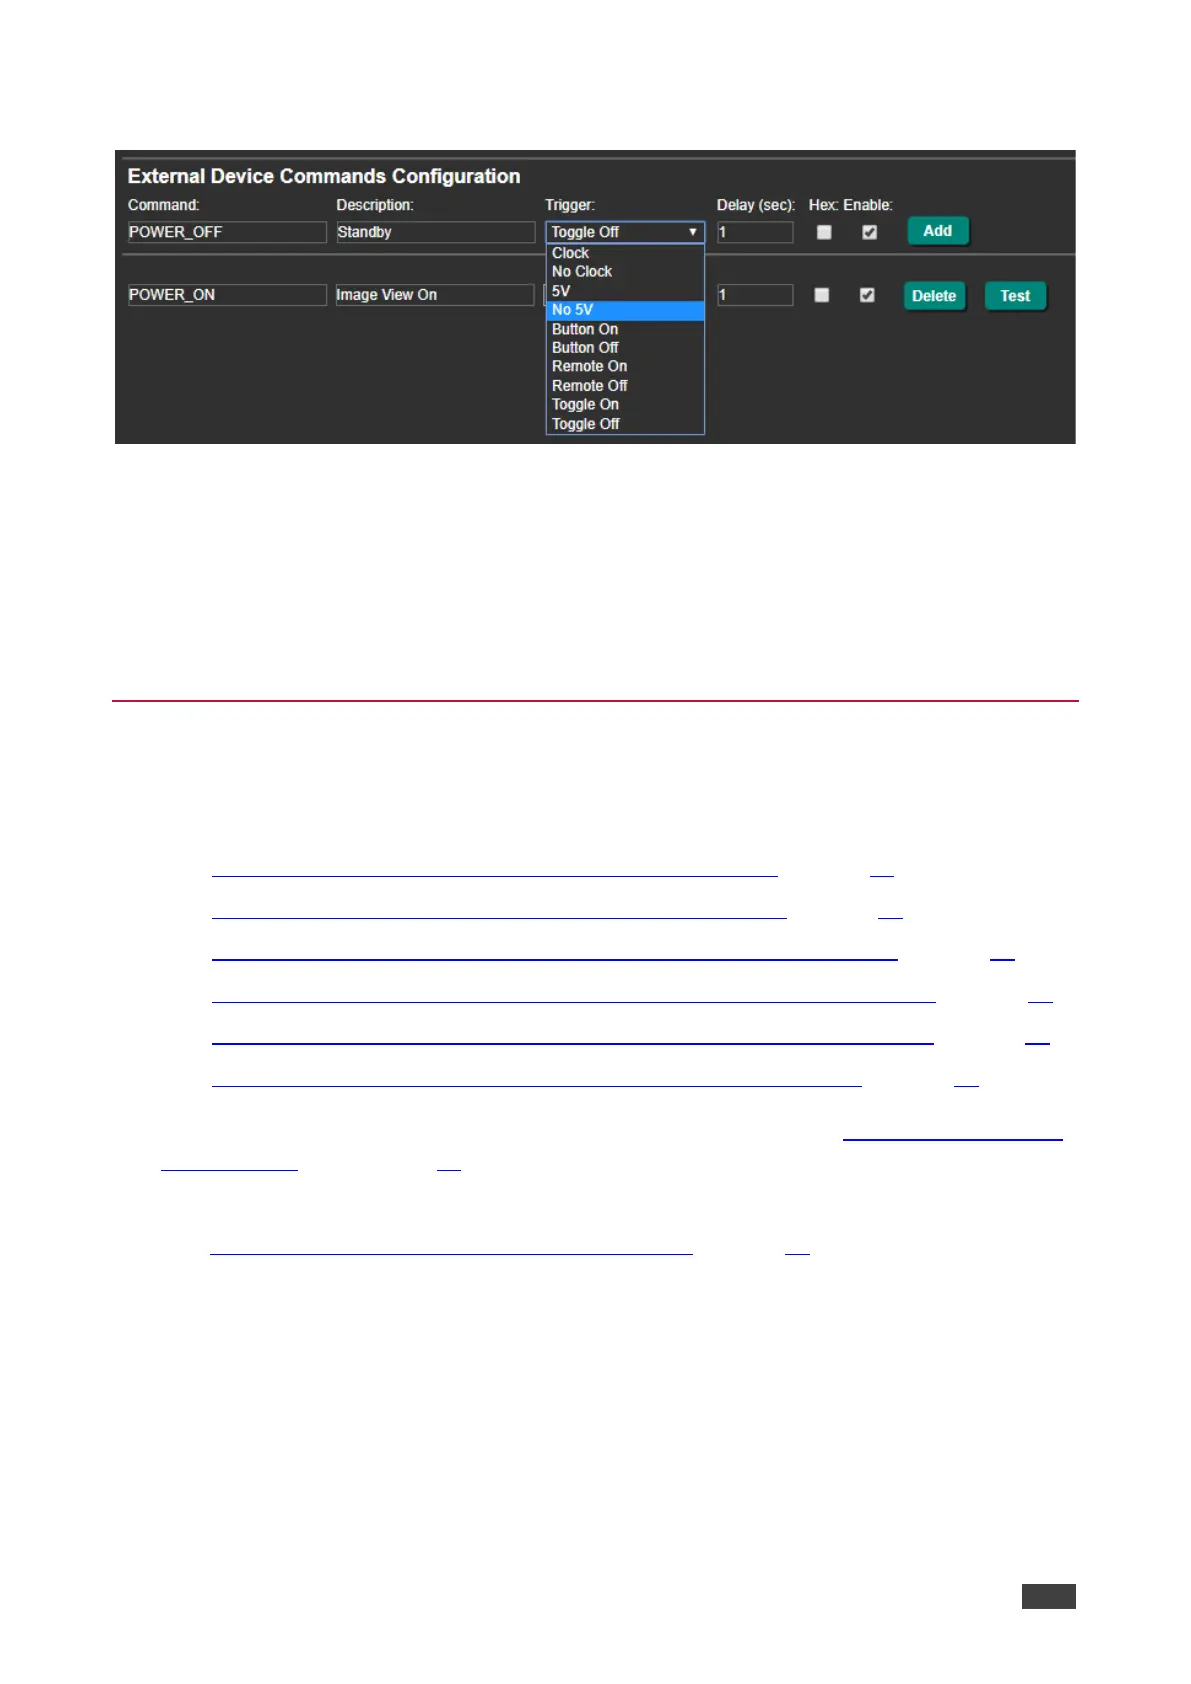
Figure 36: RS-232 & Remote Page – Clock and/or 5V Command Configuration
5. Configure the Clock / No Clock and 5V / No 5V commands and add them to the RS-232
command list.
6. If required, configure the other commands, and add them to the RS-232 command list.
The display is triggered to turn on and off automatically via 5V/No 5V/Clock/No Clock
commands.
Controlling the Display via the Network (Ethernet)
You can connect your network to FC-18 and to the display’s Ethernet port and control the
display via Ethernet in any of the following ways:
• Controlling Via RS-232 (FC-18 Sends CEC to HDMI OUT) on page 14.
• Controlling Via Ethernet (FC-18 Sends CEC to HDMI OUT) on page 16.
• Controlling Via Front Panel Buttons (FC-18 Sends CEC to HDMI OUT) on page 16.
• Controlling Via REMOTE ON/OFF Pins (FC-18 Sends CEC to HDMI OUT) on page 17.
• Controlling Via REMOTE TOGGLE Pin (FC-18 Sends CEC to HDMI OUT) on page 18.
• Controlling the Display Automatically (Sending CEC to HDMI OUT) on page 19.
You can also send display on/off commands via the RS-232 port (see Controlling the Display
via its RS-232 Port on page 21).
If your display includes CEC features, you can send display on/off commands via HDMI
(see Controlling the Display via HDMI OUT Port (CEC) on page 14).