15
Chassis
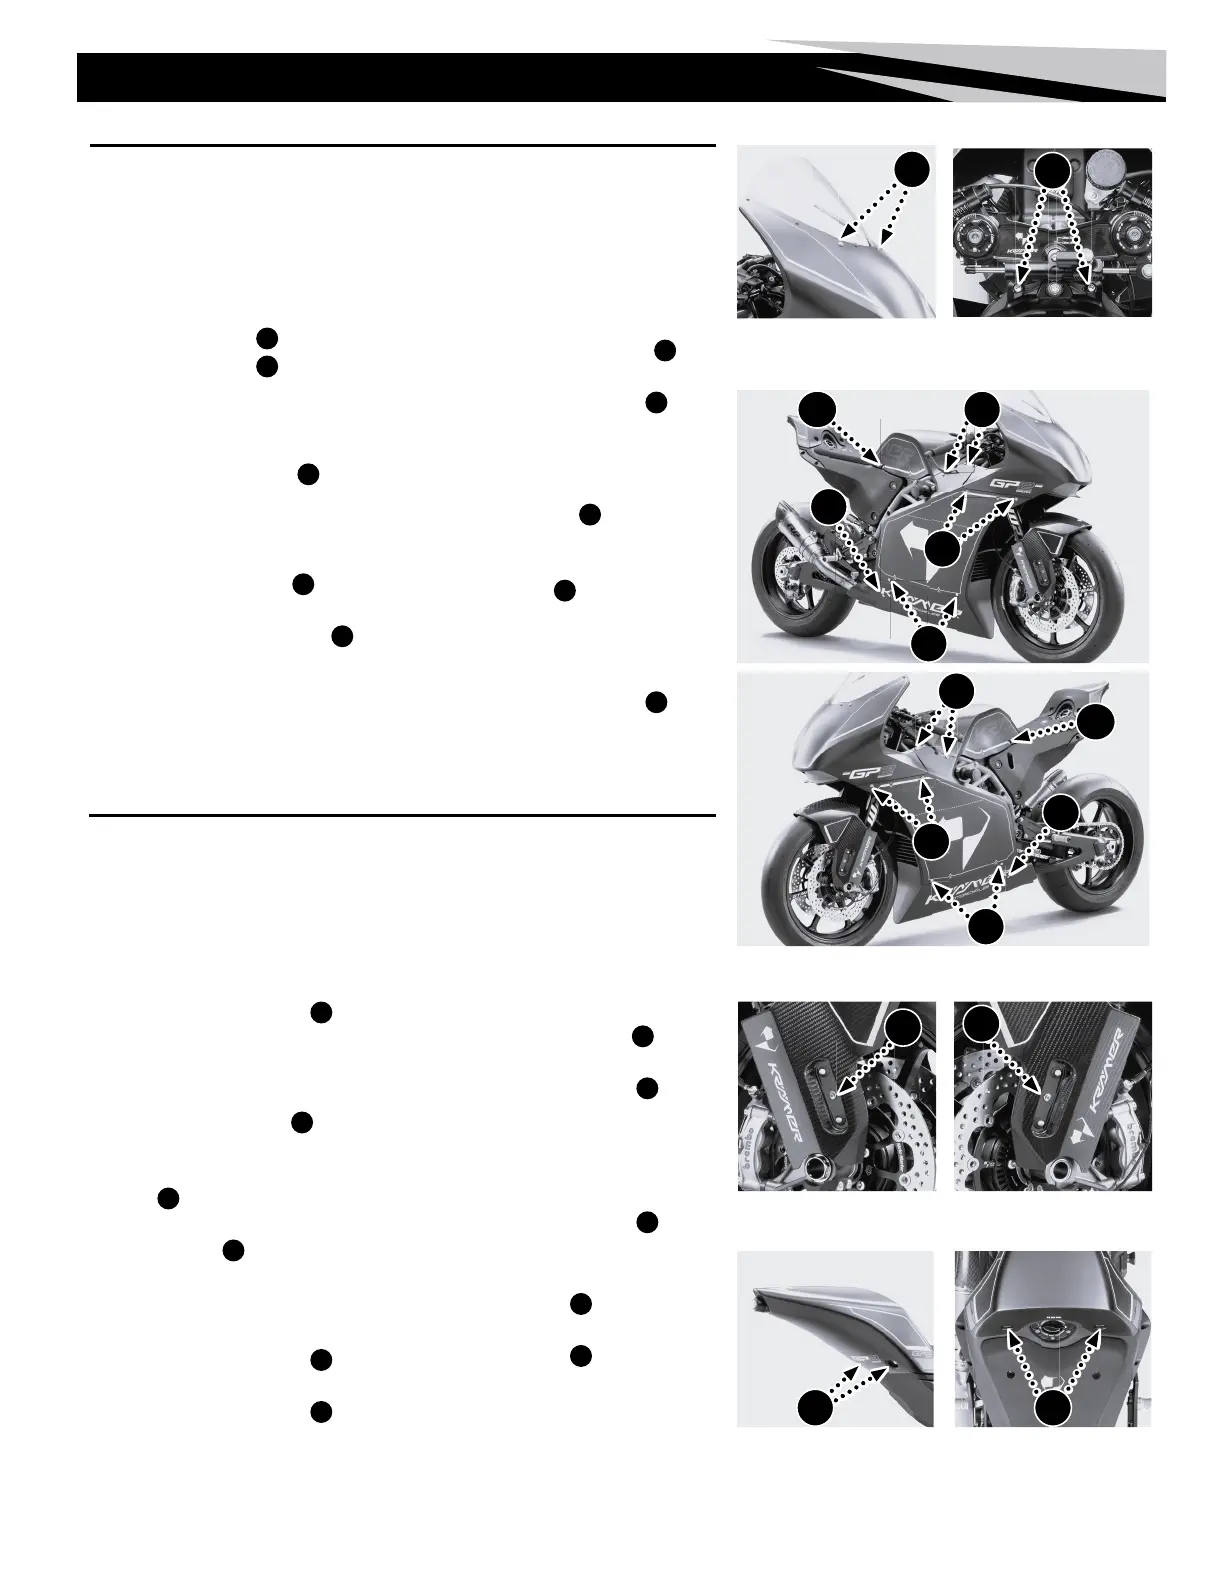
Bodywork Installation
Install bodywork in the order of appearance.
Install Upper Fairing
1. Install the upper fairing by carefully
maneuvering around the forks.
2. Install the two 1/4-turn fasteners
A
under
the windshield.
Install Intake Cover/Air Filter Box
3. Position the Intake Cover/Air Filter Box.
4. Finger-tighten the two screws
B
at the rear
of each side.
5. Apply blue thread lock* and install the two
screws
J
holding the steering damper mount
— 10 Nm (7.4 ft-lb).
6. Torque the screws
B
at the rear of each side
— 6-9 Nm (50-80 in-lb).
Install Side Fairing
7. Position the Side Fairing.
8. Install the two 1/4-turn fasteners
C
including
one pin on each side.
9. Install the two 1/4-turn fasteners
F
on each
side.
Install Lower Fairing
10. Carefully maneuver the lower fairing under the
bike, watch out not to damage the cooling ns
of the oil cooler.
11. Install the six 1/4-turn fasteners
E
– three
on each side.
12. Install the two 1/4-turn fasteners
D
– one on
each side.
Install Front Fender
13. Spread the fender and install it from the front
sliding it rearward.
14. Install the two 1/4-turn fasteners
G
– one on
each side.
Install Tail Cap
15. Install the two screws
H
under the Tail Cap
— 5 Nm (44 in-lb).
16. Install the two screws
I
on top of the Tail
Cap — 5 Nm (44 in-lb).
*Loctite
®
243™
Bodywork Removal
Remove the bodywork pieces in the order of
appearance. Reinstall the bodywork pieces in
reverse order [See below].
Remove Tail Cap
1. Remove the two screws
H
under the tail cap.
2. Remove the two screws
I
on top of the tail
cap.
3. Slide the tail cap rearward and upward.
Remove Front Fender
4. Remove the 1/4-turn fasteners
G
on each
side.
5. Spread the fender and remove it forward.
Remove Lower Fairing
6. Loosen the 1/4-turn fasteners
D
on each
side.
7. Remove the three 1/4-turn fasteners
E
on
each side.
8. Carefully remove the lower fairing, watch out
not to damage the cooling ns of the radiators.
Remove Side Fairing
9. Remove the three 1/4-turn fasteners
C
on
each side.
10. Remove the two 1/4-turn fasteners
F
on
each side.
11. Carefully remove the side fairing.
Remove Intake Cover/Air Filter Box
12. Remove the two screws
J
holding the
steering damper mount, then turn the steering
damper to the side.
13. Remove the screws
B
on each side.
14. Carefully lift the intake cover/air lter box
rearward and up.
Remove Upper Fairing
15. Remove the two 1/4-turn fasteners
A
under
the windshield.
16. Carefully remove the upper fairing by pulling it
forward.
F
C
E
D
F
B
C
E
IH
D
G
G
B
A
Front Upper Fairing Fastener
Locations
Upper and Lower Fairing Fastener Locations
Front Fender Fastener - R.H. Front Fender Fastener - L.H.
Tail Cap Fastener Locations
J
Steering Damper Screws

 Loading...