16
Chassis
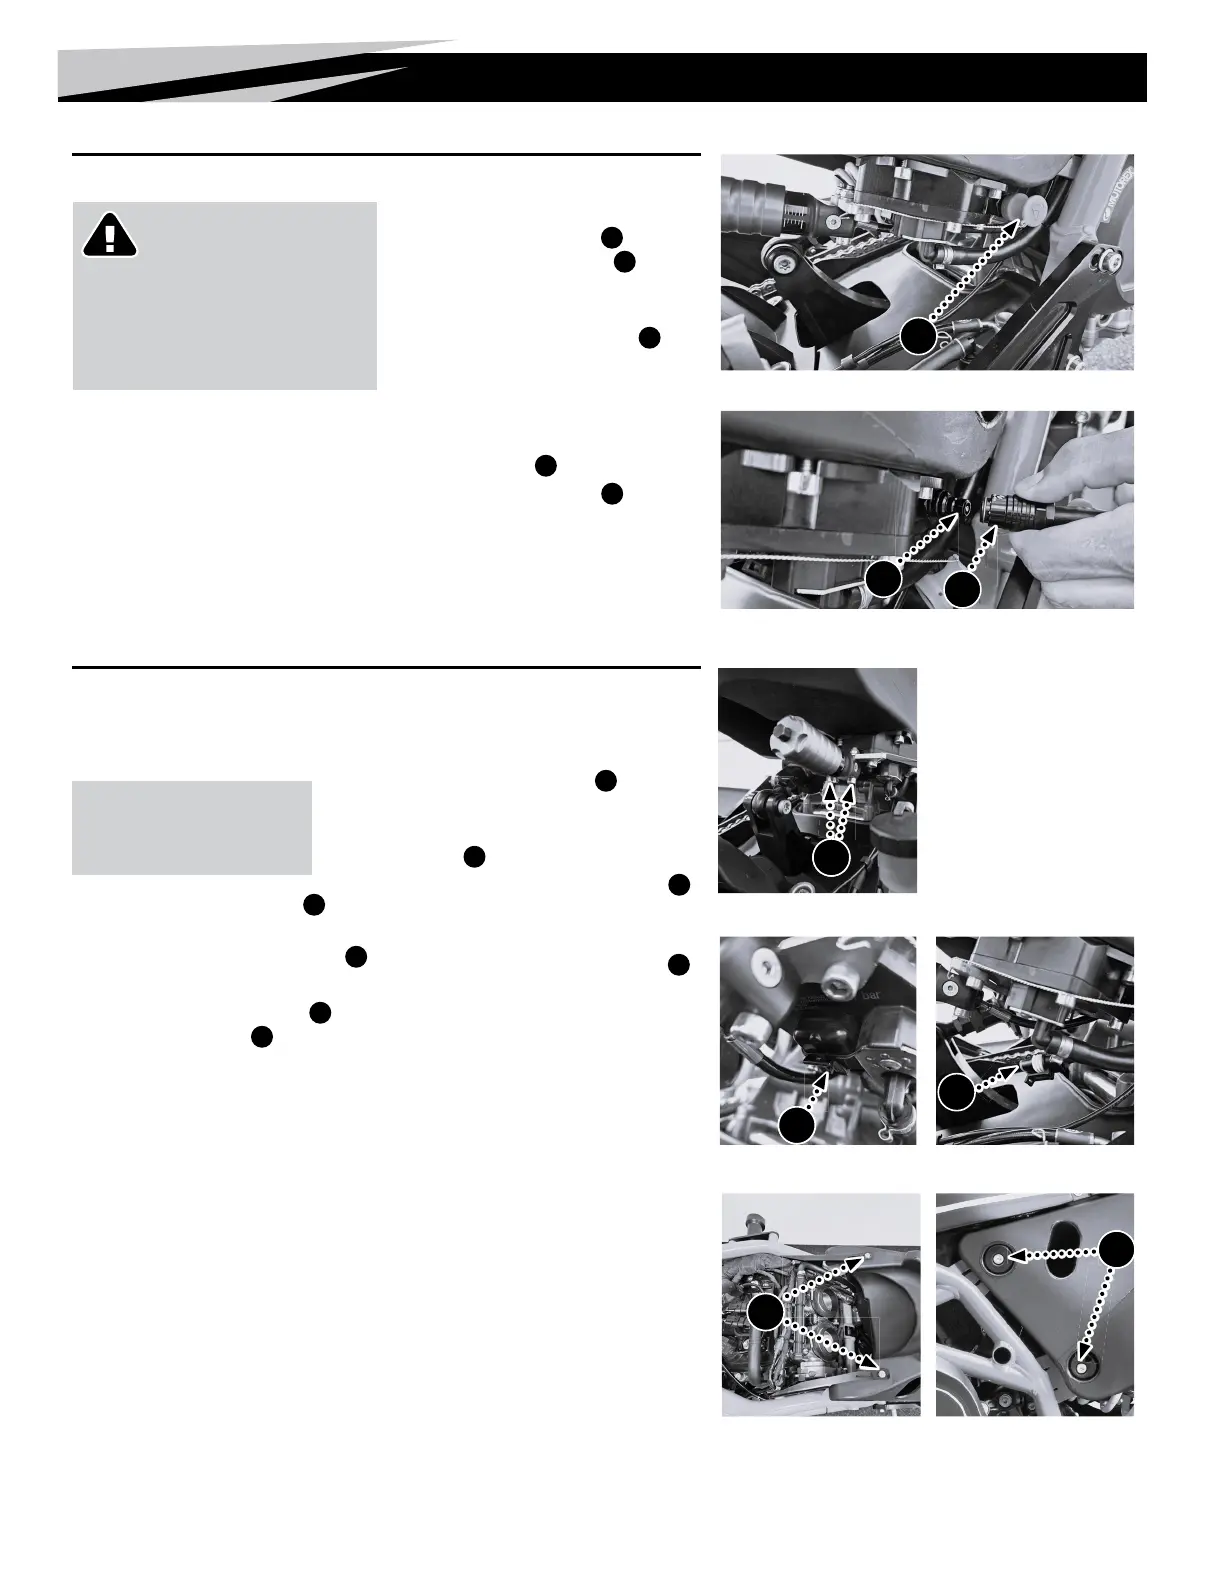
Fuel Tank Removal/Installation
Removal
1. Remove the air box cover [See pg. 15].
NOTE:
Regularly check the tightness of
velocity stacks.
2. Remove the shock adjuster screws
D
and let
the adjuster hang to the side.
3. Unplug the fuel pump electrical connector
E
.
4. Remove fuel hose from injection rail.
5. Remove the support bracket screws
F
and
the tank mounting screws
G
on both sides.
6. Remove the fuel tank by lifting it towards the
rear of the motorcycle.
Installation
7. Position the fuel tank in place.
8. Install and tighten the screws
F
on both sides
— 8 Nm (5.9 ft-lb).
9. Install, apply blue thread lock*, and tighten the
screws
G
on both sides — 25 Nm (18.4 ft-lb).
10. Plug in the fuel pump electrical connector
E
.
11. Install fuel hose on the injection rail.
12. Mount the shock preload adjuster, install and
tighten the shock preload adjuster screws
D
— 10 Nm (7.4 ft-lb)
* Loctite
®
243™
Fuel Tank Draining Procedure
NOTE: Before starting the draining procedure,
have at the ready a fuel container large enough to
hold the amount of fuel remaining in the tank.
1. Remove the fuel cap to allow tank ventilation.
2. Remove the protective red cap
A
from the
fuel tank quick-couple drain port
B
on the
fuel pump located on the lower right-hand side
of the fuel tank.
3. Using the dealer-provided drain hose
C
, slide
back the collar of the quick-couple tting, and
place it on the drain port. Fuel will start gravity-
draining immediately.
4. When the tank is empty, replace fuel cap.
5. Remove drain hose
C
, clean, and store.
6. Replace the red protective cap
A
.
D
E
E
F
G
Shock Preload Adjuster Screws
Attaching the Quick-Couple Drain Hose
Protective Cap on the Fuel Tank Drain Port
Fuel Pump Connector
Fuel Tank Mounting ScrewsFuel Tank Support Bracket Screws
A
B
C
CAUTION! Fire Hazard
Drain the fuel in a well-ventilated
area without any open ame or sparks.
Have a re extinguisher nearby.
Drain and store fuel in an approved fuel
container.
Fuel Pump Connector (unplugged)

 Loading...