Installing an 802.1X Certificate
802.1X certificates enhance the security of network authentication. KT-2010 / KT-2010WM support
.pem, .pfx and .p12 certificate formats.
Installing a certificate is a two-stage process: First import the certificate and then set it up.
Importing an 802.1X certificate
1. Copy the certificate file to an empty USB flash drive.
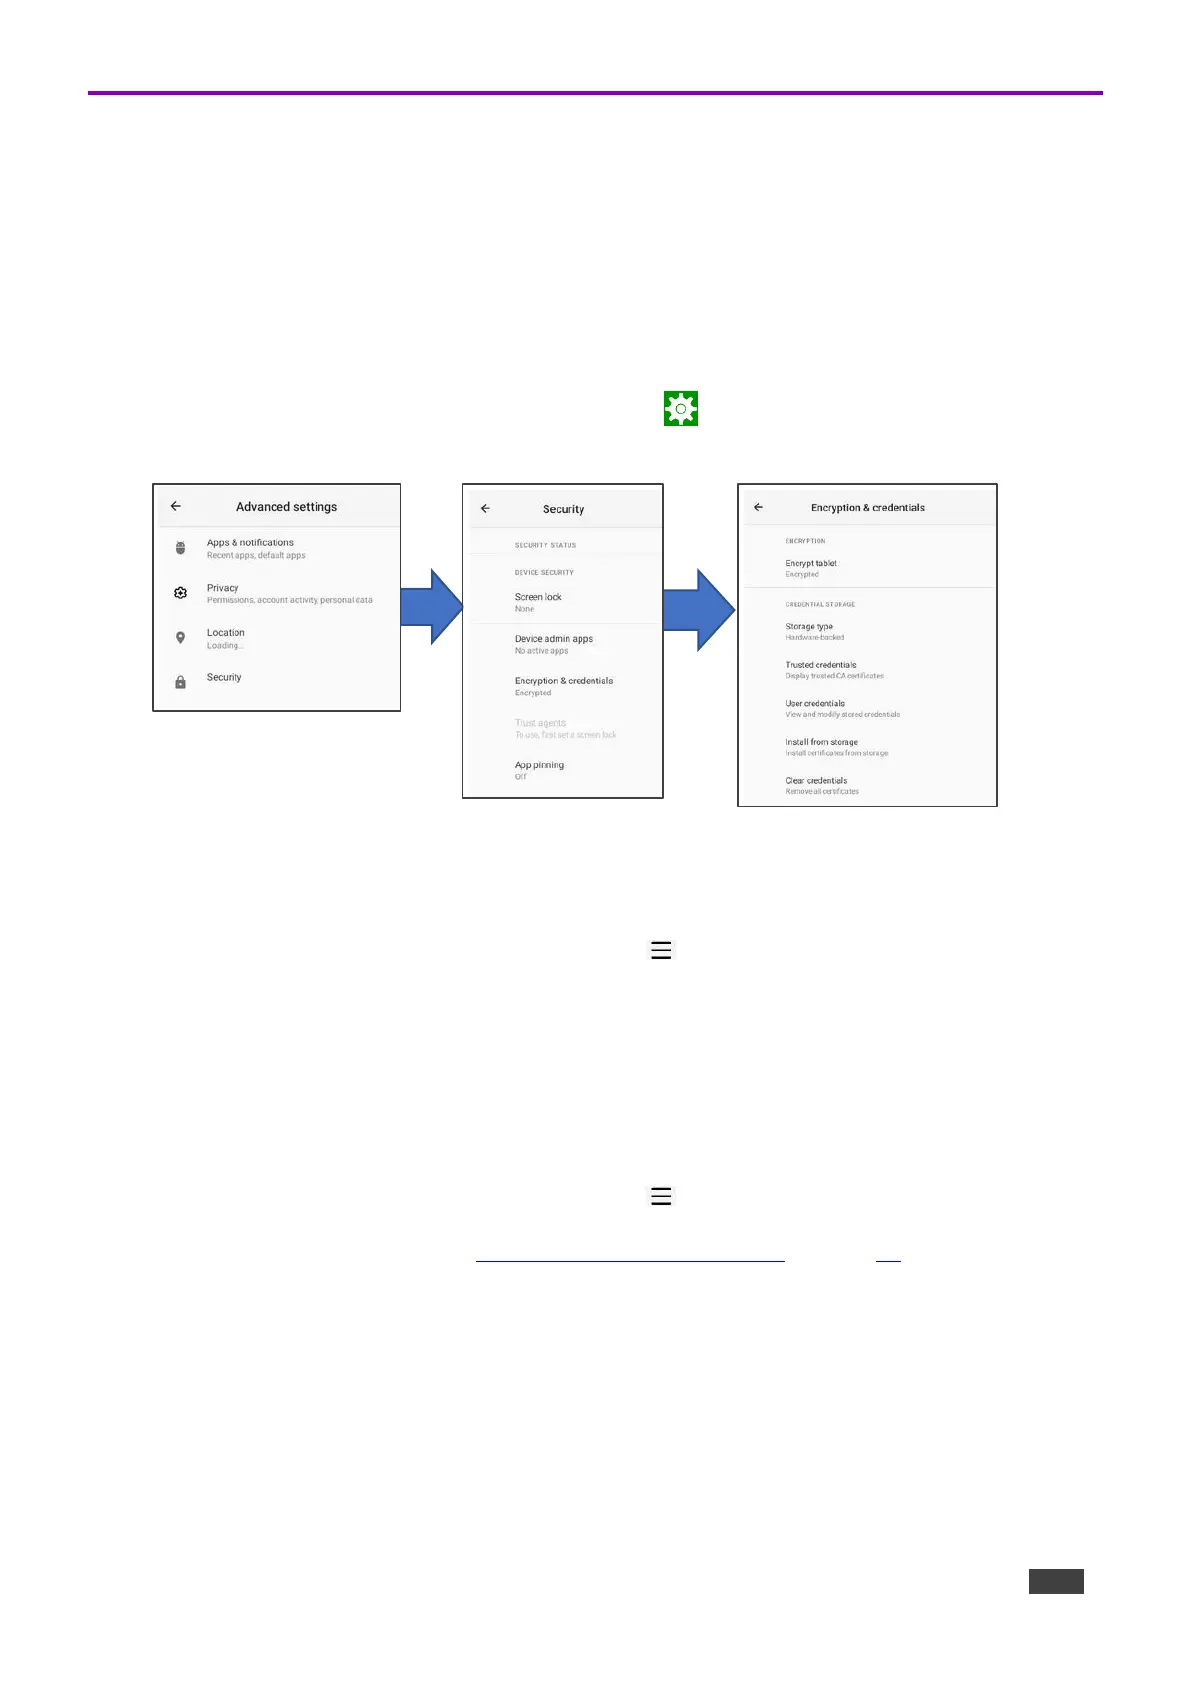
2. From the Home page, open the Settings screen .
3. Select Advanced settings > Security > Encryption & credentials.
Figure 6: The path to Install from storage
4. In the Encryption & credentials screen, select Install from storage: The Install a certificate
screen opens.
5. Select the Wi-Fi certificate: The Recent files screen opens.
To browse to the file location, press the 3 lines at the top left of the screen.
6. Select the credentials file and install it, some certificates require you to know a password.
Setting up an 802.1X certificate
7. In the Settings screen, select Network & Internet > Wi-Fi.
8. Select Install from storage: The Install a certificate screen opens.
9. Select Wi-Fi certificate (also for Ethernet connections): The Recent files screen opens.
To browse to the file location, press the 3 lines at the top left of the screen.
After installing the certificates, see Connecting to Wi-Fi or Ethernet on page 16 for instructions on
using the certificates. Ethernet must be disabled before setting-up Ethernet certificates.