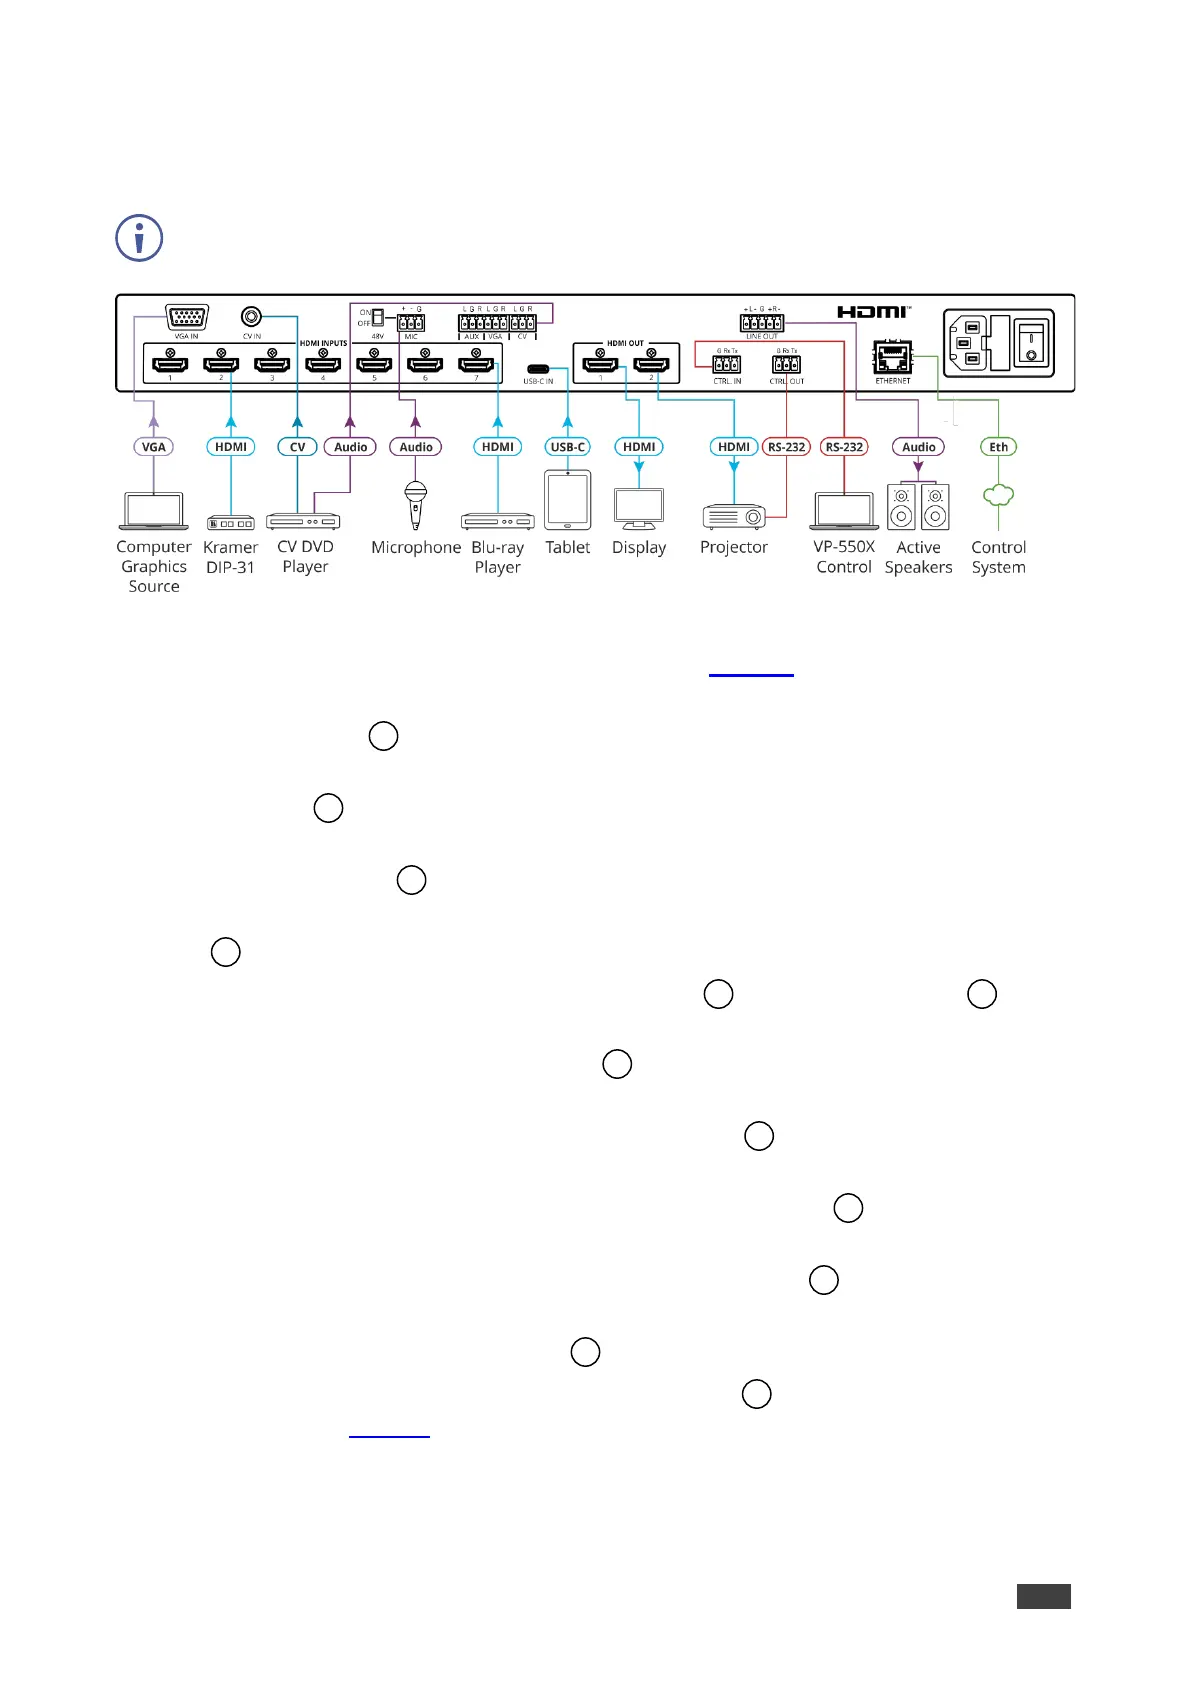
Figure 3: Connecting to the VP-550X Rear Panel
To connect the VP-550X as illustrated in the example in Figure 3:
1. Connect a computer graphics source (for example, a laptop) to the VGA IN15-pin HD
Input connector .
2. Connect a composite video source (for example, a DVD player) to the CV IN RCA
connector .
3. Connect up to 7 HDMI sources (for example, a Blu-ray player to HDMI 5) to the HDMI
INPUT connectors .
4. Connect VGA and CV stereo audio sources to the audio input terminal block connectors
(for example, the CV DVD player audio source to the CV audio input).
5. Connect a microphone to the 3-PIN terminal block and set the 48V switch ON or
OFF, as required.
6. Connect up to 2 HDMI OUT connectors to HDMI acceptors (for example, HDMI 1 to
a display and HMDI 2 to a projector).
7. Connect the LINE OUT 4-pin terminal block connector to active speakers (for
example, Kramer Tavor 5-O speakers).
8. Connect the RS-232 CTRL OUT 3-pin terminal block connector to the RS-232 port
of an external device (for example, the projector connected to HDMI 2).
9. Connect the RS-232 CTRL IN 3-pin terminal block connector to the RS-232 port on
a controller (for example, a laptop) to control the VP-550X.
10. Connect the ETHERNET RJ-45 port to the Ethernet.
11. Connect the power cord to the VP-550X mains socket
and to the mains electricity
(not shown in Figure 3).