7
Connecting the Printer to the Computer
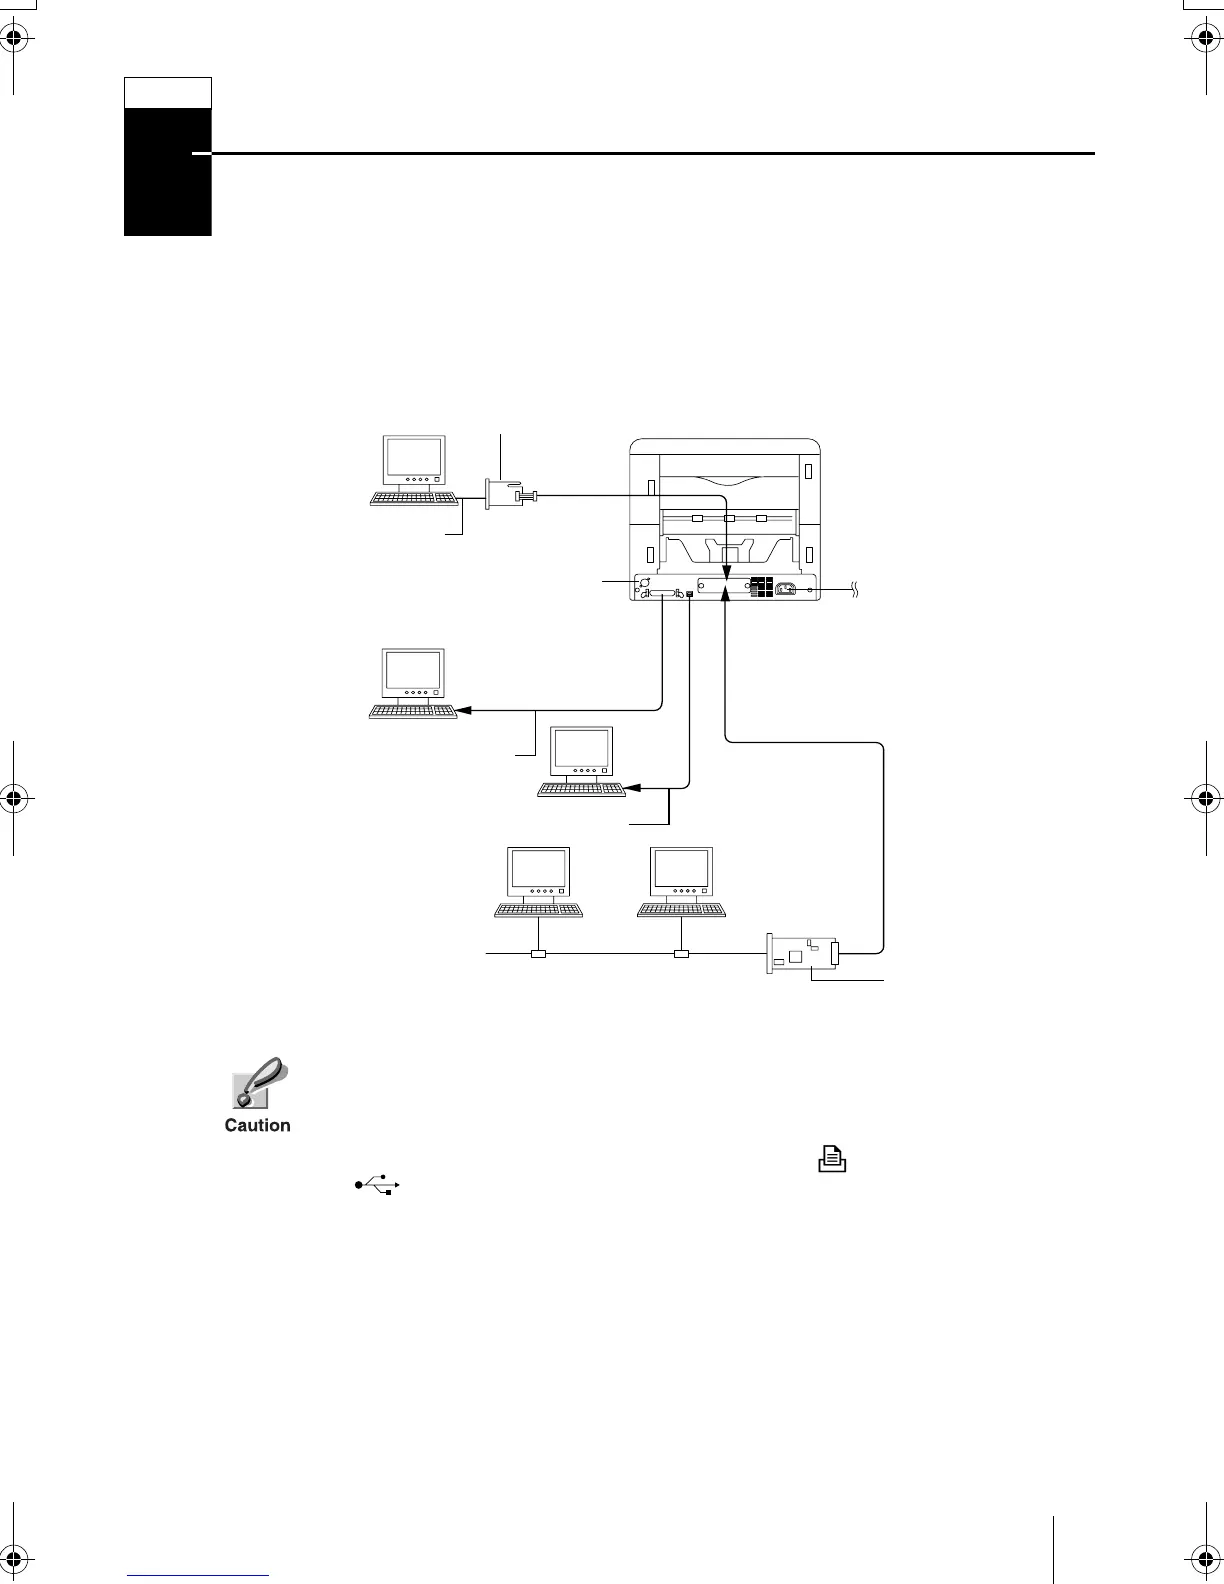
There are various ways of connecting the printer to the computer, such as through the
parallel interface connector, through the USB (Universal Serial Bus) interface connec-
tor, through the option serial interface board kit (IB-11) or through the option network
interface card.
Printer Connections
Before performing this step, be sure to turn off both the printer and the com-
puter’s power switches and unplug the printer’s power plug from the power
outlet. Failure to do so may result in electrical shock.
The standard Centronics parallel interface connector ( ) and USB interface
connector ( ) are located on the rear of the printer.
STEP
5
Printer (Rear)
Parallel Interface
Network
Option Network
Interface Card
(3.3 V DC)
Serial Interface
Power Supply
Connector for option sorter
(See the option sorter’s
user’s manual.)
USB Interface
Option Serial Interface
Board Kit (3.3 V DC)
FS-1920IG.book 7 ページ 2004年1月15日 木曜日 午前10時21分
 Loading...