Preparation for Usage
2-27
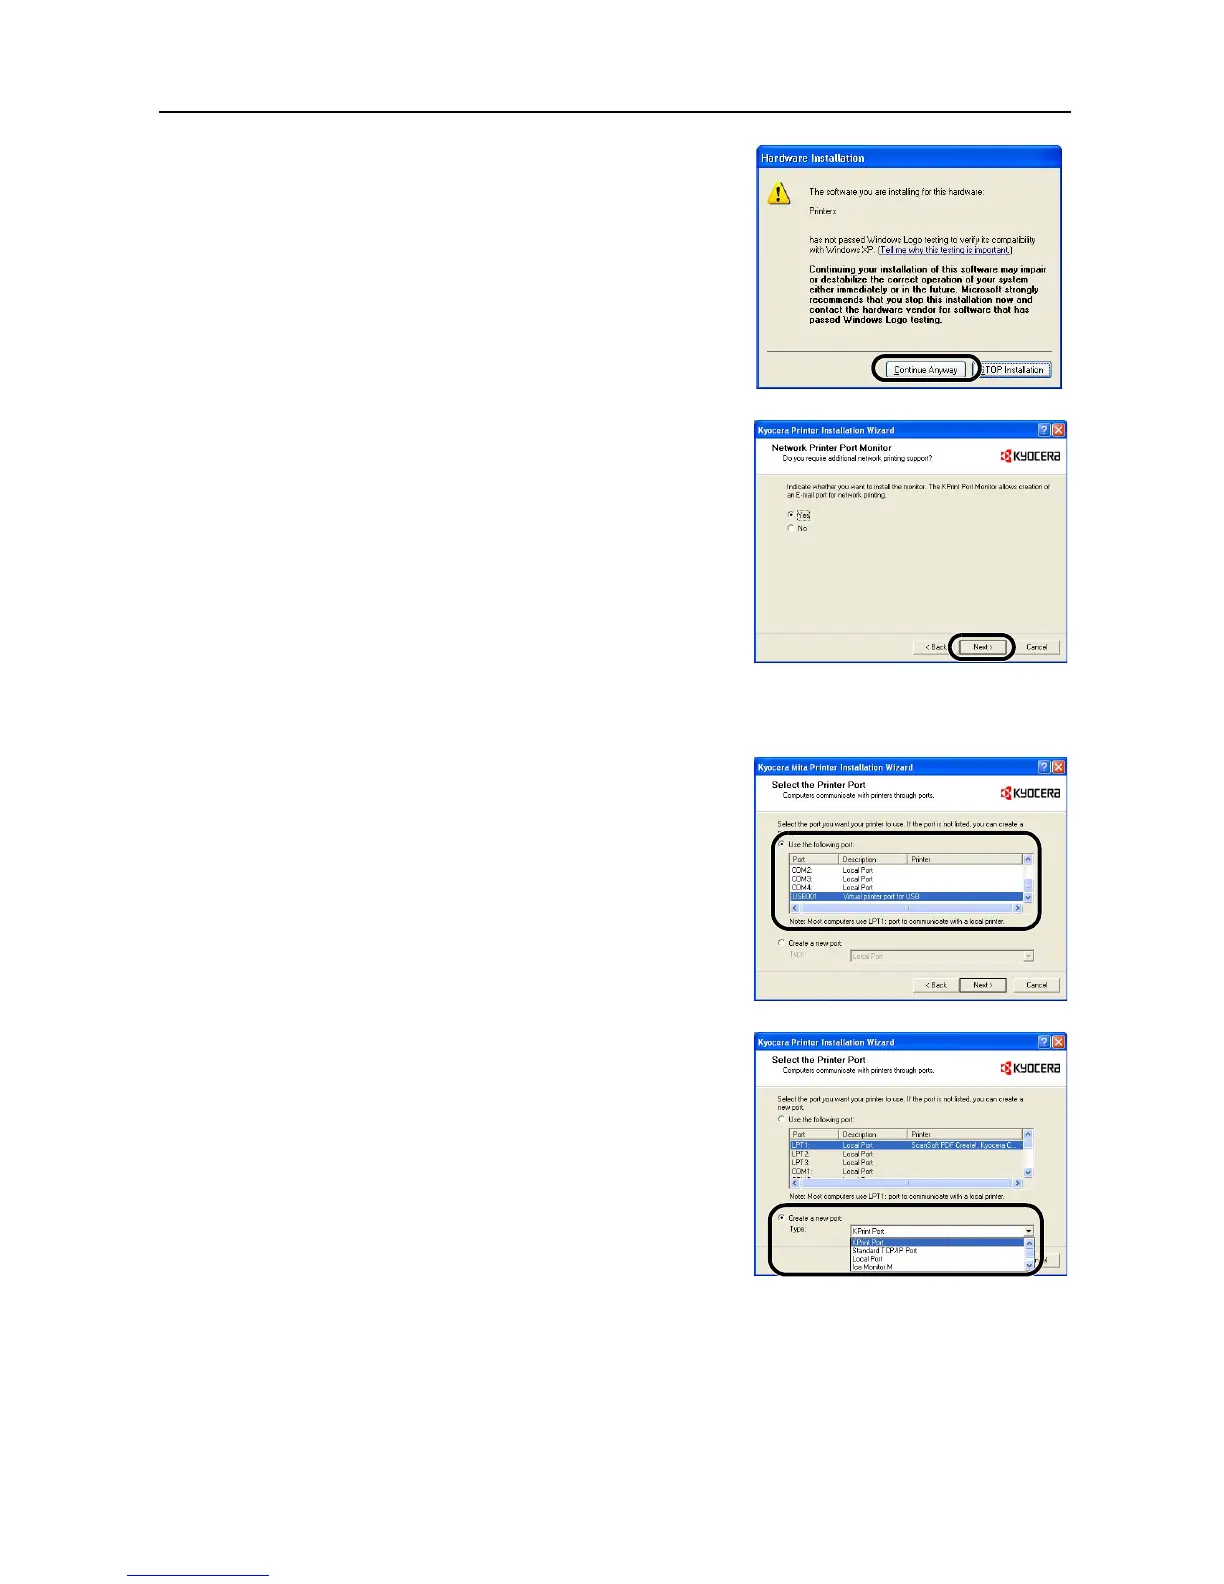
It is safe to proceed if the Hardware Installation
screen appears. Press the Continue Anyway button.
If the Network Printer Port Monitor screen is
displayed, select Yes and click the Next button.
7
The Select the Printer Port screen is displayed. Follow the procedure below for parallel port or
USB connection. Skip to Step 9 for network port connection.
8
For parallel port connection, select LPT1 in the Use
the following port list, click the Next button, and skip
to Step 19.
For USB connection, select the USB port (example:
USB001, KMUSB001), click the Next button, and skip
to Step 19. If the USB port to be used is not found, go
to Step 17.
9
Click on Create a new port. Set the type to KPrint
Port and click the Next button.

 Loading...


