6.2 - PUMP PRESSURE SETTING
Insert in the brewing unit the filter-holder filled with properly ground,
dosed and pressed coffee. Activate the switch or the unit control key-
board (17) and read the pressure on the pump manometer (12).
N.B. The correct pressure is 8/9 bar.
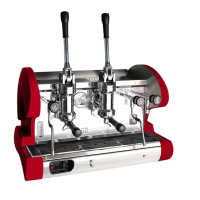
If the pressure displayed by the manometer should not prove
correct, operate the pump pressure regulation screw (Z), by
turning it clockwise to increase pump pressure or anticlockwise
to reduce pressure.
Once regulation is complete, check the pump setting by delive-
ring one or more coffee servings.
Z = Pump pressure regulation screw
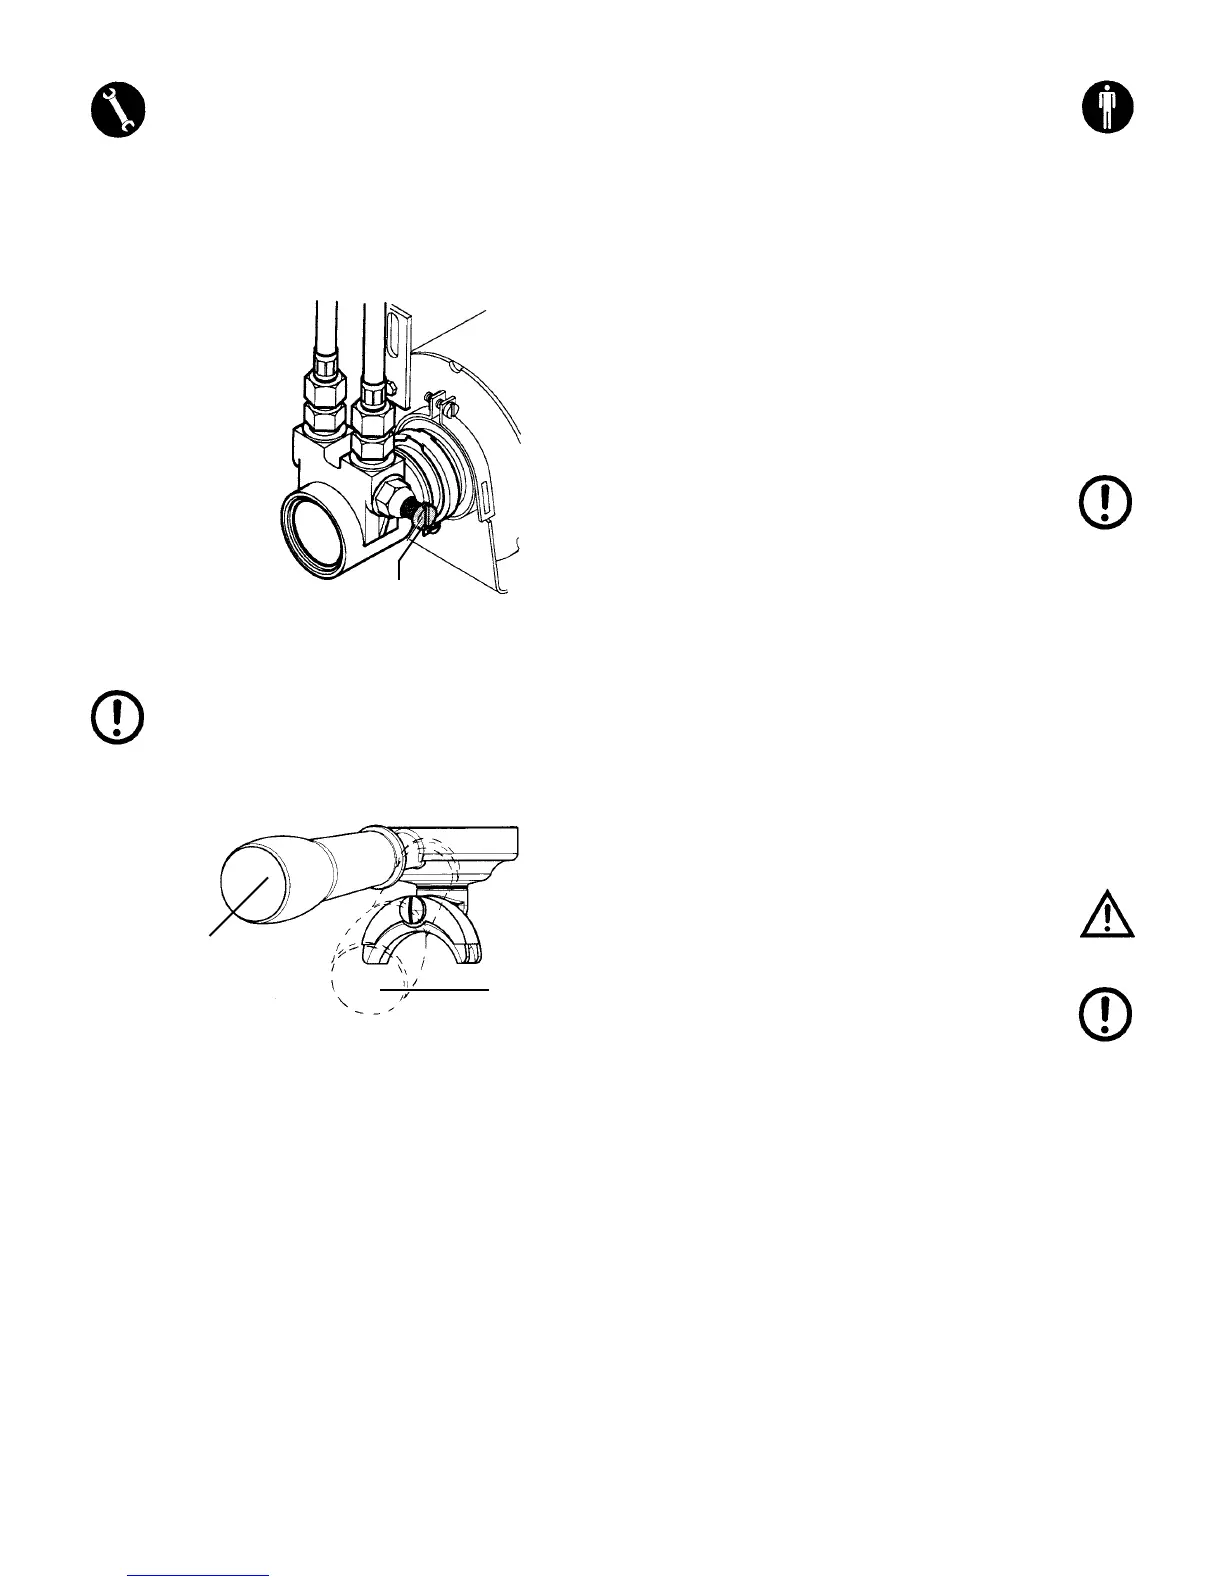
Caution! When the machine is new, the filter-holder
may not prove aligned (perpendicular to the machine
itself) as shown in the picture; this however does not
affect proper operation of the machine itself.
After a brief period of use the filter-holder will gra-
dually settle on the correct position
A = Position of the closed filter-holder when the machine is new.
B = Position of the closed filter-holder after the machine has been in
use for a brief period.
7 - COFFEE PREPARATION
In order to obtain an excellent Espresso coffee, it is important to use
a top quality coffee blend, properly roasted and ground; grinding is
correct when the coffee delivery time is of 15-18 seconds for one
serving and of 30-35 seconds for two servings. Grinding must take
place at time of use, in that, once ground, coffee loses its fragrance
within a short time; if grinding is too coarse you will obtain light-
coloured and week coffee, without froth; if grinding its too fine you
will obtain dark coloured and strong coffee, with little froth.
Warm cups contribute to maintaining freshly delivered coffee at the
right temperature; it is therefore advisable to place the cups on the
spacious cup-holder grid before use (19), which will make it possible
to take advantage of the heat emanating from the boiler.
On machines provided with an electric cup-warmer, cups are pre-
heated by pressing the yellow button (1): the button warning light will
switch on to signal that the cup-warmer is on. To switch off the cup-
warmer, pressed the yellow button (1) again.
Caution! Do not place cloths, felt covers or the like on
the cup holder.
Once you have placed the filter into the filter-holder (22), fill the filter
with the amount of coffee required for 1 or 2 cups (7 gr. – 14 gr.),
level off, and press the coffee down with the presser, manually clean
the filter edge from any coffee residues and fit the filter-holder into
the brewing unit (21) moving it rightward until it is tightly in place.
Place the cups under the spouts and start the brewing by means of
the unit control (17).
Once you have obtained the desired amount of coffee, stop delivery
by means of the unit control (17), whilst leaving the filter-holder in
place.
To prepare additional cups of coffee, remove the filter-holder (22)
from the unit, by moving it leftward, empty the coffee grounds into
the drawer provided and once again follow the steps listed above.
Caution! We recommend that you do not touch the
brewing units or the steam and hot-water nozzles
when the machine is running, and that you pay the
utmost attention not to place your hands under the
units or nozzles during delivery, to avoid possible
scalds
It is advisable to leave the filter-holders, with their own filters and
coffee grounds, fitted into the unit throughout your days’ work, to
ensure the filter-holder always preserves an optimal temperature.
A
B
Z
 Loading...