BULB REPLACEMENT
For normal operation of the light-
ing and light alarm system, use the
bulbs as defined in Appendix 2.
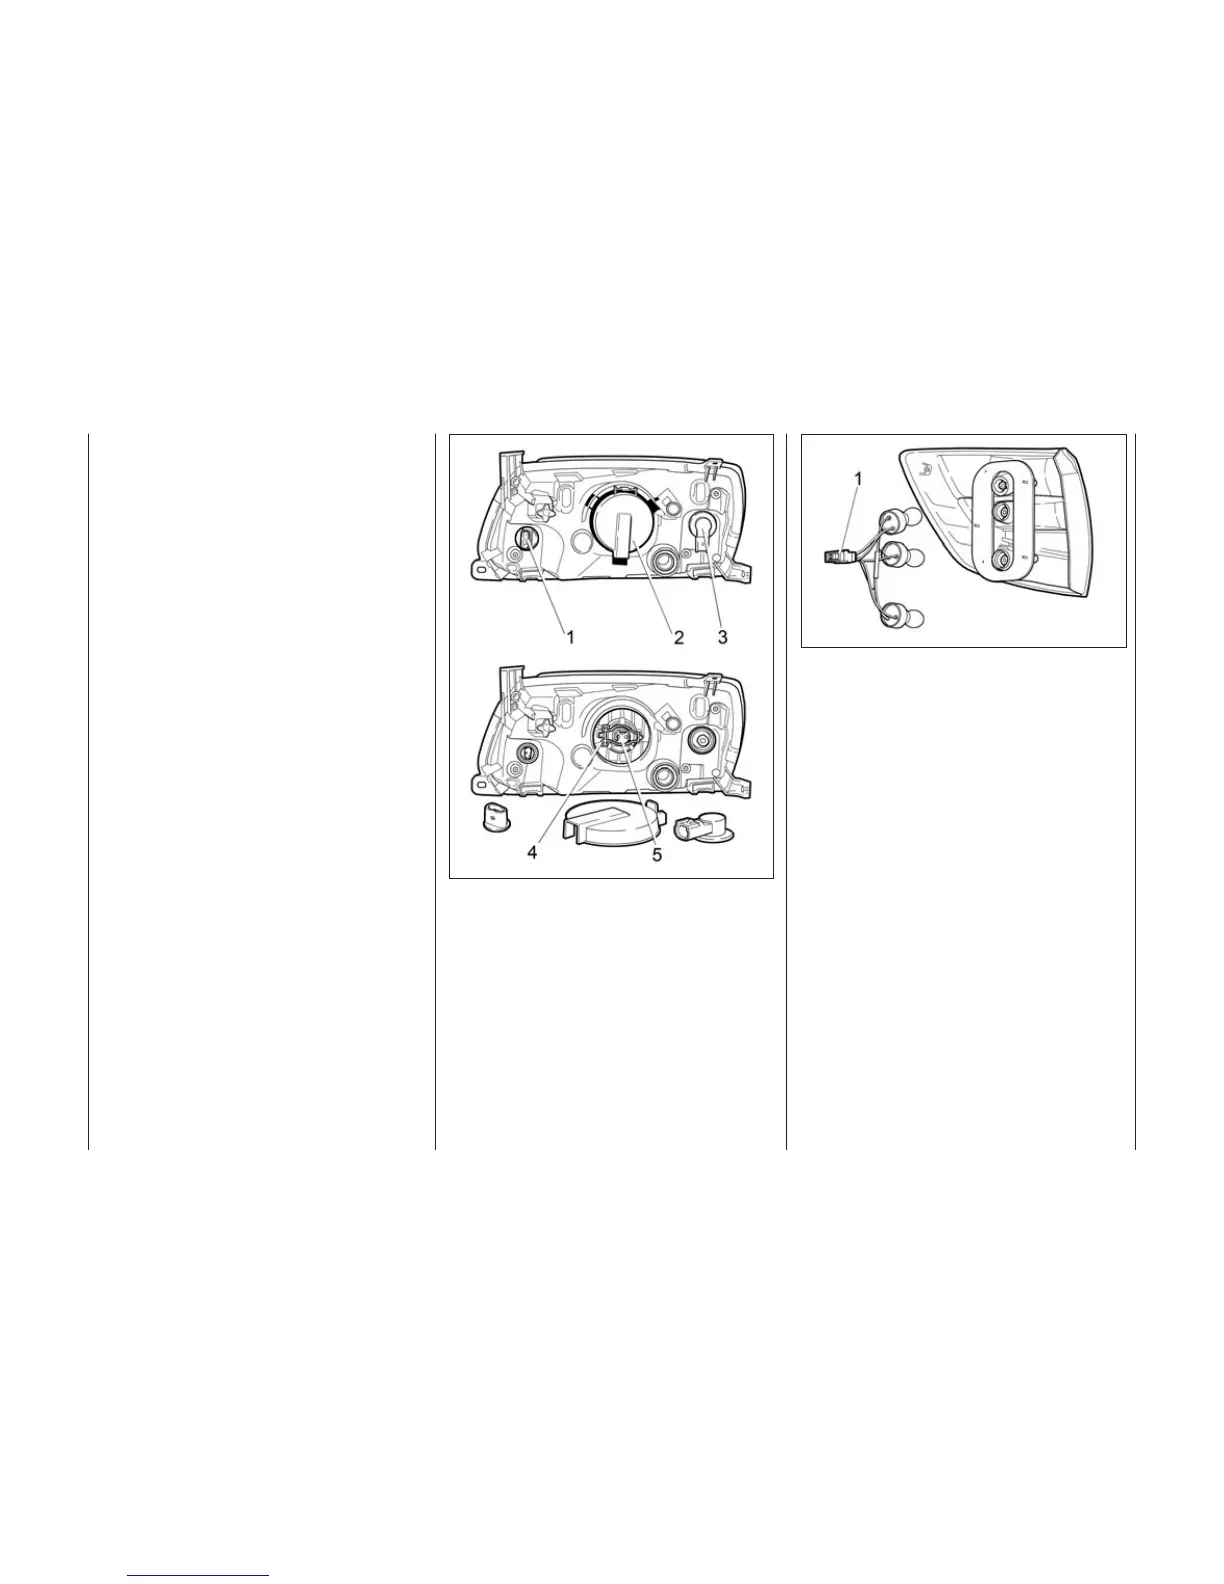
Headlight unit
To access the dipped/main
beam bulb, remove the protective
cover 2 (Fig. 59), disconnect the ter-
minal block and remove the lamp
rubber housing, in turn, pull aside the
«lugs» 4 of the bulb holder spring,
after pressing them remove the bulb
5 out of the reflector mounting brack-
et. The new bulb installation should
be carried out in reverse order. All
operations on installing a halogen
bulb should be carried out with
gloves to prevent leaving traces on
the bulb. After the dipped/main beam
bulb installation make sure in tight fit-
ting of the rubber housing in the bulb
socket and headlight unit case.
To remove the tail light/day-
time running bulb perform the fol-
lowing operations:
– in the right headlight unit turn
the bulb holder 1 counter-clockwise;
– in the left headlight unit, first,
throw the the air filter casing back-
wards and turn the holder 1 counter-
clockwise;
– dismount the bulb out of the
holder.
The new bulb installation should
be carried out in reverse order.
To remove the turn indicator
bulb perform the following opera-
tions:
– remove the turn indicator bulb-
holder 3 out of the headlight unit
mounting bracket turning it clockwise;
– in the left headlight unit, remove
the turn indicator bulb-holder 3 out
of the mounting bracket pressing
and turning the holder counter-
clockwise;
– dismount the bulb out of the
holder, first depressing the bulb in
the holder and turning it counter-
clockwise.
The new bulb installation should
be carried out in reverse order.
Rear light
To remove the bulb in the rear light
(Fig. 60a) perform the following
operations:
– open the trunk compartment lin-
ing access hole (on sticker), located
in the rear light installation area;
7 Р.Э.-21900 англ. яз 97
Fig. 59. Headlight unit
Fig. 60a. Rear light