Lake Shore Model 332 Temperature Controller User’s Manual
Heater Range and Heater Off (Continued)
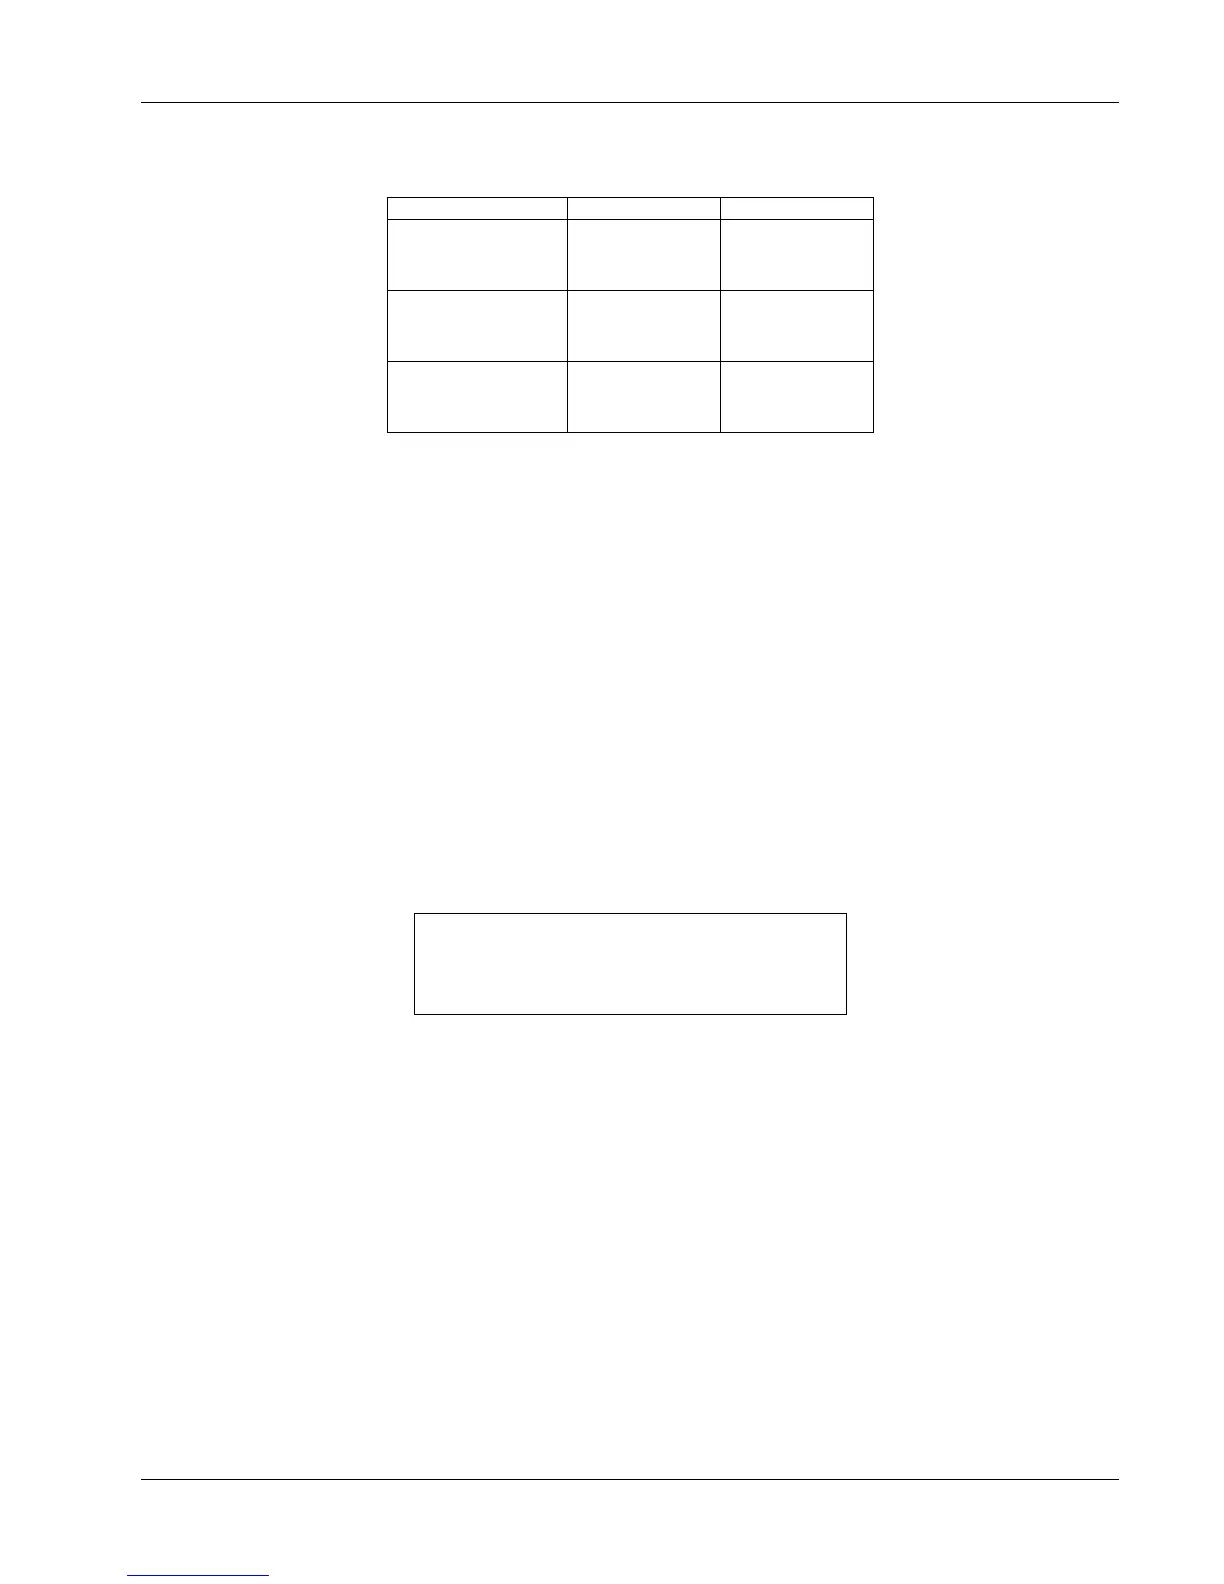
Loop 1 Full Scale Heater Power at Typical Resistance
Heater Resistance Heater Range Heater Power
10 Ω
Low
Med
High
100 mW
1 W
10 W
25 Ω
Low
Med
High
250 mW
2.5 W
25 W
50 Ω
Low
Med
High
500 mW
5 W
50 W
NOTE: During normal operation, if the input type or input curve is changed for the control
input, the heater will automatically shut off.
The Model 332 has a second control loop called Loop 2. Loop 2 has a different output than Loop 1.
Loop 2 output is a single range, variable DC voltage source that can vary from 0 V to +10 V. The output
can source up to 1 A of current providing a maximum of 10 W of heater power.
The output is rated for no more than 1 A of current. For the maximum of 10 W output power use a 10 Ω
resistive heater with a power rating greater than 10 W.
Loop 2 has fewer features than Loop 1 as described in Paragraph 1.3. The output is short protected so
the instrument is not harmed if the heater resistance is too small. It is not recommended because the
additional load on instrument power supplies causes noise on internal circuits.
Specifications of heater output are provided in Paragraph 1.3 – Instrument Specifications. Heater theory
of operation is provided in Paragraph 2.4 – Heater Selection and Installation. Various Heater installation
considerations are provided in Paragraph 3.7 – Heater Output Setup.
Once control setup parameters are configured (Paragraph 4.7), and the active control loop is selected
(Paragraph 4.6.1), the desired heater range is selected by pressing the
Heater Range key.
Select for Loop 1 °®
Heater Range Off
If configuring Loop 1, use the s or t key to cycle through Heater settings: Off, Low, Med, and High.
Once the desired heater setting is displayed, press the
Enter key. You will return to the normal display.
If configuring Loop 2, use the s or t key to toggle between Loop 2 Heater settings: Off and On. Once
the desired heater setting is displayed, press the
Enter key. You will return to the normal display.
NOTE: Loop 2 may also provide a fixed 1 W range by using the recommended Analog
Output Configuration. Refer to Paragraph 8.7 to configure the output hardware.
NOTE: If the display shows Heater Disabled, the analog output does not have the proper
parameter configuration to work as a control loop. Refer to Paragraph 4.16.
To immediately turn the heater off, press the Heater Off key. If the Heater Range is not being displayed
on the front panel, the user should immediately press the
Heater Range key to verify that the proper
loop is displayed and the heater shows Off.
Operation 4-25