CrossLink-NX Evaluation Board
User Guide
© 2019-2020 Lattice Semiconductor Corp. All Lattice trademarks, registered trademarks, patents, and disclaimers are as listed at www.latticesemi.com/legal.
All other brand or product names are trademarks or registered trademarks of their respective holders. The specifications and information herein are subject to change without notice.
FPGA-EB-02028-1.3 11
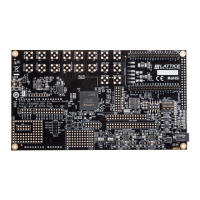
1.3. CrossLink-NX Device
The CrossLink-NX Evaluation Board features the CrossLink-NX device in a 400-ball caBGA package, also referred to as
LIFCL-40-9BG400C. For more information on the capabilities of CrossLink-NX, see CrossLink-NX Family Data Sheet
(FPGA-DS-02049).
1.4. Applying Power to the Board
Power LEDs light after applying 12 V power to CrossLink-NX Evaluation Board to indicate the board is functioning. An
Early I/O demo design is programmed into on-board boot flash as the default pattern. With this pattern, LED0 (D3)
(mapped an early I/O) immediately turns on as soon as 12 V power is supplied to the board. After about two seconds,
as configuration is successfully completed, DONE LED (D18) lights, and LED2 (D5) and LED3 (D6) light alternately in a
heartbeat pattern.
Downloaded from Arrow.com.Downloaded from Arrow.com.Downloaded from Arrow.com.Downloaded from Arrow.com.Downloaded from Arrow.com.Downloaded from Arrow.com.Downloaded from Arrow.com.Downloaded from Arrow.com.Downloaded from Arrow.com.Downloaded from Arrow.com.Downloaded from Arrow.com.