CS10/CS15 & GS Sensors, Operation
39
4.1.5 Fixing the Field Controller to a Holder and Pole
Components of the
GHT62 holder
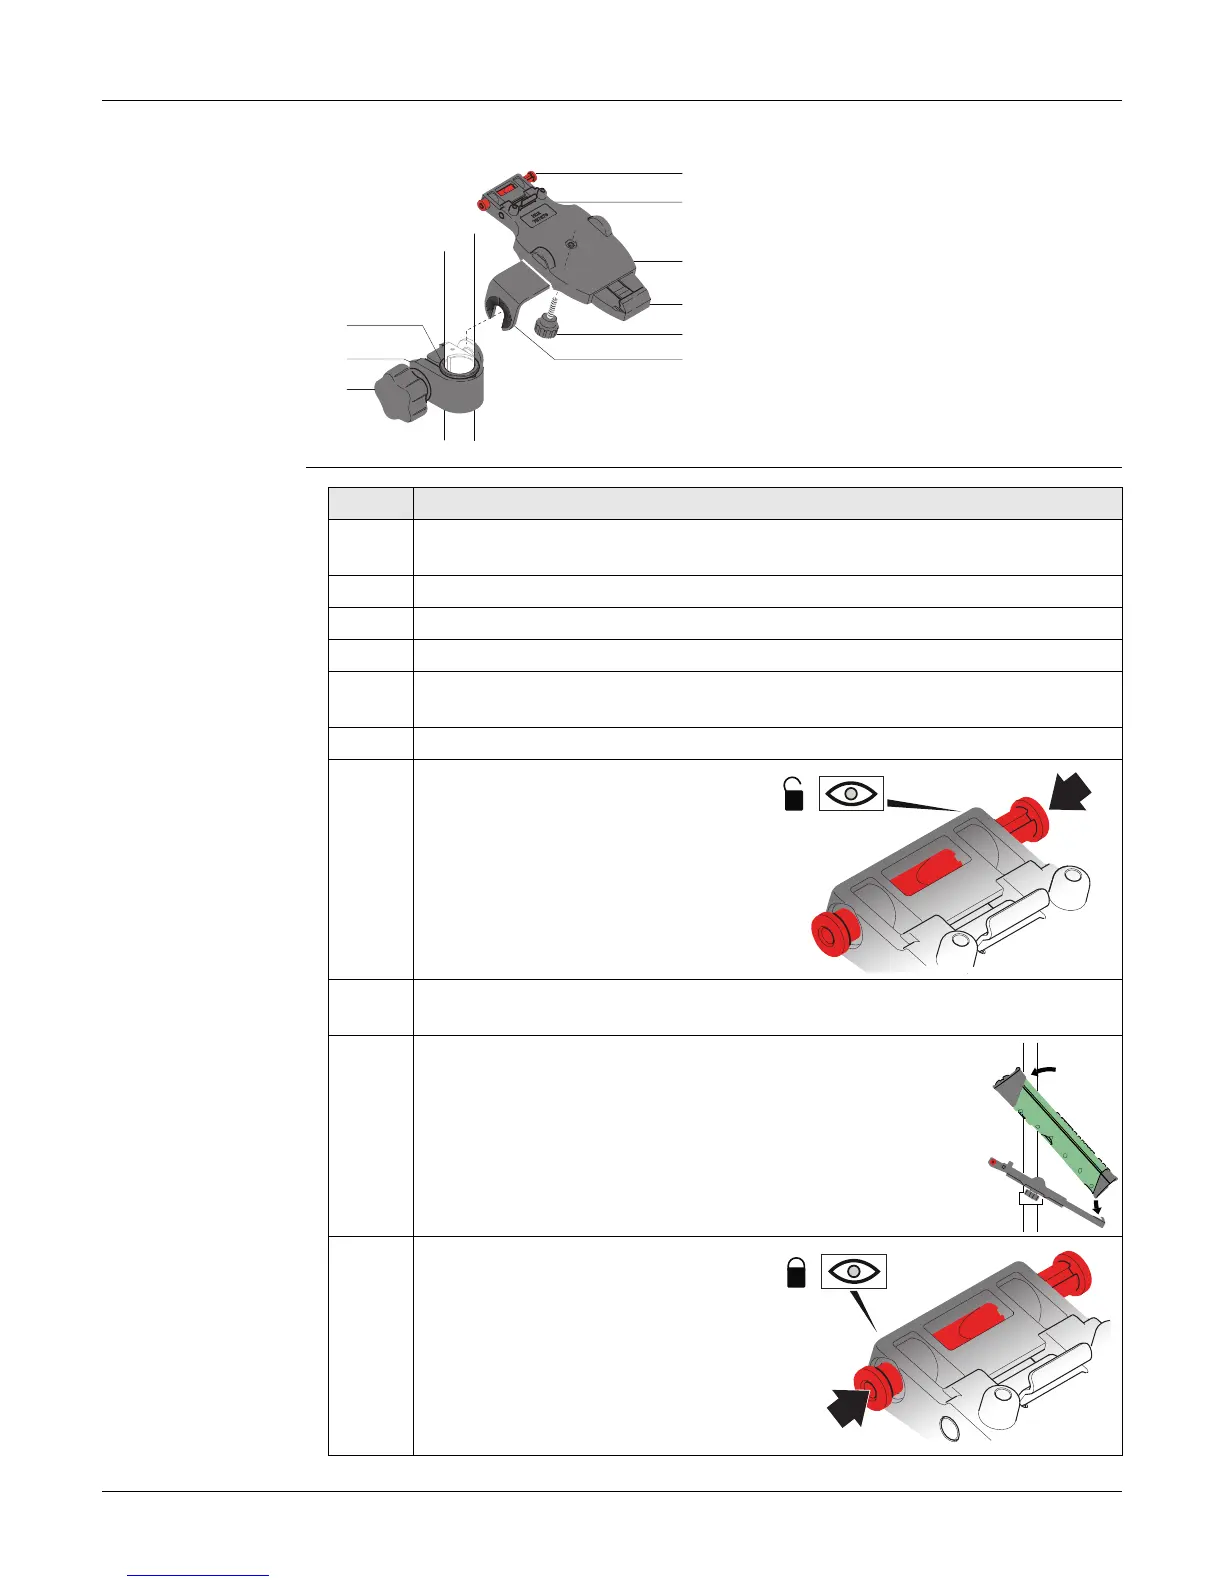
The GHT62 holder consists of some components, as shown in the diagram.
Fixing the field
controller and
GHT62 to a pole
step-by-step
GHT63 clamp
a) Plastic sleeve
b) Pole clamp
c) Clamp bolt
GHT62 holder
d) Locking pin
e) Top clip
f) Mounting plate (extendable)
g) Bottom clip
h) Tightening screw
i) Mounting arm
TS_058
a
d
e
f
g
i
b
c
h
Step Description
If you use the CS15 field controller, extend the mounting plate of the holder
first.
For an aluminium pole, fit the plastic sleeve to the pole clamp.
1. Insert the pole into the clamp hole.
2. Attach the holder to the clamp using the clamp bolt.
3. Adjust the angle and the height of the holder on the pole to a comfortable
position.
4. Tighten the clamp with the clamp bolt.
5. Before the field controller is placed
onto the mounting plate, ensure that
the locking pin is put into the
unlocked position. To unlock the
locking pin, push the locking pin to
the left.
6. Hold the field controller above the holder and lower the end of the field
controller into the mounting plate.
7. Apply slight pressure in a downward direction and then
lower the top part of the field controller until the unit is
clicked into the holder. The guides of the mounting plate
aid in this action.
8. After the field controller is placed
onto the mounting plate, ensure that
the locking pin is put into the locked
position. To lock the locking pin, push
the locking pin to the right.
TS_055
TS_056
TS_054