40
Version 2.0, Revision I
Instrument Setup
4
1
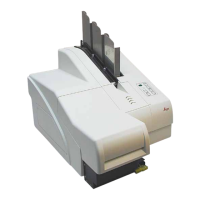
Fig. 36
Removing the red protective cap
1. Unscrew the red protective cap (→ "Fig. 35-3") all the way.
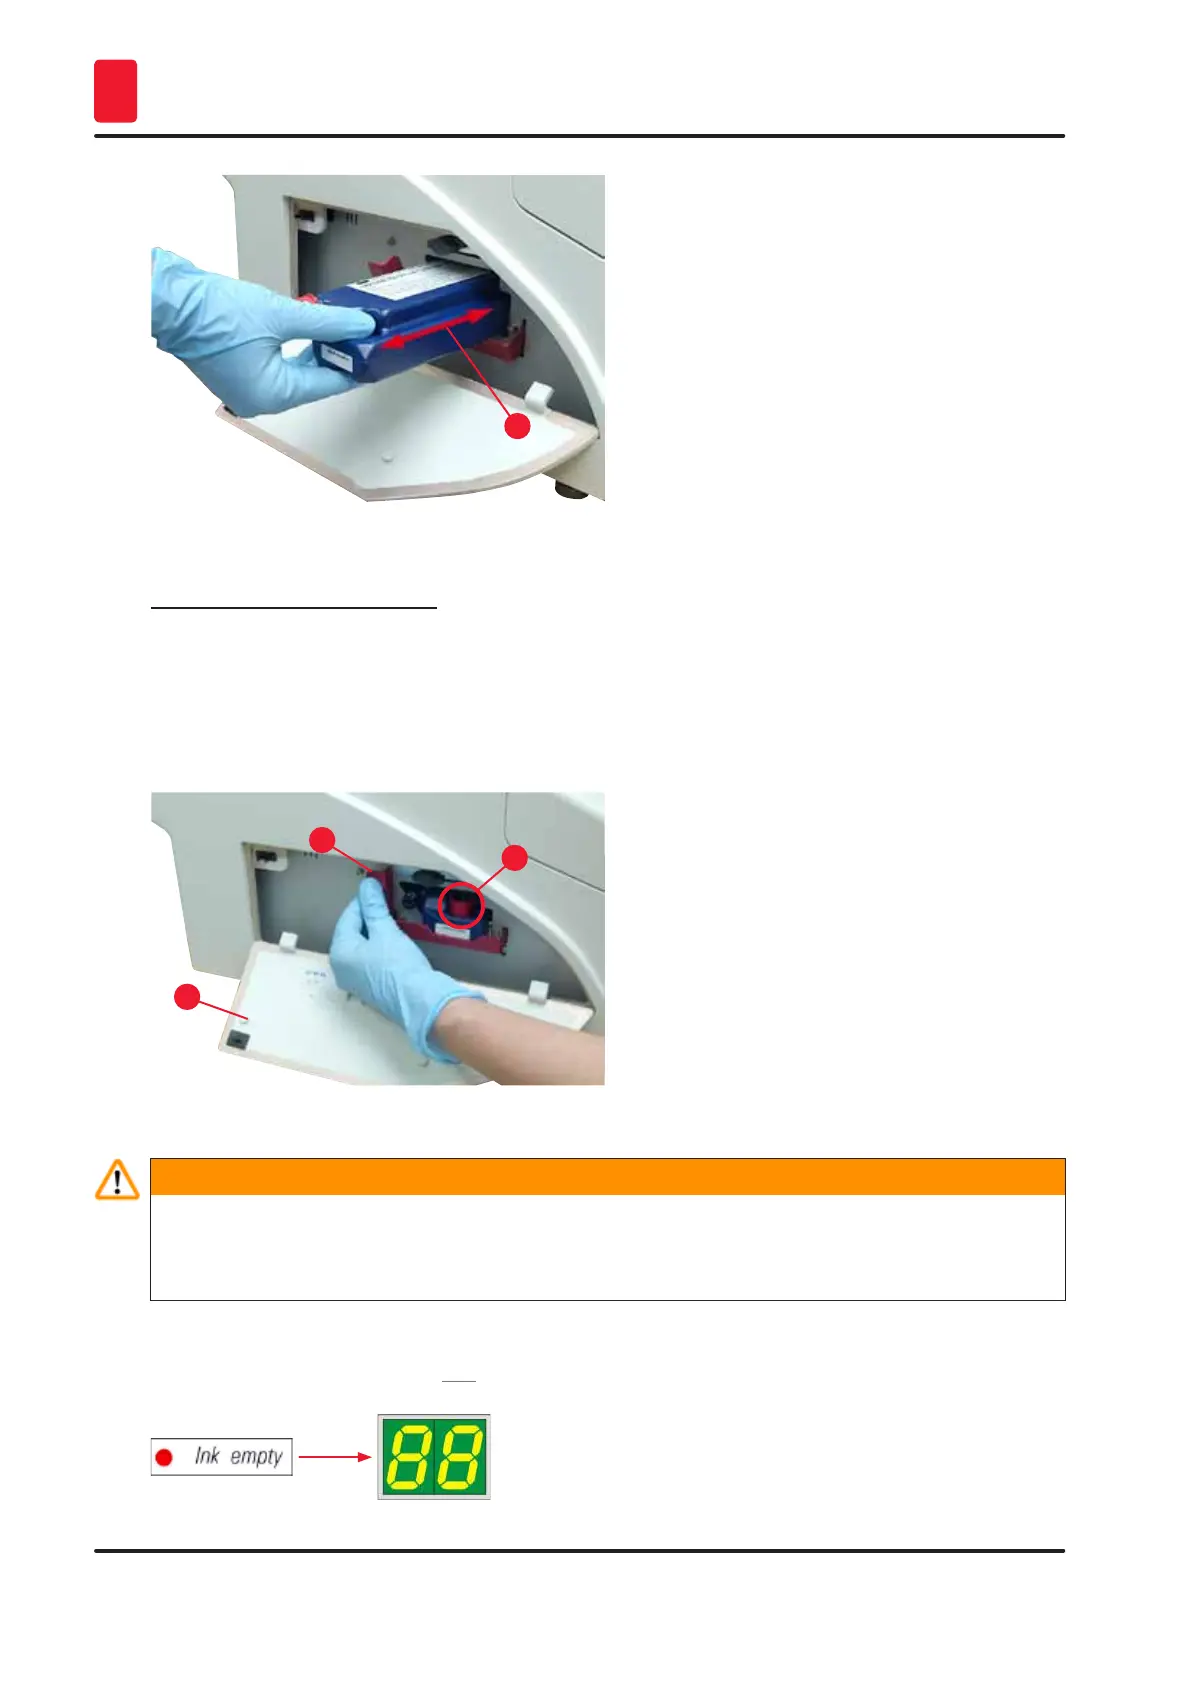
2. Remove the information flag and place the red protective cap in the recess provided on the ink
cartridge (→ "Fig. 37-1").
3. Upon completion, make sure that the red retaining bracket is in the correct position
(→ "Fig. 37-2") and close the cover plate (→ "Fig. 37-3") of the printer.
1
2
3
Fig. 37
Warning
Never press the CLEAN button while a new or used ink cartridge is in the instrument!
Very important! Prior to each transport, the cap (→ "Fig. 35-3") must be screwed onto the nozzle to
prevent the ink from spilling.
4. The sensor in the cartridge slot recognizes the presence of a new cartridge.
5. The INK EMPTY indicator LED goes out and 88 appears on the display.