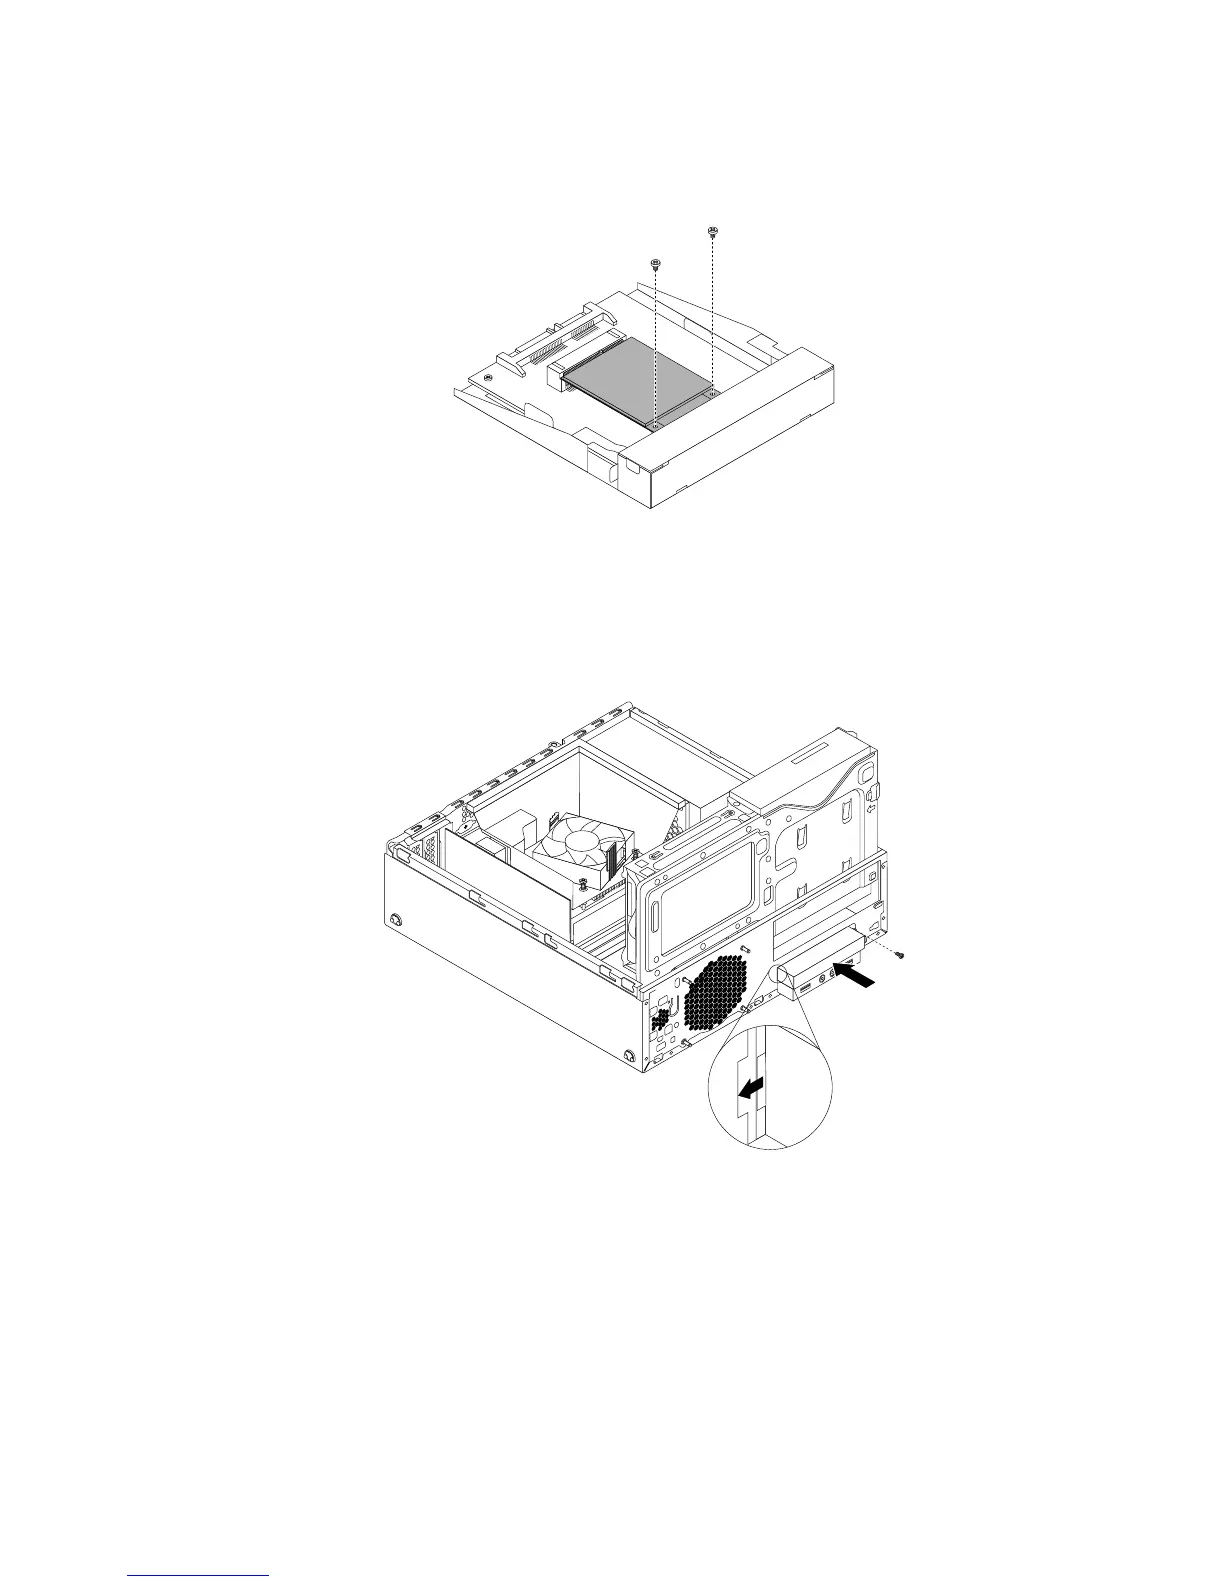
10.InstallthetwoscrewsthatcamewiththemSATAsolid-statedrivetosecurethedrivetothestorage
converter.
Figure54.InstallingthescrewstosecurethemSATAsolid-statedrive
11.InstallthenewmSATAsolid-statedriveintothecardreaderdrivebayuntilitsnapsintoposition.Then,
pushthenewmSATAsolid-statedrivetotheleftuntilthescrewholeinthemetalbracketofthemSATA
solid-statedriveisalignedwiththecorrespondingholeinthechassis.
Figure55.InstallingthemSATAsolid-statedriveintothechassis
12.Reconnectthesignalcableandthepowercabletotherearofthestorageconverter.
Whattodonext:
•Toworkwithanotherpieceofhardware,gototheappropriatesection.
•Tocompletetheinstallationorreplacement,goto“Completingthepartsreplacement”onpage103.
Chapter5.Installingorreplacinghardware61