Notes:
•Ensurethatthenewmicroprocessoristhecorrecttypeyourserversupports.See“Features”onpage7
.
Whentwomicroprocessorsareinstalled,bothmusthavethesamecorevoltageandcorespeed.
•Useanydocumentationthatcomeswiththemicroprocessoroptionkitandfollowthoseinstructionsin
additiontotheinstructionsinthistopic.
•Yourmicroprocessor,socket,andsocketcovermightlookslightlydifferentfromtheillustrationsinthis
topic.
Toreplacethemicroprocessor,dothefollowing:
1.Removeallexternalmediafromthedrivesandturnoffallattacheddevicesandtheserver.Then,
disconnectallpowercordsfromelectricaloutletsanddisconnectallcablesthatareconnectedto
theserver.
2.Prepareyourserver.See“Removingorextendingtheserverfromtherackcabinet”onpage65.
3.Removetheservercover.See“Removingtheservercover”onpage65.
4.Removethecoolingshroud.See“Removingandreinstallingthecoolingshroud”onpage68.
5.Removetheheatsink.See“Installingorreplacingaheatsink”onpage124.
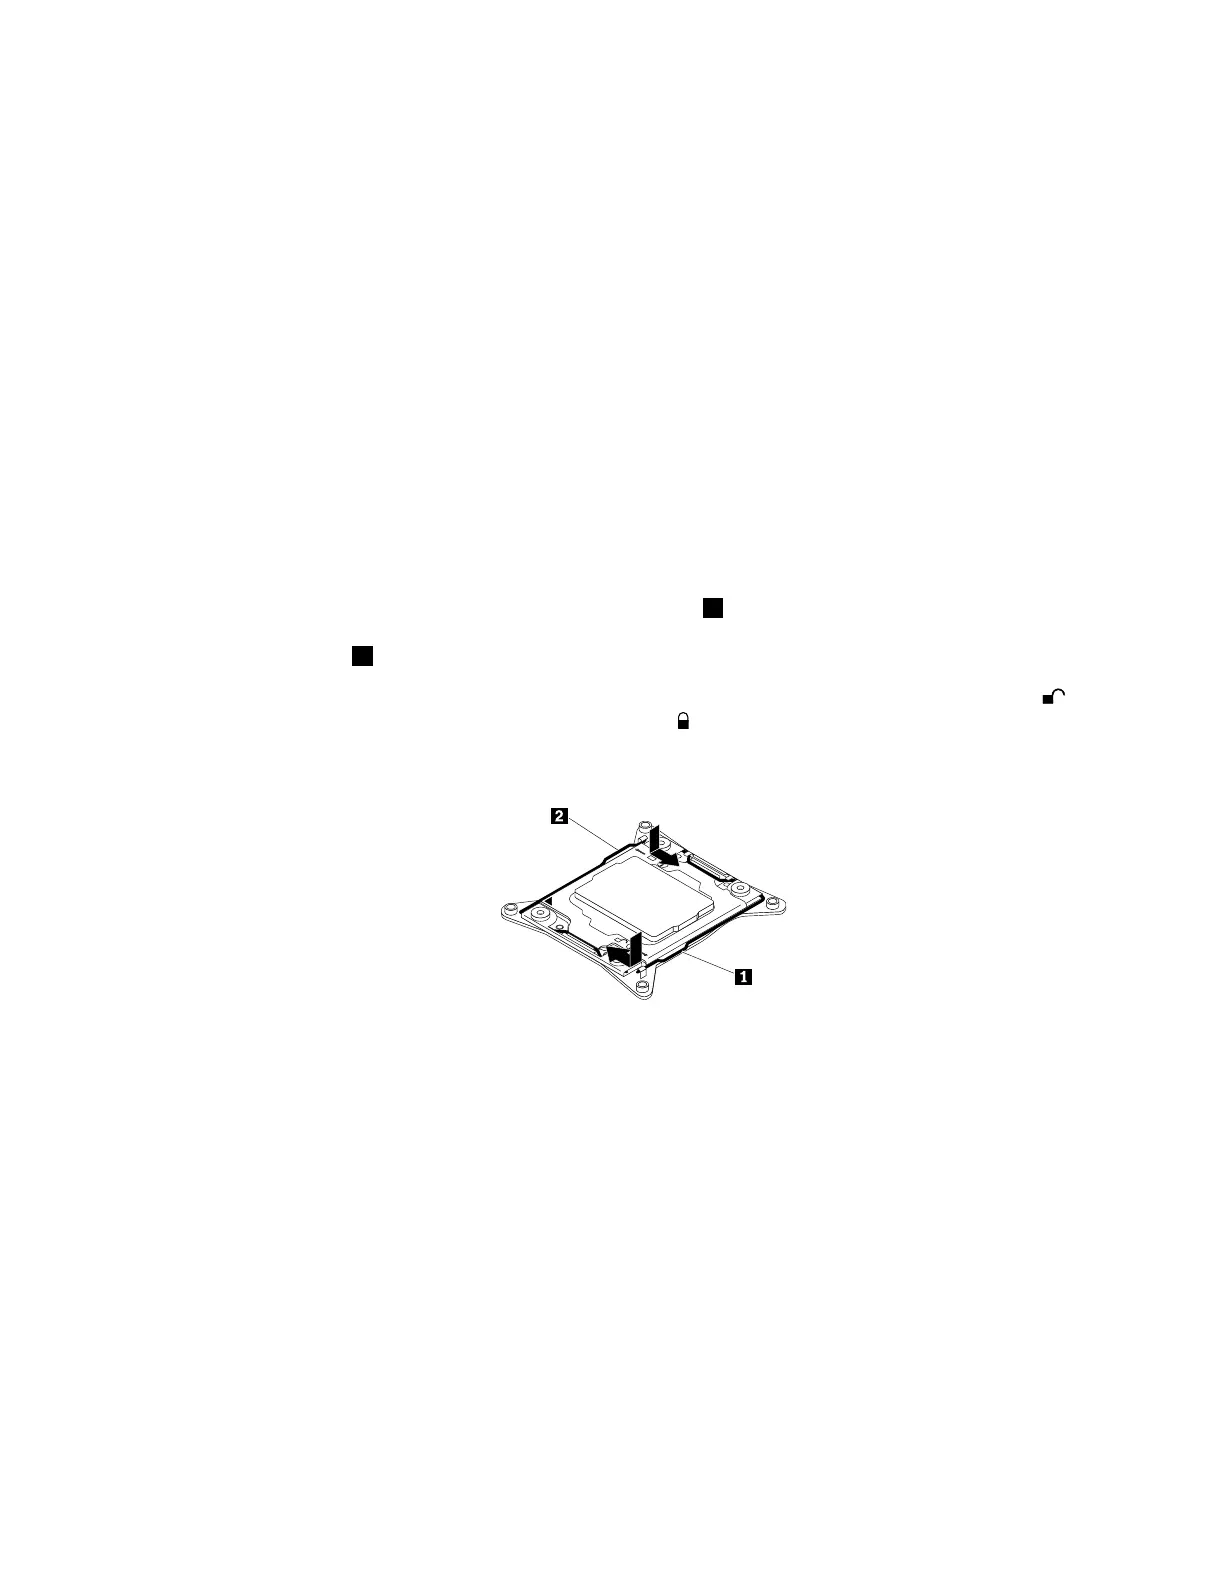
6.Locatethemicroprocessorsocket.Openthesmallhandle1firstbygentlypressingdownthehandlea
littlebitandthenpushingthehandleinwardtoreleaseitfromthesecuredposition.Then,openthe
othersmallhandle
2inthesameway.
Note:Therearetwomarksonthemicroprocessorretainer.Openthesmallhandlemarkedwith
firstandthenopentheothersmallhandlemarkedwith.Alwaysfollowthecorrectsequencewhen
youopenthesmallhandles.
Figure101.Openingthehandlesofthemicroprocessorretainer
Chapter6.Replacinghardware131