Install the power interface board
Use this information to install the power interface board.
“Read the
installation
Guidelines” on
page 59
“Power off
the server
for this task”
on page 12
“ATTENTION:
Static Sensitive Device
Ground package before opening”
on page 60
Before installing the power interface board, touch the static-protective package that contains the new power
interface board to any unpainted surface on the outside of the server. Then, take the new power interface
board out of the package and place it on a static-protective surface.
To install the power interface board, complete the following steps:
Watch the procedure. A video of the installation process is available:
• Youtube:
https://www.youtube.com/playlist?list=PLYV5R7hVcs-Acsjj4tU79GzKnWG316BYn
• Youku: http://list.youku.com/albumlist/show/id_50483452
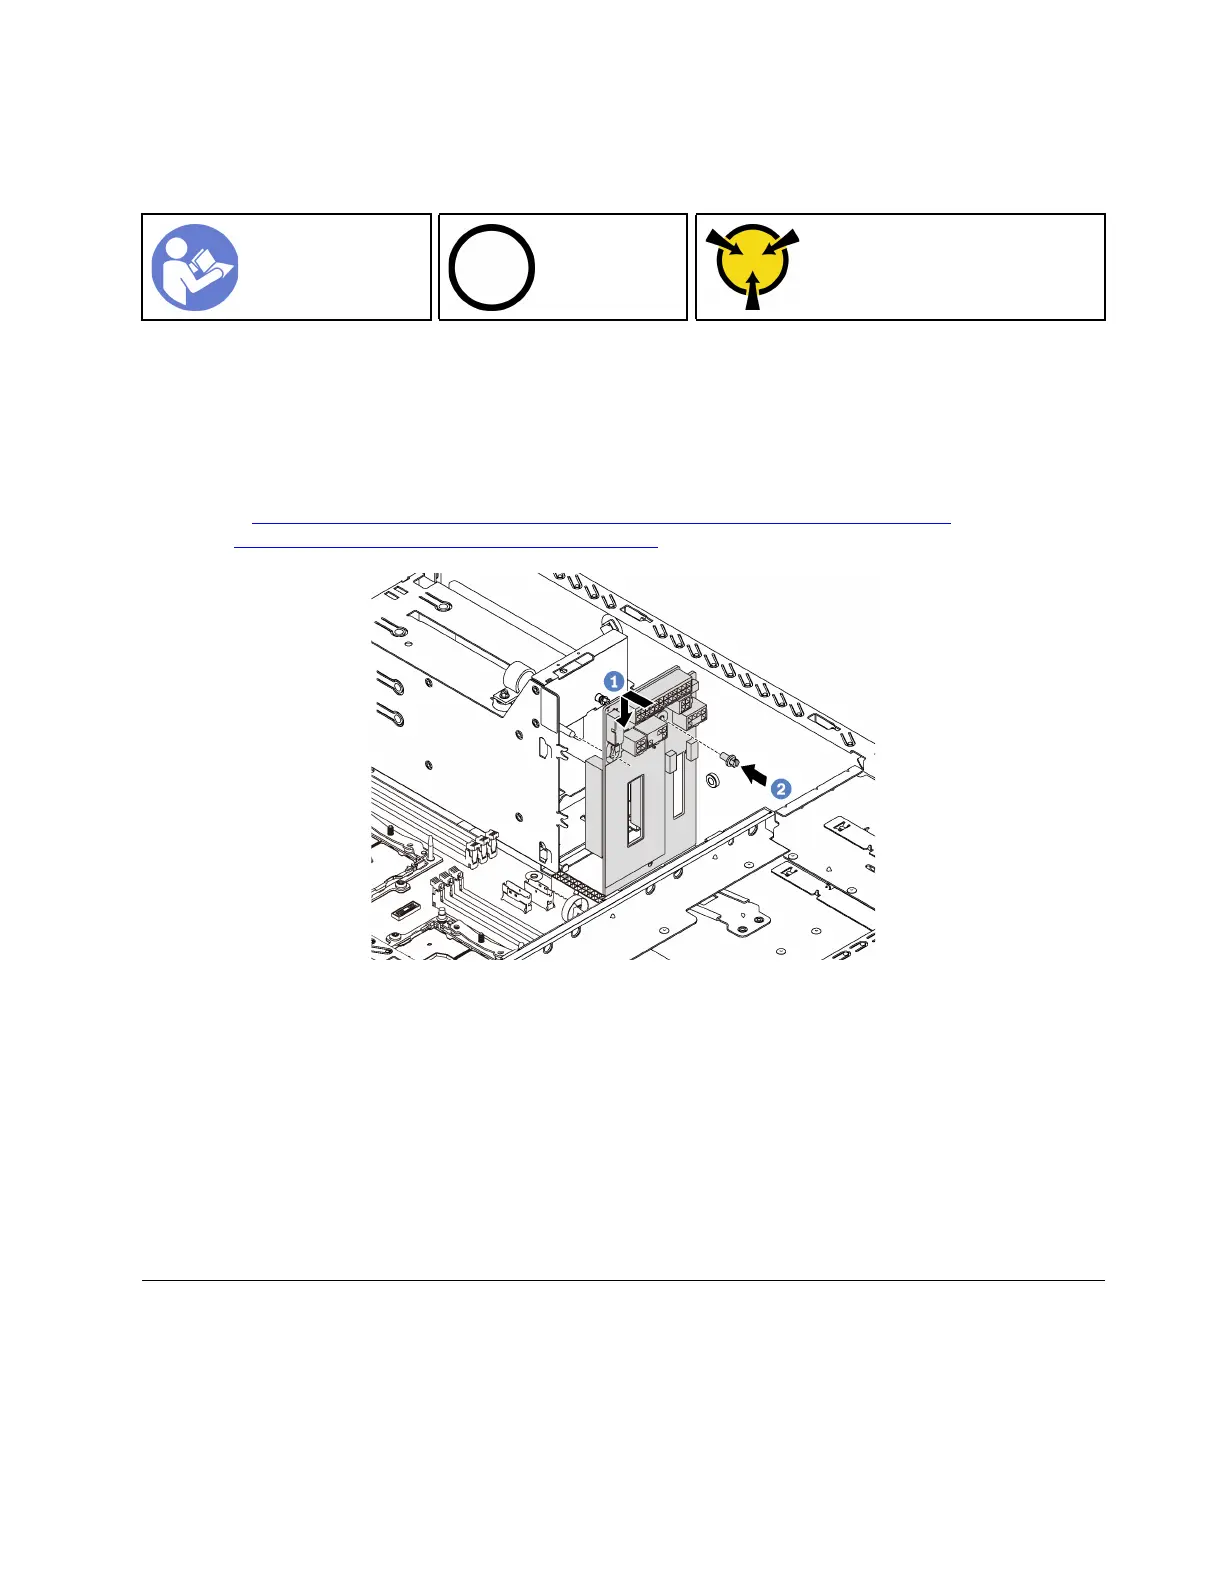
Figure 115. Power interface board installation
Step 1. Insert the hole in the power interface board into the corresponding mounting stud on the chassis.
Then, gently move the power interface board downward so that it is engaged with the mounting
stud.
Step 2. Install the screw to secure the power interface board in place.
After installing the power interface board:
1. Reconnect all cables to the power interface board. See “Power interface board” on page 33.
2. Complete the parts replacement. See “Complete the parts replacement” on page 178.
Hot-swap power supply cage replacement
Use this information to remove and install the hot-swap power supply cage.
Note: This section applies only to server models that have the hot-swap power supply cage installed.
Chapter 3. Hardware replacement procedures 157

 Loading...


