3. Make sure that the dust cover is securely attached to the CPU socket assembly.
Install the system board
Use this information to install the system board.
“Read the
installation
Guidelines” on
page 59
“Power off
the server
for this task”
on page 12
“ATTENTION:
Static Sensitive Device
Ground package before opening”
on page 60
Before installing the system board, touch the static-protective package that contains the new system board
to any unpainted surface on the outside of the server. Then, take the new system board out of the package
and place it on a static-protective surface.
To install the system board, complete the following steps:
Watch the procedure. A video of the installation process is available:
• Youtube:
https://www.youtube.com/playlist?list=PLYV5R7hVcs-Acsjj4tU79GzKnWG316BYn
• Youku: http://list.youku.com/albumlist/show/id_50483452
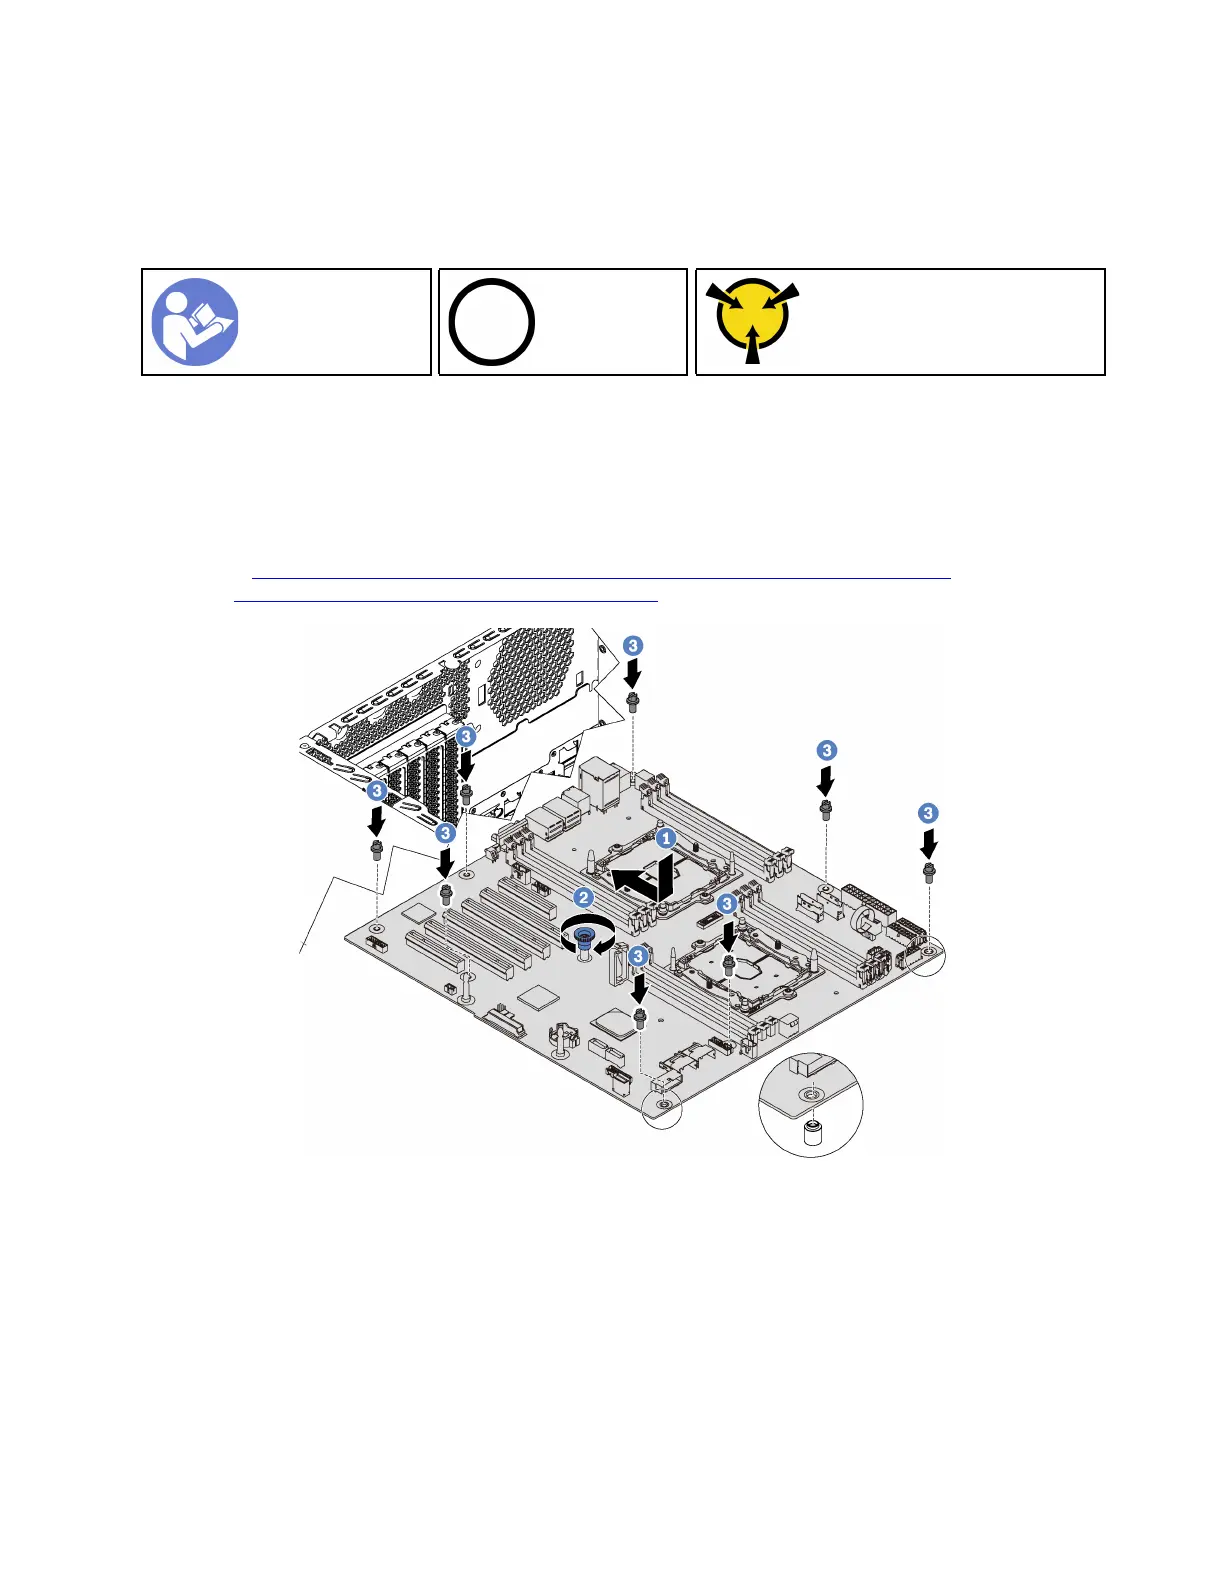
Figure 126. System board installation
Step 1. Gently lower the system board into the chassis. Then, move the system board toward the rear of
the server. Ensure that the rear connectors on the new system board are inserted into the
corresponding holes in the rear panel.
Step 2. Tighten the thumb screw.
Step 3. Install the eight screws to secure the system board in place.
Chapter 3. Hardware replacement procedures 171

 Loading...


