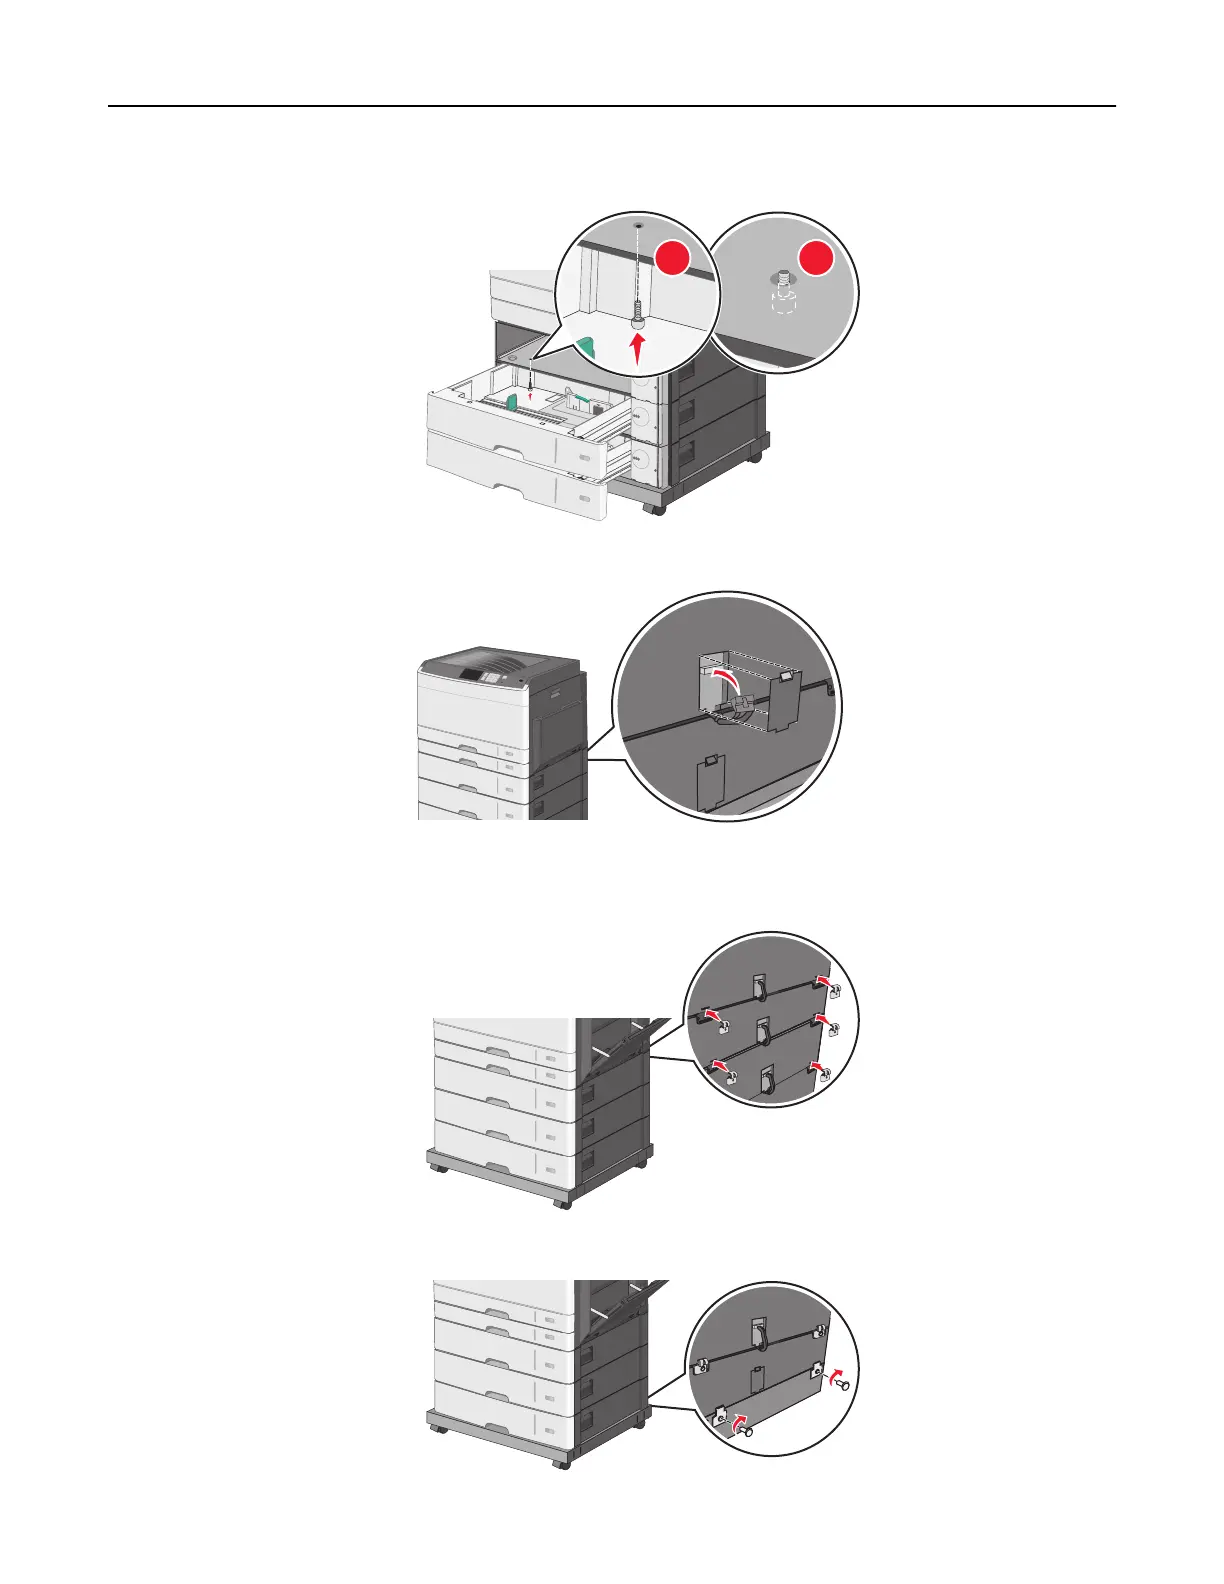
b Reach into the lower optional tray and insert a screw, pushing it upward to the optional tray above it.
1 2
8 Plug in the electrical connections between trays.
9 Attach brackets to the back of the printer and optional trays.
a Insert brackets on the slots located at the back of the optional trays.
b Secure the brackets with screws.
Additional printer setup 48