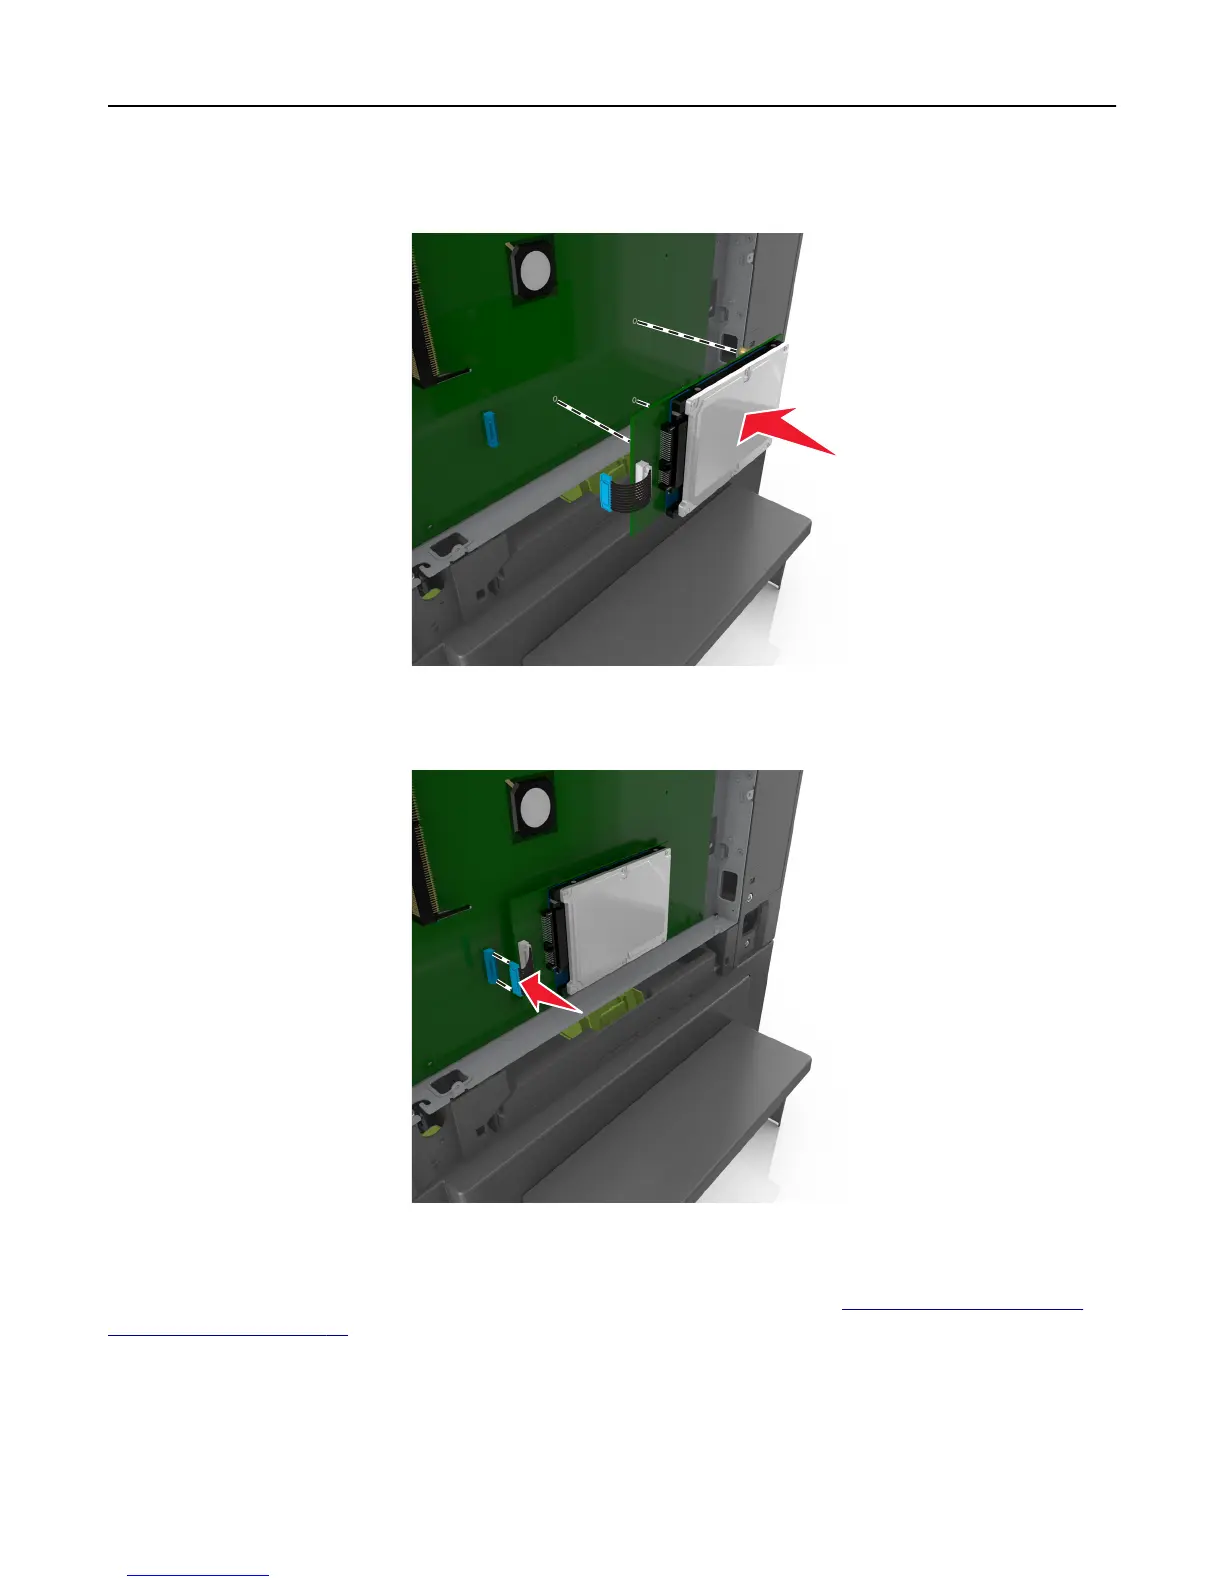
5 Align the standoffs of the printer hard disk to the holes in the controller board, and then press the printer hard disk
down until the standoffs are in place.
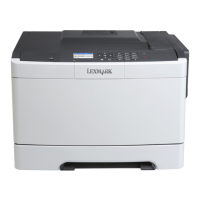
6 Insert the plug of the printer hard disk interface cable into the receptacle of the controller board.
Note: The plugs and receptacles are color‑coded.
7 Close the controller board access cover.
Note: When the printer software and any hardware options are installed, you may need to manually add the options
in the printer driver to make them available for print jobs. For more information, see
“Adding available options in
the print driver” on page 36.
Removing a printer hard disk
Note: This task requires a flathead screwdriver.
Additional printer setup 31