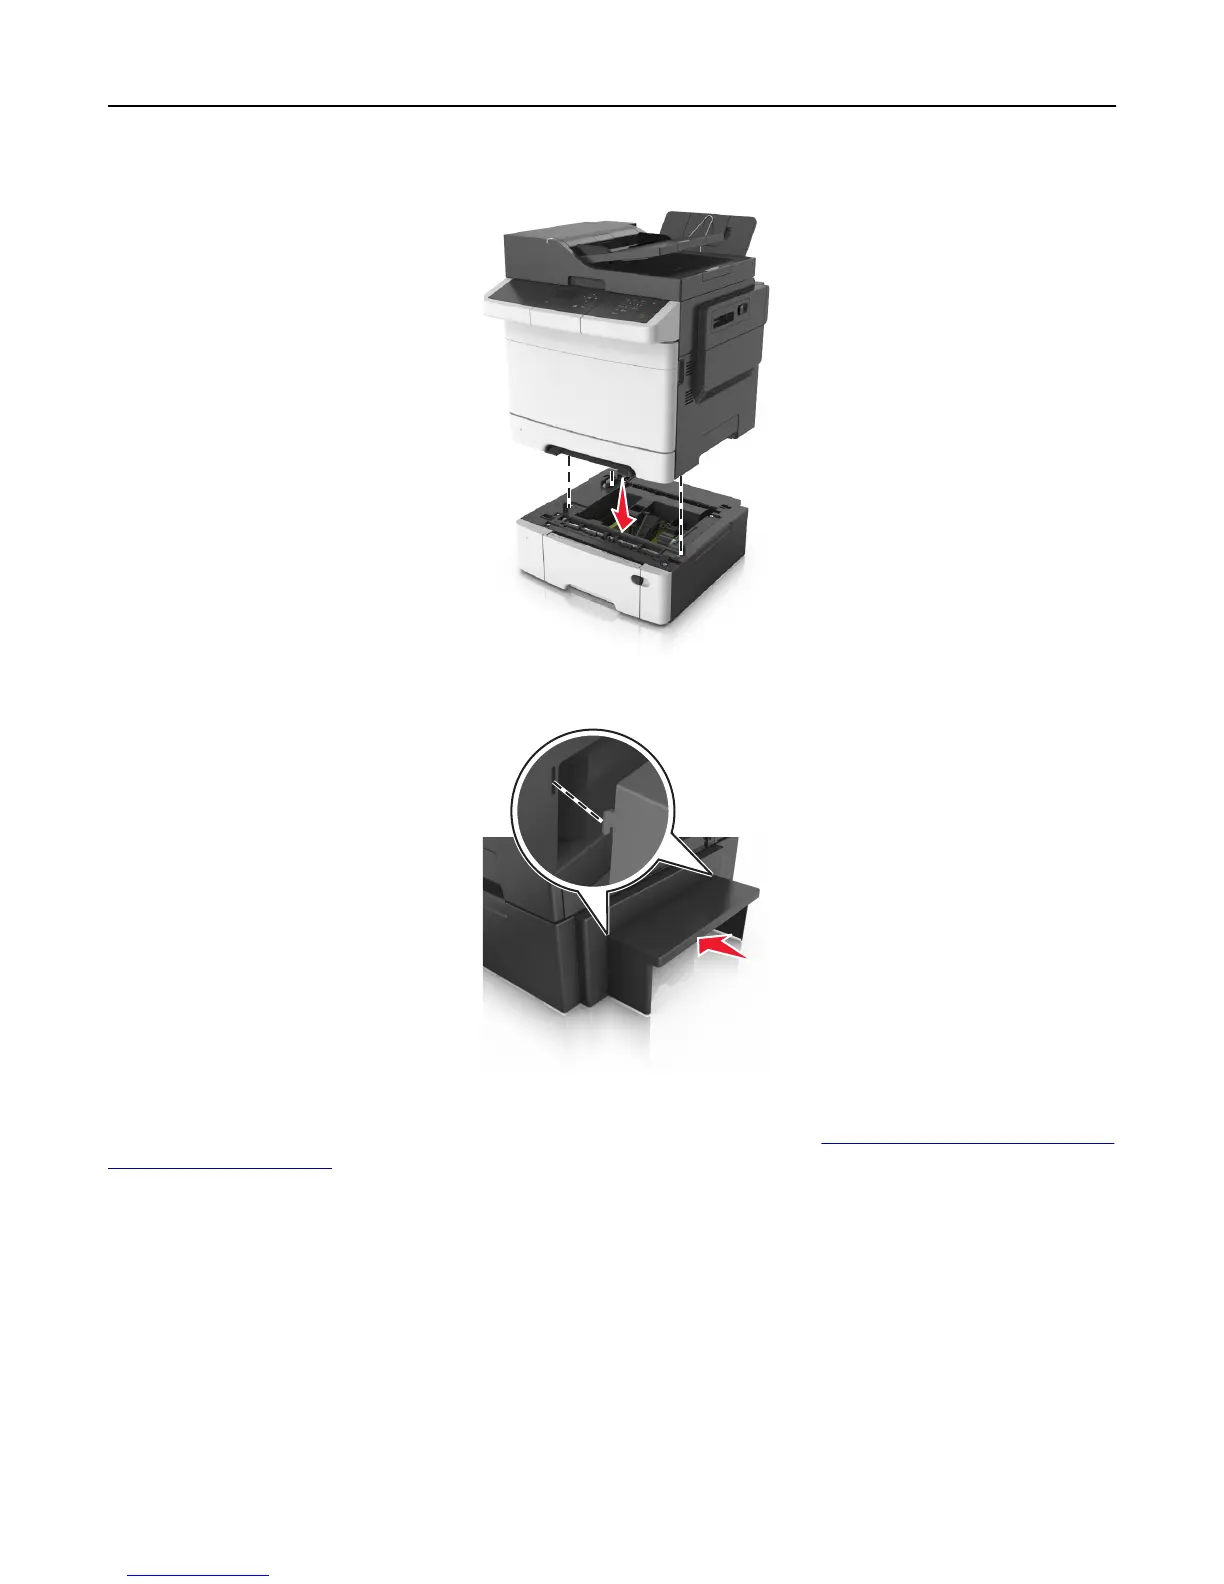
EasyManuals Logo

Lexmark CX310 User Manual

Lexmark CX310
256 pages
To Next Page IconTo Next Page
To Previous Page IconTo Previous Page
Page #23 background imageLoading...
Page #23 background image
3 Align the printer with the 650sheet duo tray, and then lower the printer into place.
4 Install the dust cover.
Note: When the printer software and any options are installed, it may be necessary to manually add the options in
the printer driver to make them available for print jobs. For more information, see
“Updating available options in the
printer driver” on page 25.
Attaching cables
Connect the printer to the computer using a USB cable or to the network using an Ethernet cable.
Make sure to match the following:
The USB symbol on the cable with the USB symbol on the printer
The appropriate Ethernet cable to the Ethernet port
Warning—Potential Damage: Do not touch the USB cable, any network adapter, or the printer in the area shown
while actively printing. Loss of data or a malfunction can occur.
Additional printer setup 23

Table of Contents

Other manuals for Lexmark CX310

Questions and Answers:

Question and Answer IconNeed help?

Do you have a question about the Lexmark CX310 and is the answer not in the manual?

Lexmark CX310 Specifications

General IconGeneral
Print TechnologyLaser
Scan TechnologyCIS
Scan ResolutionUp to 600 x 600 dpi
Duplex PrintingManual
Display2.4-inch color LCD
Processor Speed800 MHz
Standard Memory256 MB
Fax Speed33.6 Kbps
Operating System CompatibilityWindows, Mac OS, Linux
Print ResolutionUp to 600 x 600 dpi
ConnectivityUSB, Ethernet
Standard Paper Input250 sheets
Scanner TypeFlatbed, ADF
Fax Resolution300 x 300 dpi
Paper Capacity250 sheets
Network ConnectivityEthernet
Copy SpeedUp to 22 cpm (black), Up to 18 cpm (color)

Related product manuals