Repair Information 3-11
4510-001
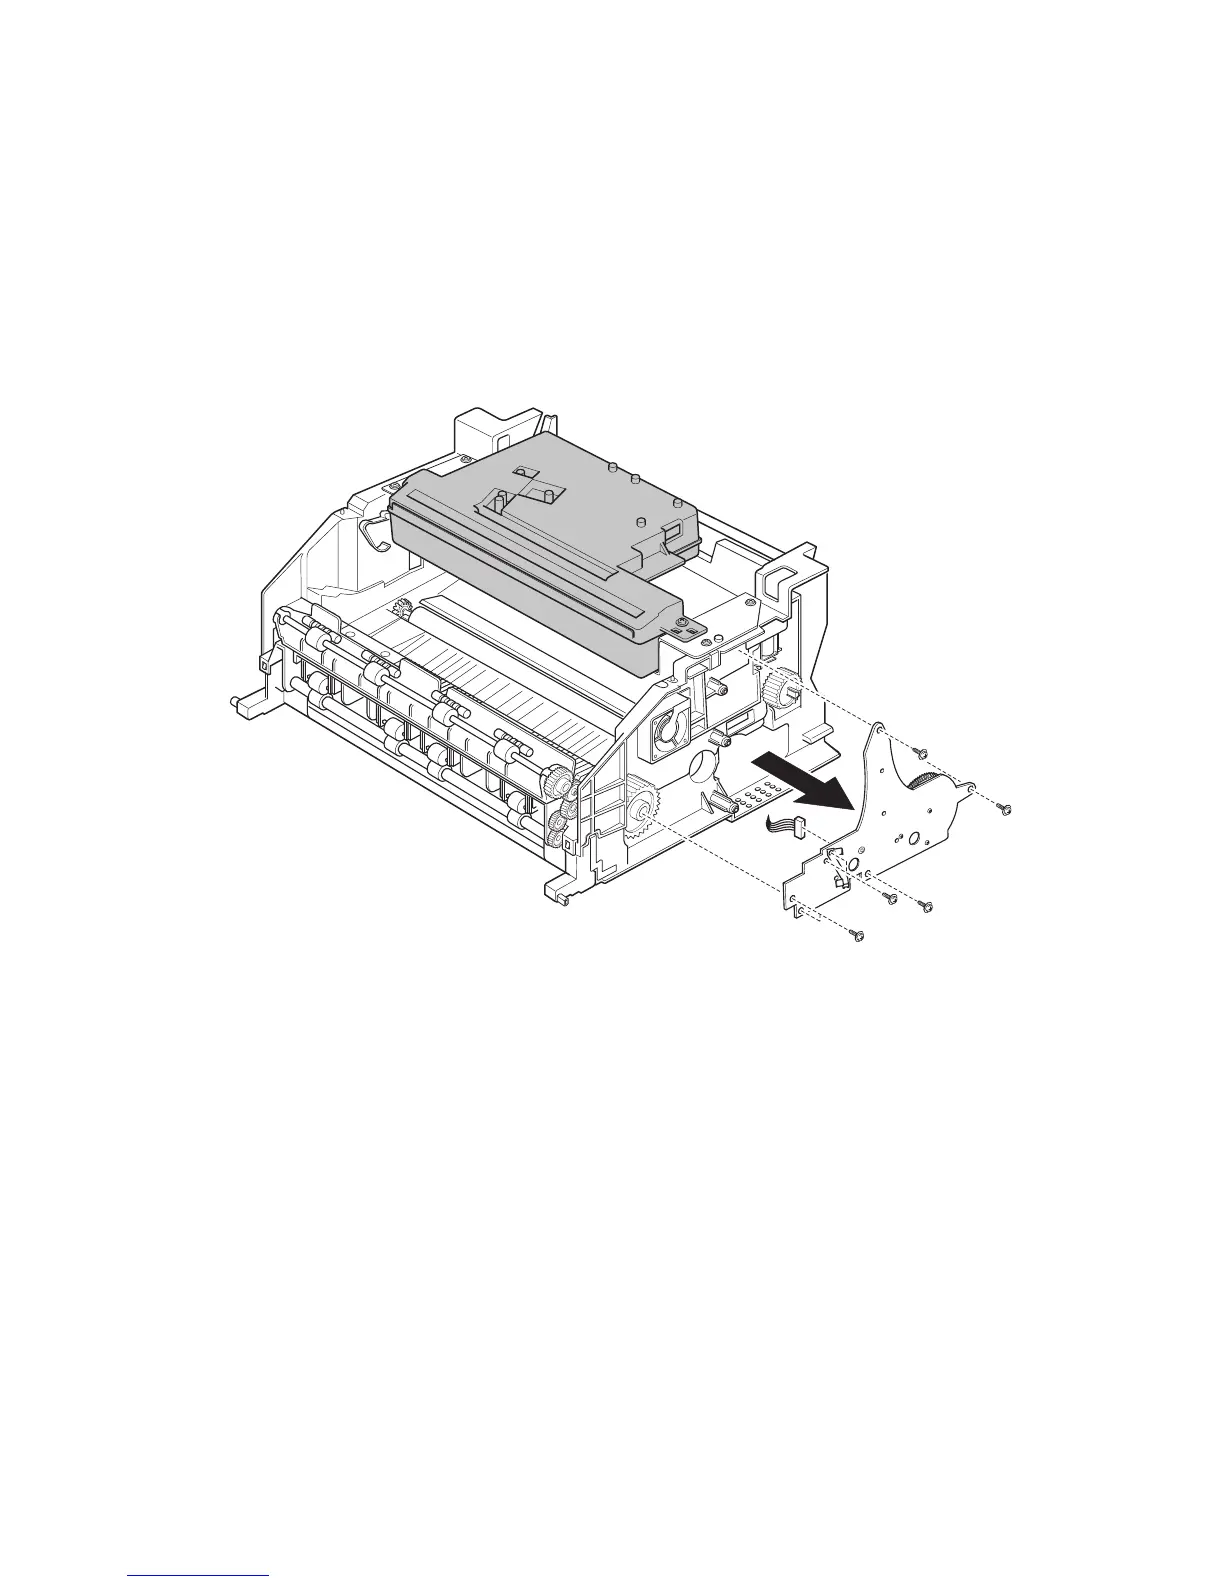
Motor Assembly
1. Before removing the motor assembly, remove the front cover,
top cover, rear cover, right side cover, and the metal bottom
cover.
2. Remove five screws securing the motor assembly and remove a
connector from the motor assembly. Then remove the motor
assembly.
Pick Roller Clutch Solenoid
1. Before removing the solenoid, remove the top cover, rear cover,
right side cover and the metal bottom cover.
2. Disconnect the solenoid connector from the LVPS.
3. Remove the screw securing the solenoid.
4. Remove the solenoid.