22
USING THE PROJECTOR
USING THE PROJECTOR
Using the Projector
Turning on the Projector
1 Connect the power cord.
2 Wait a moment after connecting the
power cord, then open the lens cap
and press the POWER button on the
control panel or remote control. (The
light on the control panel turn on.)
3 In the Language Selection screen,
select a language.
4 Use the INPUT button on the remote
control to select an input signal.
Adjusting Focus and
Position of the Screen
Image
When an image appears on the screen,
check that it is in focus and ts in the
screen properly.
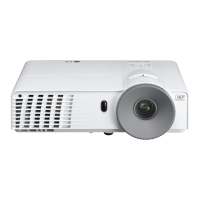
Zoom ring
Focus ring
y
To adjust the focus of the image,
rotate the focus ring (the outer ring
of the projector lens).
y
To adjust the size of the image,
rotate the inner zoom ring.
To move the screen image upward/
downward, adjust the height of the
foot at the bottom of the projector.
Front foot
adjustment button
y
While pressing the front foot adjust-
ment button, adjust the projector
upward/downward until the screen
image is in the
desired position.
y
When you release the front foot
adjustment button, the front foot be-
comes fixed at the current position.
Using the Projector
1 In Standby mode, press the POWER
button to turn the projector on.
2 Press the INPUT button to select the
input signal you want.
3 Control the projector using the fol-
lowing buttons while watching the
screen.
Button Description
VOL -, + Adjusts the volume level.
MUTE Mutes all sounds.
Q.MENU Accesses the quick menu.
RATIO Resizes an image.
Key's Adjusts Keystone.
4 Press the POWER button to turn the
projector off.