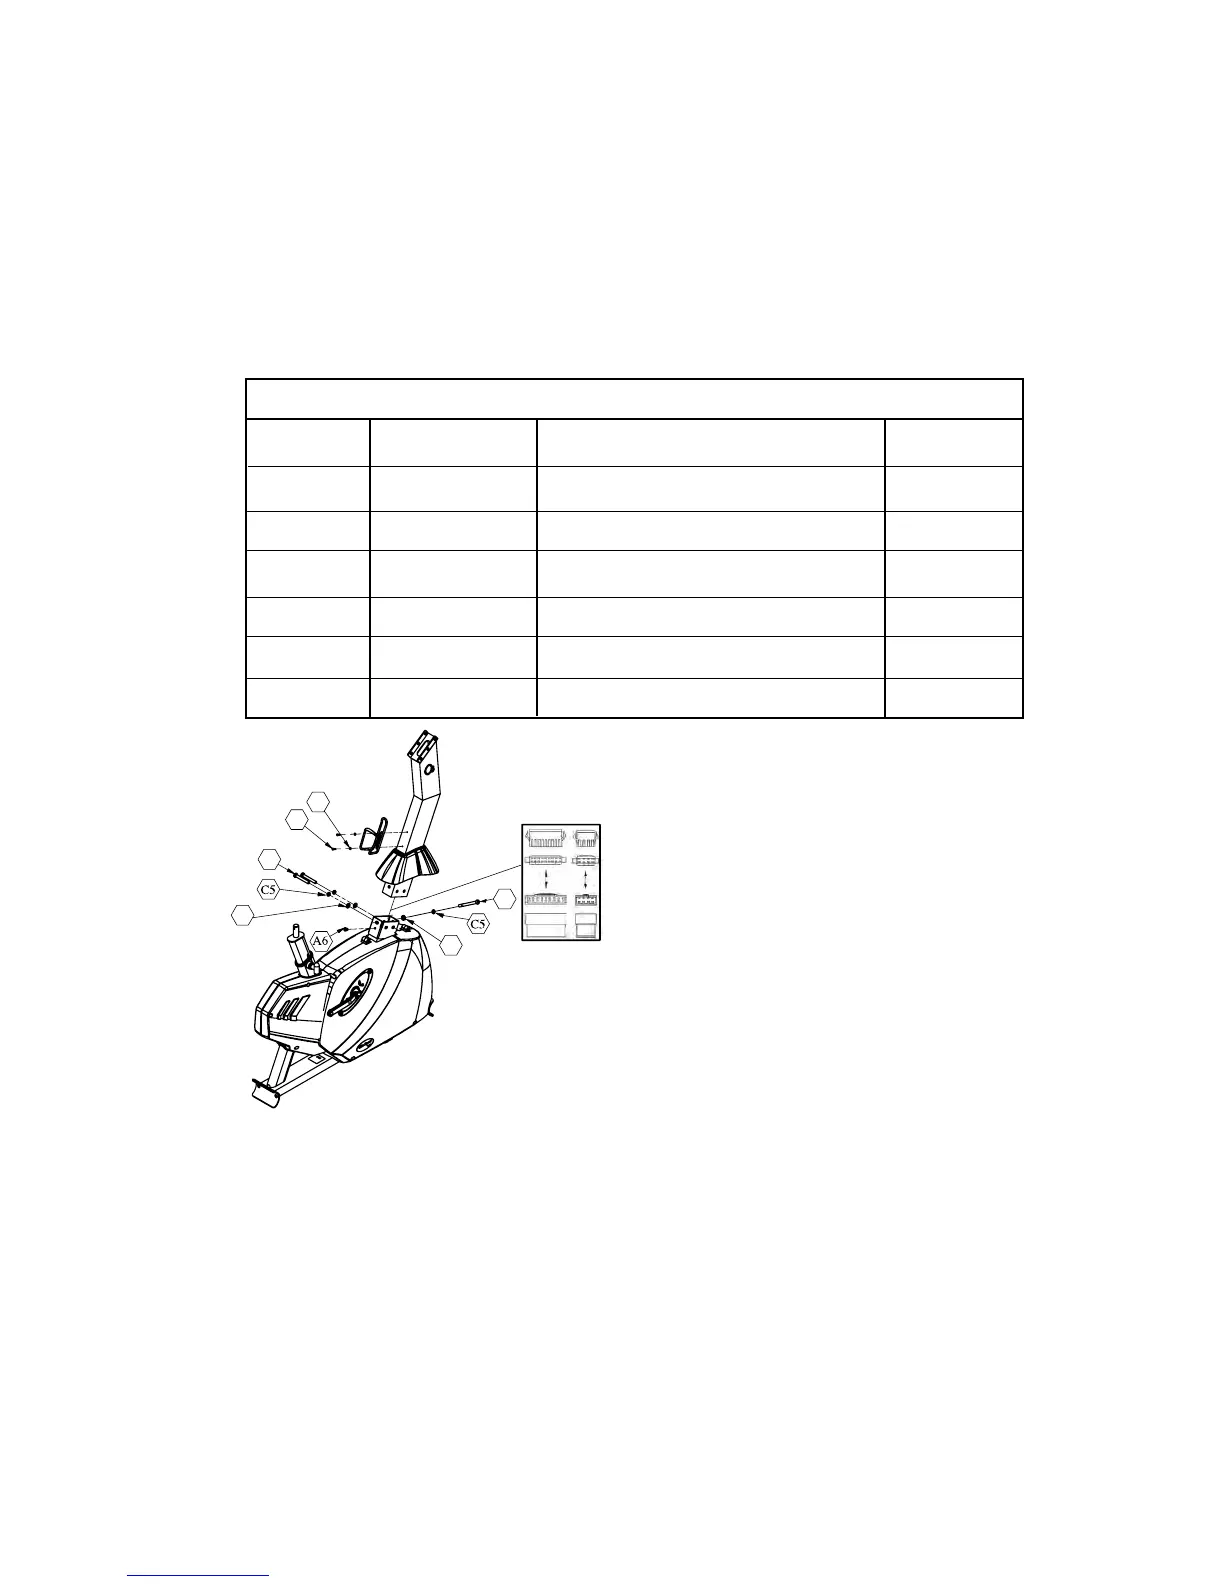
Step 3: Handlebar Post
Parts Required
Handlebar Post
Rubber Boot
Hardware Required
Part # Size Description Quantity
A-2 M10 * 120 Dome Head Allen Screw 1
A-3 M10 * 70 Dome Head Allen Screw 2
A-4 M5 * 15 Phillips Screw 2
A-6 M8 * 10 Dome Head Allen Screw 1
C-2 M10 Flat Washer 3
C-4 M5 Flat Washer 2
C-5 M10 Spring Washer 3
Main Frame
1. Locate the hardware bag for Step 3.
2. Slide the rubber boot over the handlebar post as
shown in the diagram.
3. Remove the wire tie holding the harnesses in place
and connect the two wiring harnesses.
4. Insert the handlebar post into the frame making
sure that the wiring harnesses are not pinched. It
may help to keep some tension up on the harnesses
from the top of the handlebar post.
5. Install Screws:
a. Insert the M10 * 120 mm dome head screw (A2) with Flat Washer (C2) and Spring
Washer (C5) thru the hole in the front of the post.
b. Insert the 2 M10 * 70 mm dome head screws (A3) with Flat Washer (C2) and Spring
Washer (C5) thru the holes in the left side of the post.
6. Once all the screws are in place, securely tighten them using the 6 mm Allen Wrench
included with the hardware kit.
7. Install and tighten the M8 * 10 mm dome head screw (A6) into Console side of the post to
eliminate any play in the handlebar post.
8. Locate the Phillips Head Screws and Washers and install the Water Bottle Holder.
16
C4
A4
A3
C2
A2
C2

 Loading...