ORPHEUS User’s Manual
18 support@lightcon.com Light Conversion
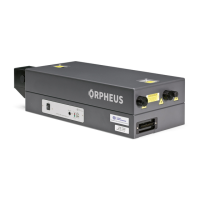
side, below the output ports. In some configurations the main circuit board connections might be in front
of the ORPHEUS housing, below the attached beam routing mirror.
Figure 9. Connectors of ORPHEUS
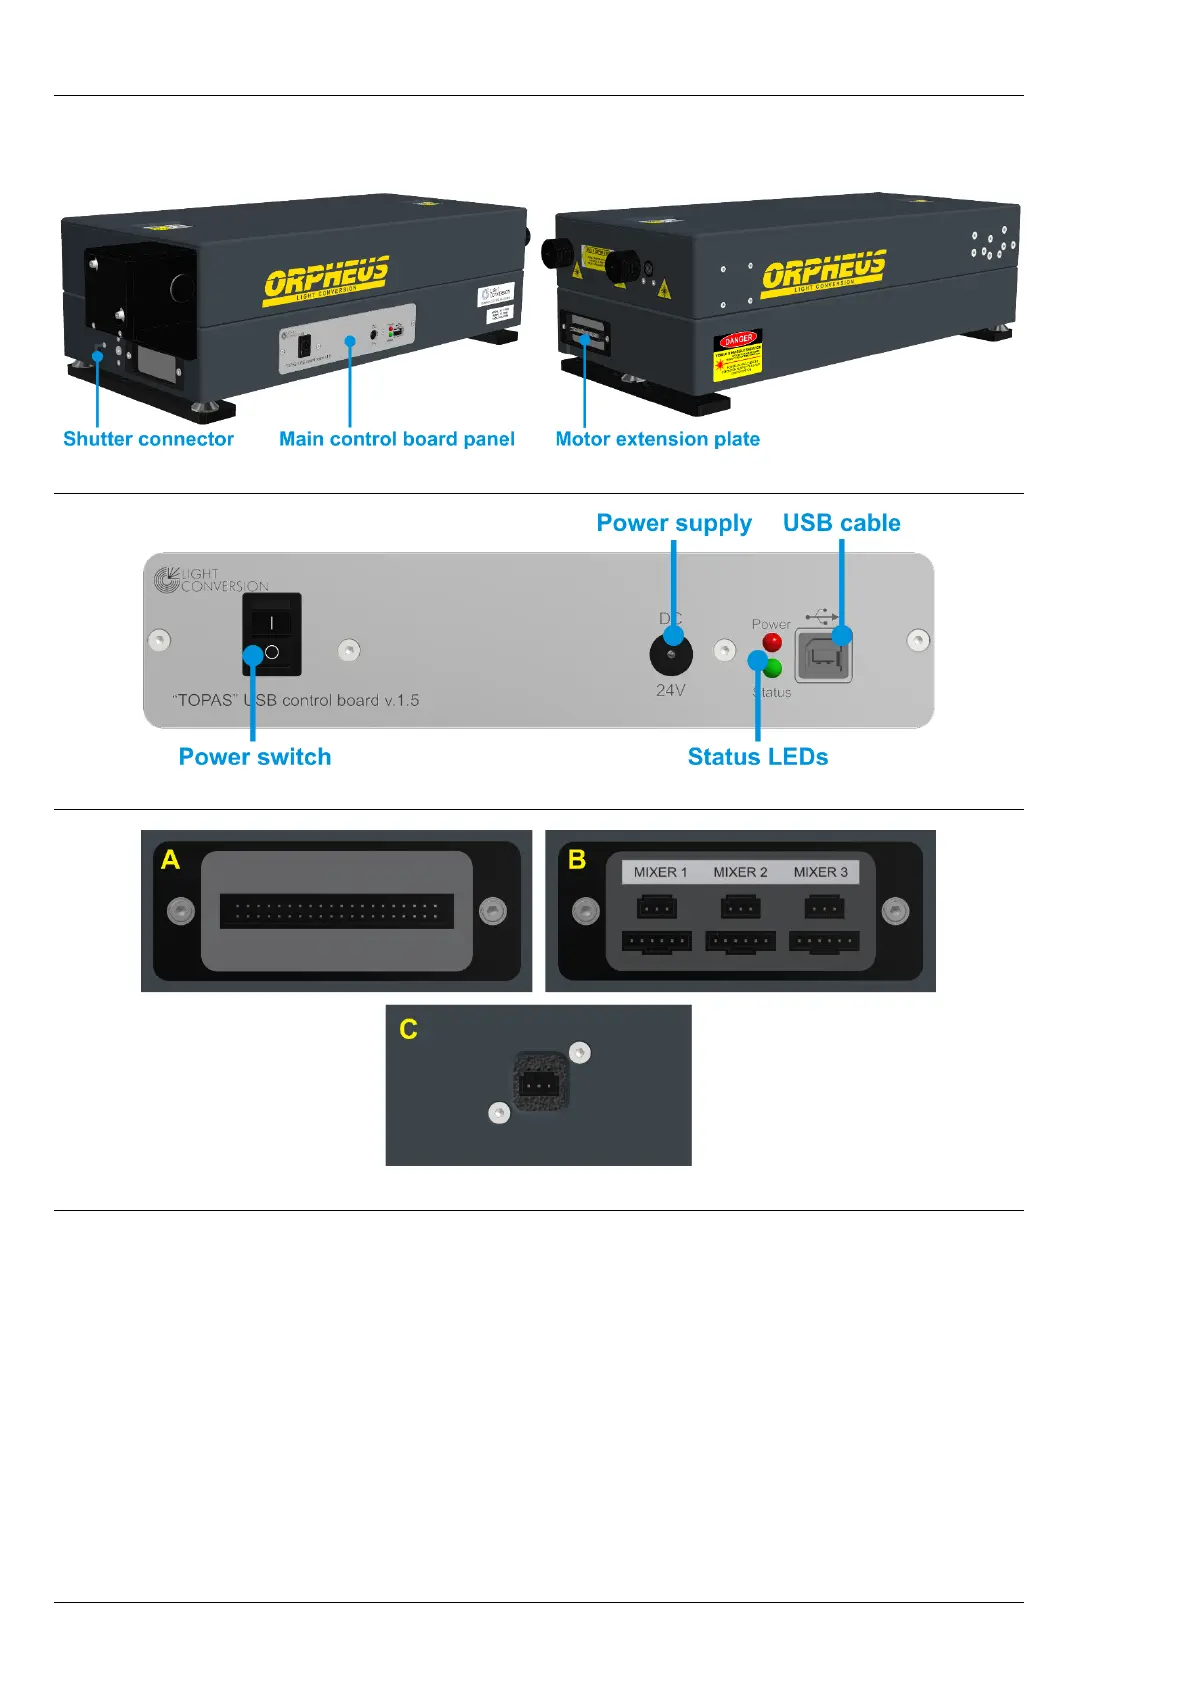
Figure 10. The main USB control board of ORPHEUS
Figure 11. ORPHEUS extension plates (A or B) and shutter connector (C)
The sequence of connecting the ORPHEUS should be as follows:
1. Water cooling to the water-cooled beam blocks, if applicable.
2. External devices (Mixers, LYRA, etc.) to the extension plate.
3. Shutter cable to the dedicated shutter connector.
4. USB cable.
5. Power supply cable.
6. Install WinTOPAS from your USB flash disk.
7. Turn on the USB control board.
8. Install the control board driver as described in WinTOPAS user’s manual.