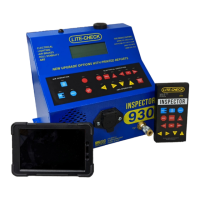
LITE-CHECK INSPECTOR 930
20
Inspecting for Trailer Electrical Faults
Overview
Always begin the inspection operation with a properly setup INSPECTOR 930.
Adequate air and 12-volt power should be verified before starting the test.
NOTE: Air and air connections are not required when performing electrical inspections
only.
LITE-CHECK automatic testers are programmed to concurrently monitor all of the wires
on the 7-way cable connecting the tester to the trailer. This provides immediate
feedback on the conditions of each electrical circuit under test.
Electrical faults are signaled by the tester.
Electrical circuits that have burned-out, or have damaged lamps may still have properly
operating lamps AND the circuit will not indicate a fault. The tester’s digital display can
be used to observe the current drawn by each circuit and to look for unusual variances
from the expected values.
NOTE: If more than one fault is detected, the tester will identify the faults in the order of
the “Fault Detection Hierarchy” list on page 20. Once the first fault is corrected, the
tester will go to the next fault and so on until all the faults have been cleared.
Electrical Testing
In normal operating mode only ONE electrical circuit will operate at a time. The digital
display will show amperage, voltage and circuit condition. The corresponding electrical
indicator LED will be lit.
1. Start at the front corner of the trailer and observe the lights. Press the button for
the circuit being tested. Each light must be visually inspected to ensure it is
good.
2. Move to the next corner of the trailer and continue the light inspection.