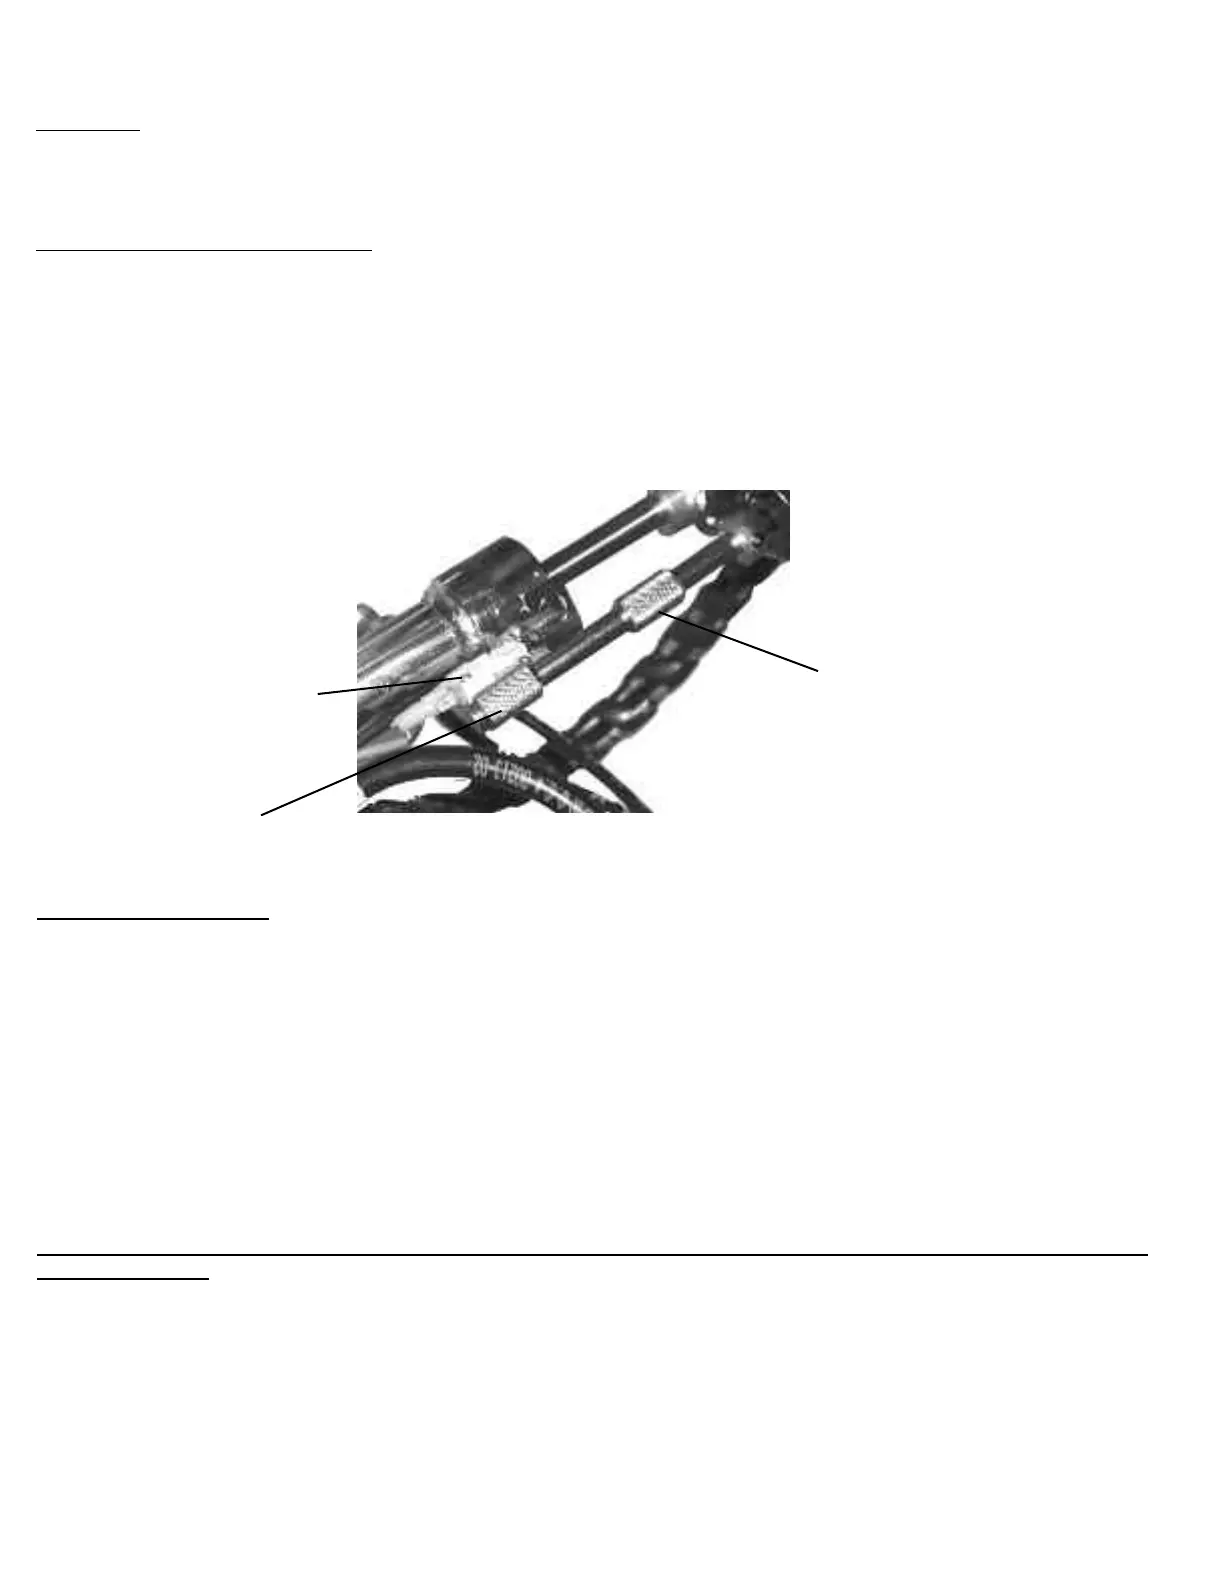
Flexion Height Adjustment
The two Flexion control collars operate the distance of travel in the up (#1) and down (#2) motion on the pelvic cushion. The limit
switch (#3) senses the location of the collars.
To increase the upward motion slide collar (#1) down.
To decrease the upward motion slide collar (#1) up.
To increase the downward motion slide collar (#2) up.
To decrease the downward motion slide collar (#2) down.
If you are performing manual flexion the limit switch (#3) may end up outside of the slide collars. If this happens you will be unable to
use the auto flexion feature until the limit switch (#3) is in between the slide collars.
CAUTION!! Excessive speed may cause discomfort or injury to the patient, make sure to check the flexion speed before adjusting any
patients on the table.
Down Delay
The down delay adjustment knob (#5) controls the amount of time the pelvic cushion stays in the lowest set position from 0 to 30 seconds.
Simply turn the knob clockwise to increase the delay.
Manual Flexion – Pressure Adjustment
To increase the pressure in manual flexion push the pressure build button (#6). To release pressure see page 12.
Auto Pelvic Flexion
# 3 Limit Switch
# 1 Slide Collar
Up Motion
# 2 Slide Collar
Down Motion
- If the auto flexion is stopped by the Patient Stop Switch, the red stop light (#8) will illuminate.
To reset the auto flexion press the reset switch (#7) and the auto flexion will resume.
Page 18