23Carbide Cutter OM
Maintenance
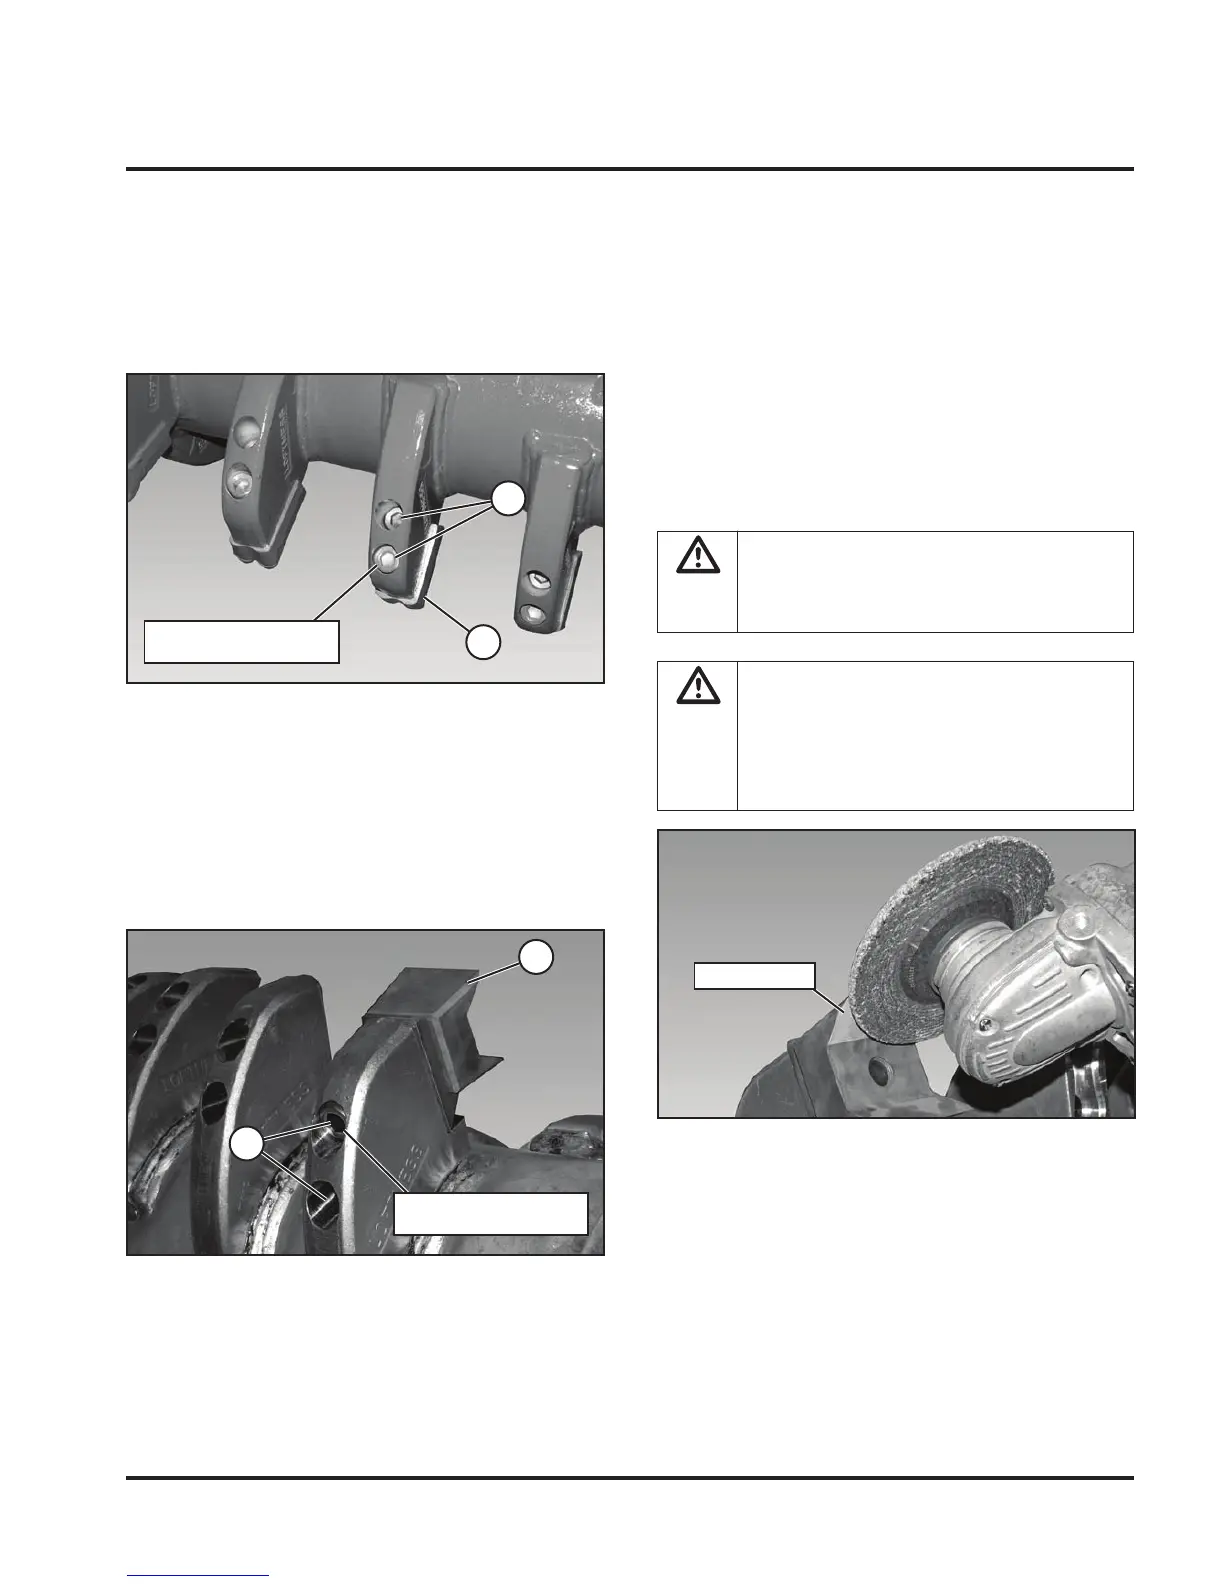
Tooth Removal and Installation
Double Tooth & Double Planer
Install the rotor locking pin. See “Rotor Locking Pin
Installation” on page 16.
Remove the two bolts (1) and tooth (2).
Use copper based anti-seize when reinstalling the bolts.
Torque to 137 ft.-lbs.
IMPORTANT: Tighten the bolt on the top edge of the
tooth first when reinstalling.
Quadco Teeth
Remove the two bolts (1) and tooth (2).
Use copper based anti-seize when reinstalling the bolts.
Torque to 137 ft.-lbs.
IMPORTANT: Tighten the bolt on the top edge of the
tooth first when reinstalling.
Tooth Sharpening (Quadco Option
Only)
NOTE: The teeth need to be kept sharp to maintain the
most effective operation of the attachment. Daily
inspection and touch up is recommended.
NOTE: The teeth can either be removed from the
attachment or remain installed for sharpening.
Install the rotor locking pin. See “Rotor Locking Pin
Installation” on page 16.
NOTE: The Quadco cutter teeth have been heat treated
to a specific hardness. Care must be taken to
avoid overheating the leading edge of the tooth
while sharpening. If the coloring in the tooth
changes to either a blue or brown during the
sharpening, you have removed the temper and
the tooth will not hold it’s cutting edge.
NOTE: When re-sharpening teeth using machine shop
equipment, avoid overheating the teeth by using
a flood coolant system.
WARNING: Rotor must be stabilized with
rotor locking pin to prevent accidental
rotation any time the rotor is exposed for
service work.
WARNING: Do not remove the locking pin
for any reason when one or more teeth
are missing from the rotor assembly. The
imbalance could cause the rotor to turn
without warning causing serious personal
injury.
1
2
When reinstalling bolts,
tighten this bolt first.
1
2
When reinstalling bolts,
tighten this bolt first.
Leading Edge
Note: Guard on grinder
removed for
photo clarity.