- 34 -
FOCS Workshop Manual_cod. 1.5302.351_7° ed_ rev. 06
21
22
23
4
24
Return pulley
Remove the center bolt 1 and slide the pulley from the engine.
Components:
1 Bolt 6 Bearing
2 Washer 7 Spacer
3 Spacer 8 Bearing
4 Pulley 9 Snap Ring
5 Snap Ring
Note: On remounting thoroughly clean out the threads of screw 1
and tighten at 25 Nm.
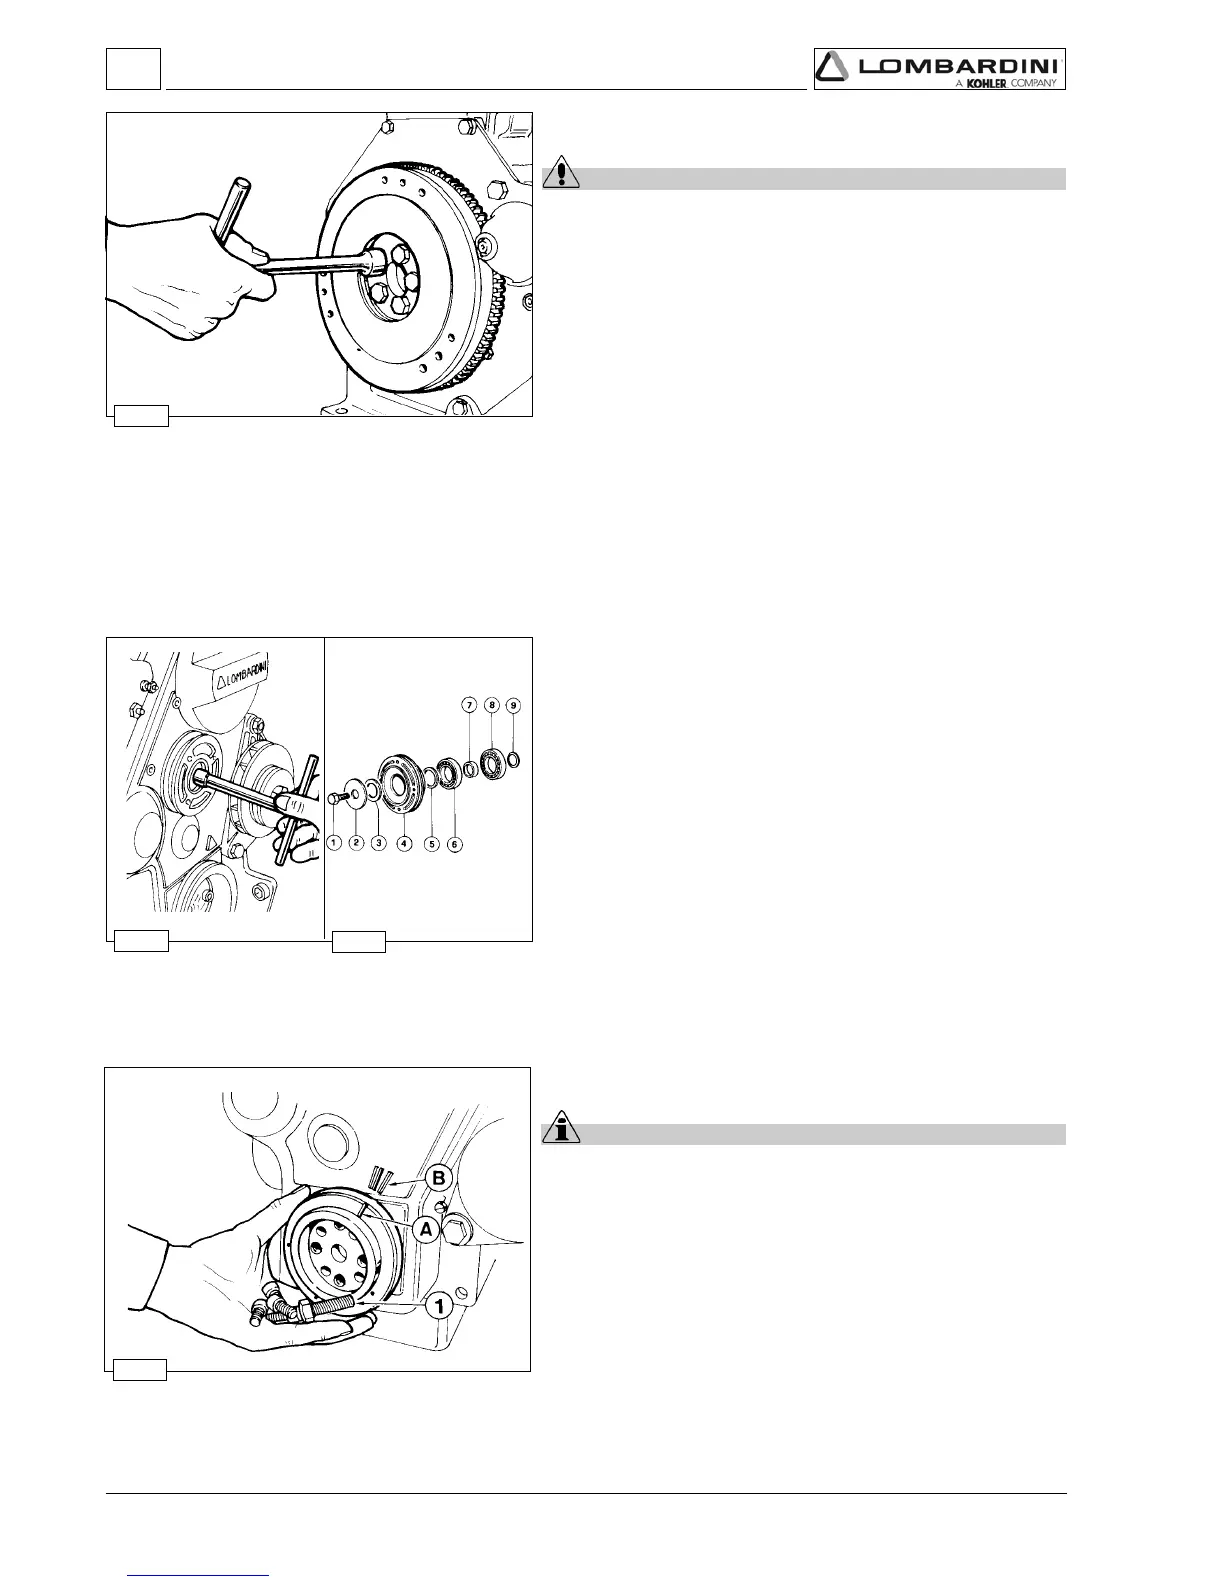
Flywheel
Danger - Attention
During dismounting be particularly careful not to let the
flywheel fall, as this can be very dangerous for the operator.
Use protective goggles while removing the starter ring gear.
Unscrew the screws that fasten it to the crankshaft.
In order to replace the ring gear, it is necessary to disassemble the
flywheel.
Cut the ring gear in several places using a chisel and remove it.
Heat the new ring gear uniformly and keep it at a temperature of
300°C for 15÷20 minutes.
Insert the ring gear into its seat and place it carefully on the rim of the
flywheel.
eave to the ring gear to cool gently before reassembling the flywheel.
When refitting tighten the screws at 80 Nm.
Driving pulley
Important
To loosen or screw in screw 1 at the set torque you must
always stop the crankshaft and not other parts of the engine.
Locking the crankshaft: remove the engine starter and installing the
fixture tool 1460-051.
Remove the pulley, after having unscrewed central screw 1 and
proceed with the four lateral screws.
The central bolt 1 is left-handed.
When reassembling, apply some Moly-slip antiseizure compound
on the screw thread and tighten at 360 Nm.
Note: When pulley reference mark (A) aligns with the timing cover
reference mark (B), the flywheel side piston is at TDC.
Disassembly / Reassembly
 Loading...