36
EN
Keeppassingthecranksetthroughtheframe,taking
carenottoscratchthecranksetwiththebearingsor
theframewiththechainrings.
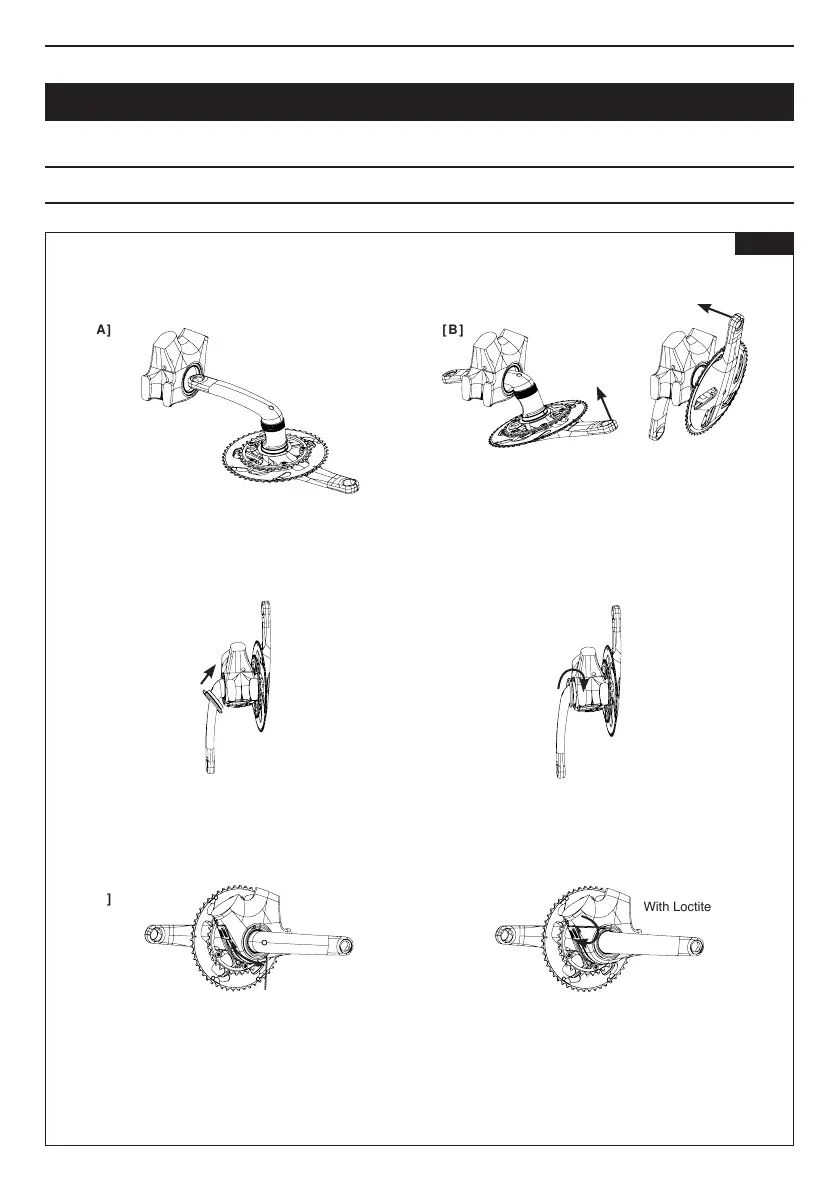
Oncethecranksetis correctly mounted, tighten the
M3 screw to 1Nm having previously added some
threadlocktypeLoctite®243.
Checkthatthereis no playinthecrankset.If there
is,unscrewtheM3screwandre-tightentheZednut.
Primethenuttobescrewed.
Oncethecrankset hasbeenprepared.Fit itintothe
framewiththeleftcrank.
Insertthe2.5mmAllenkeyintotheholeoppositethe
lockingscrewanduseittoturnandtightenthenut.
Tightenthenutuntilyounolongerfeelanyplayinthe
assembly.(Usethecrankstochecktheplay).
Slidethenutwiththeleftcrank.
Attention :
Tightento=1Nm
WithLoctite®243
FITTING THE CRANKSET
[ A ]
[ E ]
[ C ]
[ B ]
[ F ]
[ D ]
Fig 10