Pump Installation 5756 Pump Installation
L4
L2
L1
L6L3
L5
5050
77
77
50
EN EN
3 m
Filter
tape
8.2.5 Installation Depth
Make sure that the pump unit is suspended properly
and is not in contact with sand and mud from the
well bottom. It is recommended to install the pump
above the lter zone (= water entry zone) of the well
to keep the sand content in the water low and ensure
proper cooling of the motor, see also "Figure 22:
Installation depth" on page 57.
a
CAUTION – The pump must be
submerged completely. Never let the
pump run dry. Dry running will damage
the pump and void the warranty.
LORENTZ prescribes a dry run protection
for every pump system.
CAUTION – If the pump does not
hang above the lter zone a ow sleeve is
necessary.
Figure 22: Installation depth
8.2.6 Removal
If you have to remove the pump system it is the
same principle as the installation in reverse order.
When removing the pump the pipes will be full of
water and will be heavier.
a
CAUTION – When you lift the pump
system out of the well the pipes are full
of water. This causes additional weight.
In the table below you can see the additional weight
of the water per meter pipe length.
Table 11: Additional weight per meter pipe length
Pipe
diameter
Additional weight
[in] [kg/m] [lb/ft]
2 2.0 14.5
2.5 3.2 23.1
3 4.6 33.3
4 8.2 59.3
5 12.7 91.9
6 18.4 133.1
L1: Installation depth
L2: Max immersion depth = 150m
L3: Min immersion depth = 1m
L4: Distance to lter
L5: Depth to highest water level
L6: Depth to lowest water level
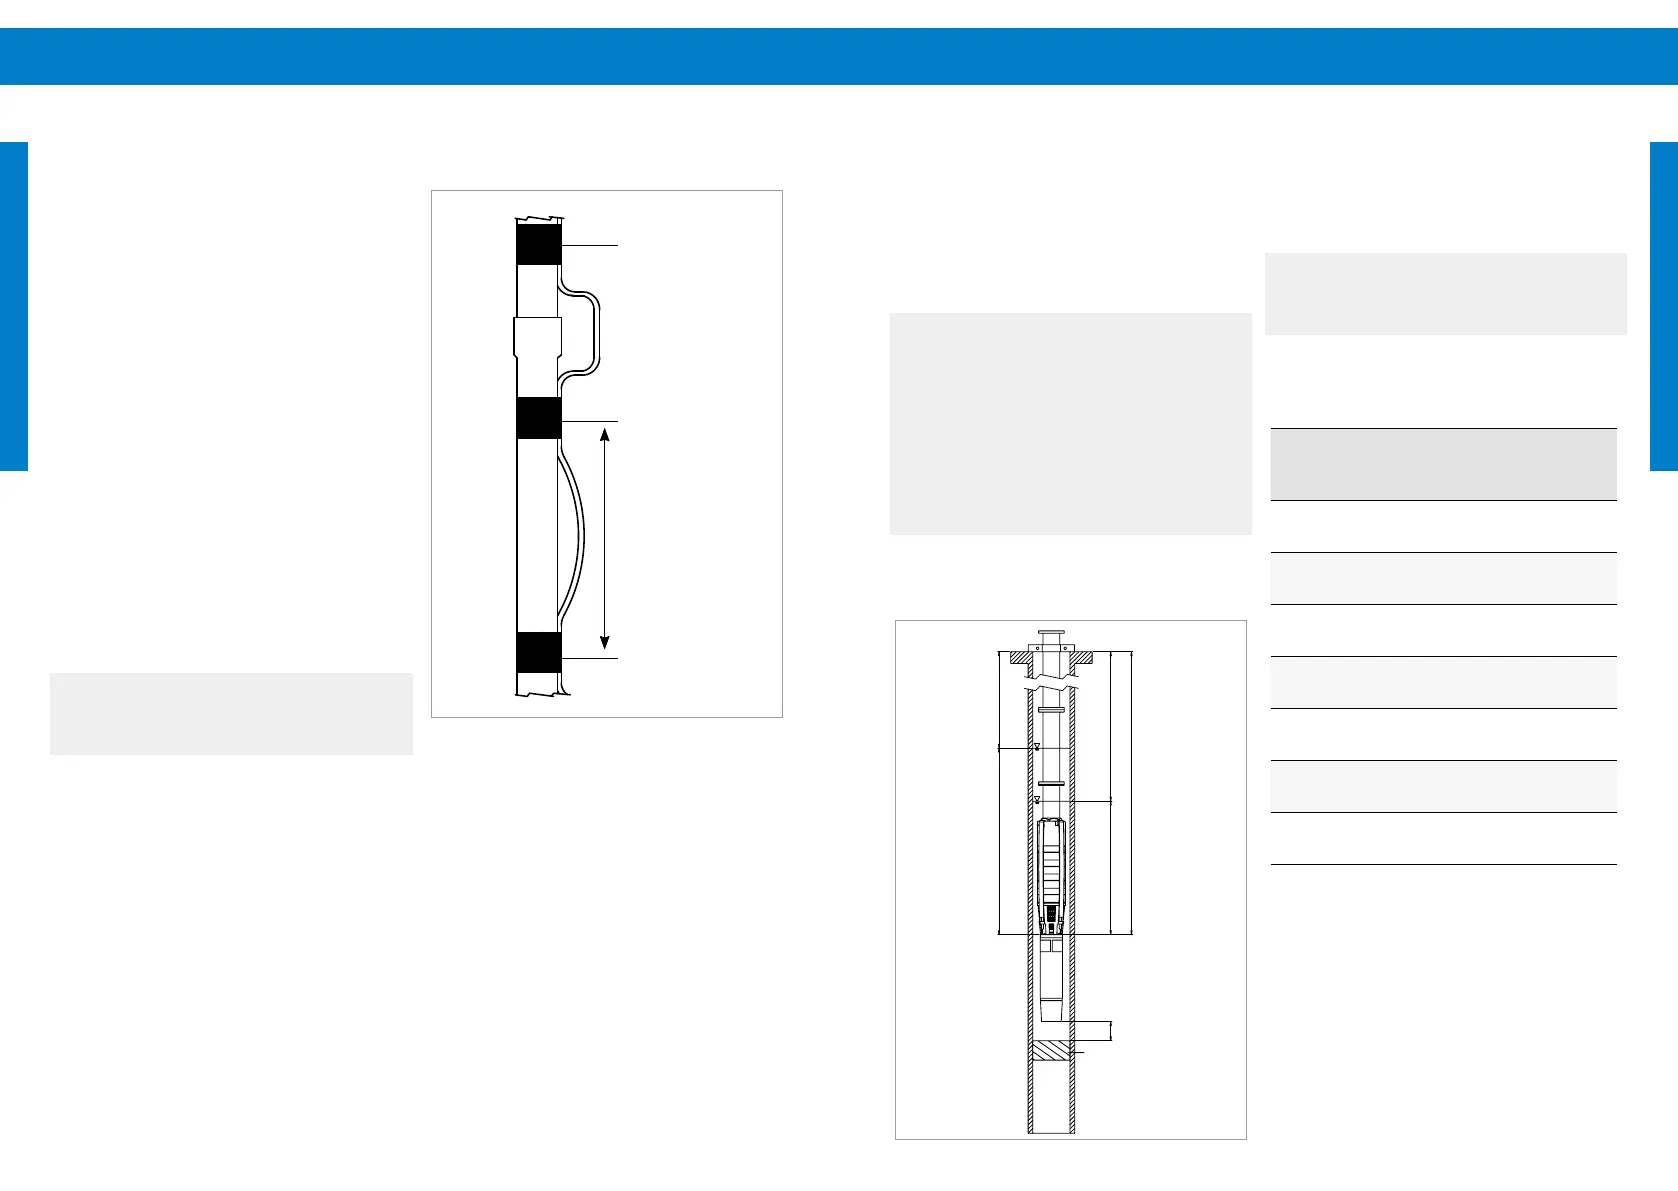
During the process of lowering the pump into the
well the motor cable has to be xed properly to the
pipe, see "Figure 21: Fixing of the motor cable at a
joint and a strait pipe" on page 56.
Where a plastic pipe is used, the longitudinal stretch
of the pipe under load has to be considered by
leaving a sucient gap between the pipe and the
cable!
The cable should be xed with water-resistant tape.
It is a good installation practice to form a loop with
the motor cable near the pump and repeat it about
every 40 m / 130 ft along the riser pipe. This will keep
any tensile forces away from the motor cable.
To extend the motor cable pay attention to chapter
„8.1.2 Cable Splicing“ on page 50.
Round o the edges of a ange to prevent damage
to the cable. Do not x the cable tightly. Leave space
for the pipes to expand. The cable needs to get xed
every 3 m.
a
NOTE – Measuring and noting down the
distances between the xing will help to
lower the pump to the right depth.
Figure 21: Fixing of the motor cable at a joint and a
strait pipe