Basic Setup (LNR400 Series)
6
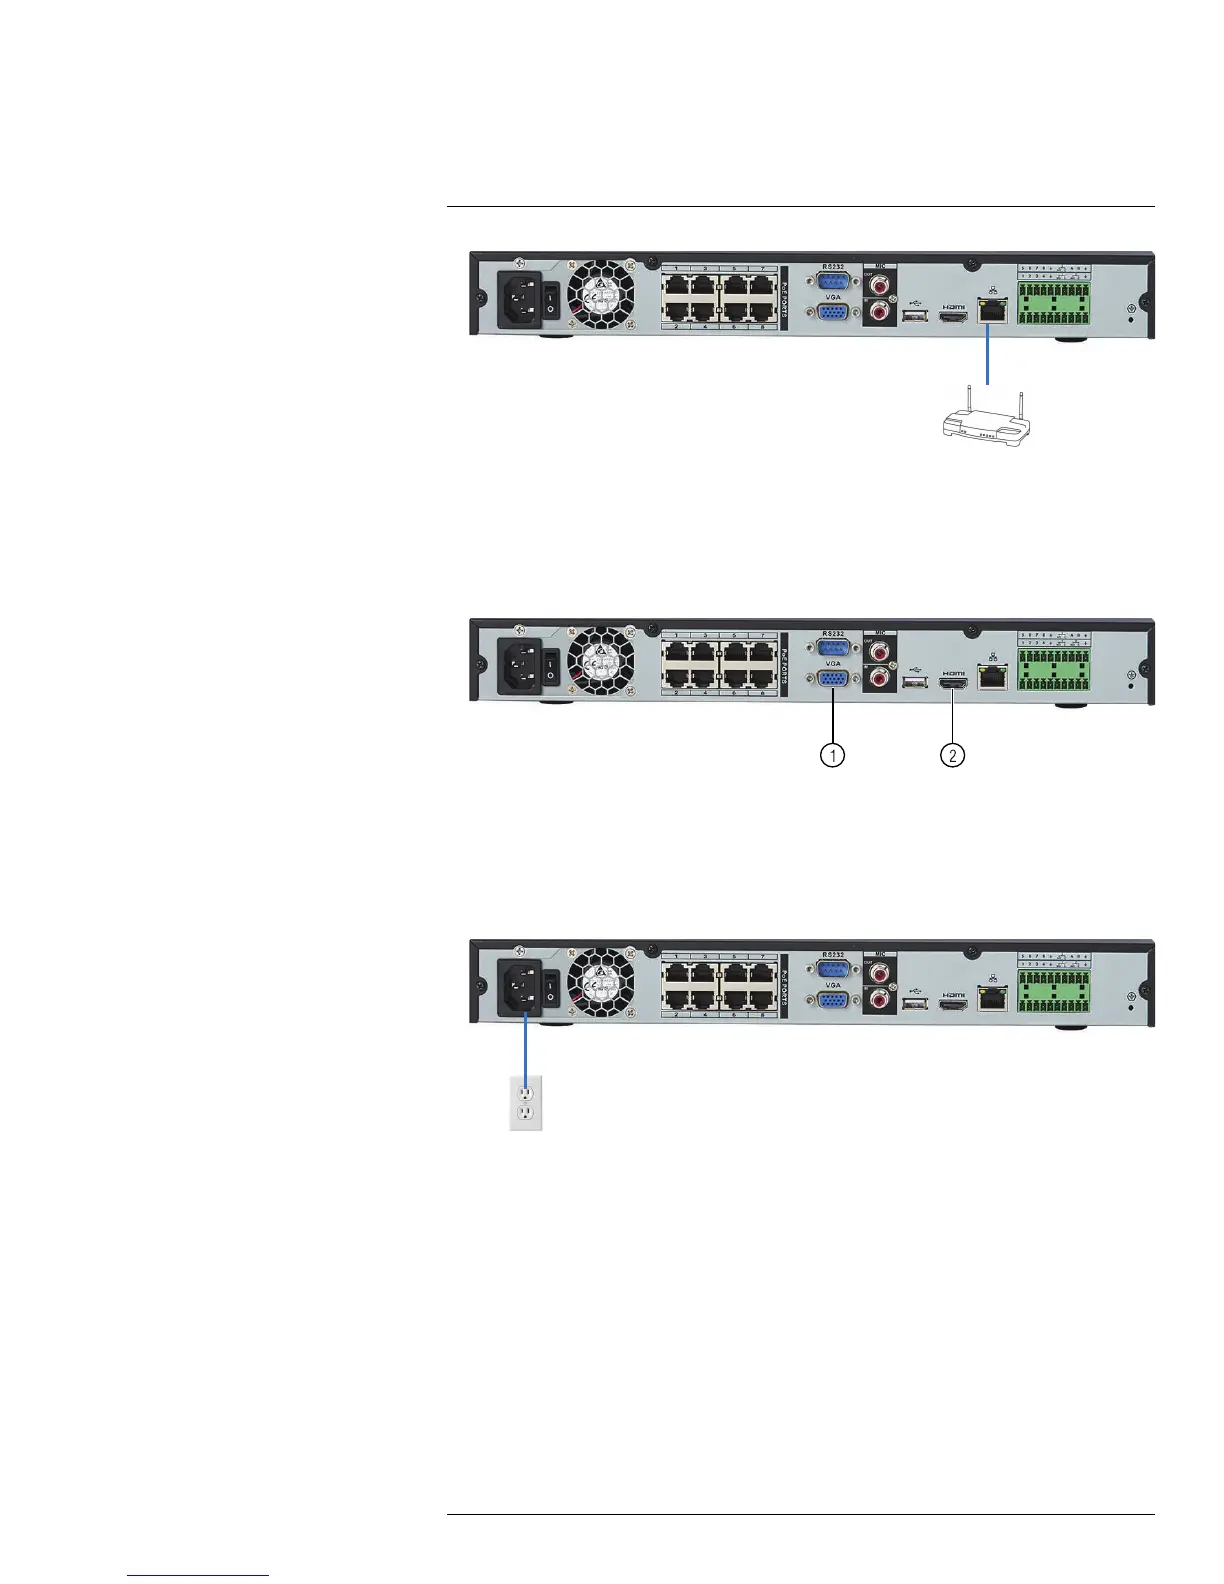
6.4 Step 4: Connect the Monitor
• Connect the included HDMI cable from the HDMI port to the TV or monitor
(recommended).
OR
• Connect a VGA cable (not included) from the VGA port to the monitor.
1. VGA port.
2. HDMI port.
6.5 Step 5: Connect the Power Adapter to Power the NVR
• Connect the included AC power adapter to the NVR and connect the other end to a
power outlet or surge protector. Then turn the power switch to l to power on the NVR.
At startup, the system performs a basic system check and runs an initial loading sequence.
After a few moments, the system loads a live display view.
6.6 Step 6: Upgrade Firmware to Latest Version (if Available)
If a firmware upgrade is available, you will be asked to install it once the system starts up.
It is required to upgrade your system firmware and client software or mobile apps to the lat-
est version to enable remote connection to the system.
If a firmware upgrade is available:
1. After startup, a notification will appear asking you to upgrade the firmware. Click OK to
upgrade.
#LX400021; r. 1.0/16017/16020; en-US
10

 Loading...