Using the Main Menu15
2. Check DHCP (recommended) to let the system automatically obtain an IP address
from the router or uncheck to assign a static IP address.
If you uncheck DHCP, configure the following:
• IP Address: Enter the IP address you would like to assign to the system. Make sure
that no other device on your network is using the same IP address.
• Subnet Mask: Enter the subnet mask for your network.
• Default Gateway: Enter the gateway address for your network.
• Preferred DNS: Enter the address of your primary DNS server.
• Alternate DNS: Enter the address of your secondary DNS server.
3. Click OK to save changes.
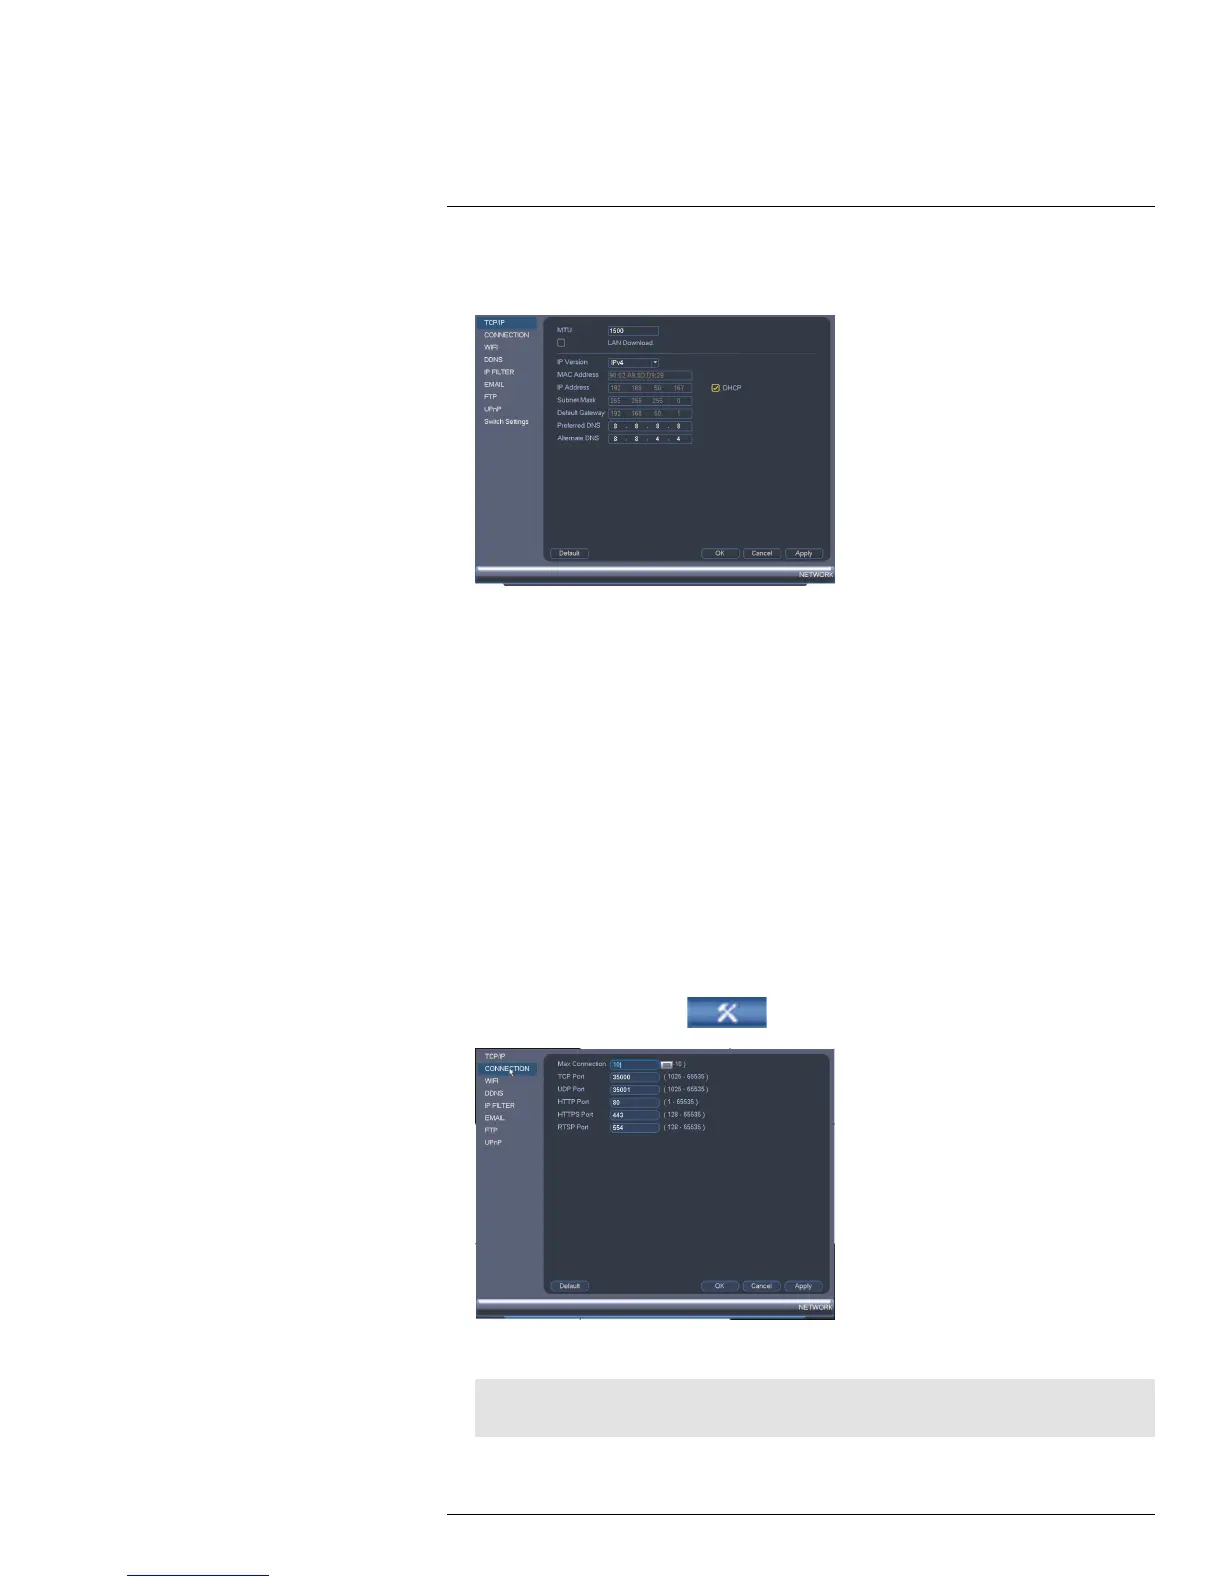
15.3.3 Configuring System Ports (Connection)
The Connection menu allows you to configure ports used by the system. Please note that
port forwarding is not required to use FLIR Cloud™ or to connect using the apps.
If you are using DDNS connectivity, port forwarding is required for the HTTP Port (defaut:
80) and TCP (Client Port) (default: 35000).
To configure system ports:
1. From the Main Menu, click
and then select Network>Connection.
2. Configure the ports as needed and click OK to save changes.
Note
Up to 3 devices may connect to the system at the same time.
#LX400021; r. 1.0/16017/16020; en-US
55

 Loading...